
-
Contents
-
Table of Contents
-
Troubleshooting
-
Bookmarks
Quick Links
D01175820A
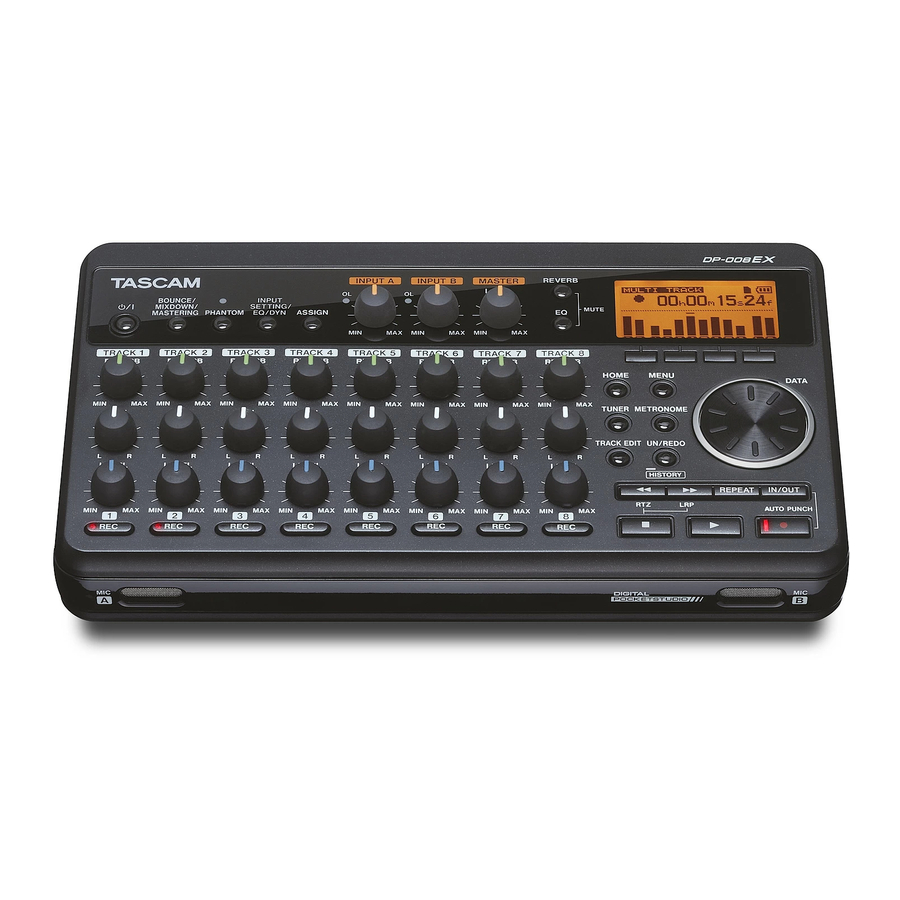
DP-008EX
Digital Multitrack Recorder
OWNER’S MANUAL
Related Manuals for Tascam DP-008EX
Summary of Contents for Tascam DP-008EX
-
Page 1
D01175820A DP-008EX Digital Multitrack Recorder OWNER’S MANUAL… -
Page 2: Important Safety Precautions
Declaration of Conformity TO THE USER This equipment has been tested and found to Model Number : DP-008EX comply with the limits for a Class B digital device, Trade Name : TASCAM pursuant to Part 15 of the FCC Rules. These limits are Responsible party : TEAC AMERICA, INC.
-
Page 3: Important Safety Instructions
TASCAM DP-008EX…
-
Page 4: Safety Information
(e) The return and collection systems are available to the end users. For more detailed information about disposal of waste batteries and/or accumu- lators, please contact your city office, waste disposal service or the shop where you purchased them. TASCAM DP-008EX…
-
Page 5
• Do not disassemble a battery. The acid inside the battery could harm skin or clothing. 8 For China 产品有毒有害物质或元素的名称及含量 机种 : DP-008EX 有毒有害物质或元素 铅 汞 镉 六价铬 多溴联苯… -
Page 6: Table Of Contents
Using automatic punching in/out ……55 Rear panel connections ………35 Rehearsing with auto punch in/out ….55 Right side panel connections ……35 Recording with auto punch in/out ….55 Adjusting the contrast ……….36 8 – Editing Tracks ………56 Setting the backlight ……….36 TASCAM DP-008EX…
-
Page 7
Supported operating systems ………75 Connecting with a computer ……..75 Disconnecting …………76 Song backup and restoration ……..77 Backing-up songs ……….. 77 Restoring songs …………78 Track import and export ……….79 Importing to tracks ……….79 Exporting tracks …………80 Exporting stereo master tracks……..81 TASCAM DP-008EX… -
Page 8: Introduction
1 – Introduction • Thank you for your purchase of the TASCAM DP-008EX Import and export stereo WAV files to stereo tracks • Digital Multitrack Recorder. Export stereo masters as stereo WAV files • Before connecting and using the unit, please take…
-
Page 9: Conventions Used In This Manual
• Words that appear on the computer display are from infringement of any third party’s intellectual shown in quotation marks like this: “DP-008EX” property rights or other proprietary rights, and • The currently selected MTR partition is called the further, assumes no liability of whatsoever nature “active partition”.
-
Page 10: About Sd Cards
A list of SD cards that have been confirmed for use happen, leave the unit for one or two hours before with this unit can be found on the TASCAM website turning the unit on. (http://tascam.com/). Please check this site or contact TASCAM customer support.
-
Page 11: 2-Quick Start Guides
ON or OFF (putting it in standby mode). Doing so could cause loud noises that might harm your hearing. • This unit can also be powered by a TASCAM Close the battery compartment cover after PS-P520 power adaptor (sold separately). (See installing the batteries.
-
Page 12: Listening To The Demo Song
Use the VOLUME dial on the back of the unit to adjust the final monitoring level. Use the DATA wheel to select (highlight) SONG and press the F4 [t] button to open the SONG menu screen. TASCAM DP-008EX…
-
Page 13: From Recording To Mastering
INPUT A/B connector on the back of the unit and record with it instead. Creating a new song When the recorder is stopped, press the MENU button to open the screen. MENU Press the HOME button to return to the Home Screen. TASCAM DP-008EX…
-
Page 14: Connecting And Setting Input Sources
Press the INPUT SETTING/EQ/DYN button to open the screen. INPUT SETTING On this screen you can set the input sources for both INPUT A and INPUT B. At first, the current input source for INPUT A is already selected (highlighted). TASCAM DP-008EX…
-
Page 15: Setting The Guitar As The Track 1
Adjusting the input level and screen and change the setting to Internal monitoring MIC/Hi gh After changing the setting, press the HOME Press the HOME button to return to the Home button to return to the Home Screen. Screen. TASCAM DP-008EX…
-
Page 16: Recording Guitar To Track 1
(left channel) (right channel) meters on the display TRACK 1 REC indicator become active. When you are finished playing, press the Stop (8) button to stop recording. Press the TRACK 1 REC button to turn its REC indicator off. TASCAM DP-008EX…
-
Page 17: Playing Back The Recording
Use the following procedures to change the recording (left channel) and (right channel) meters source for TRACK 2. on the display become active. When the recorder is stopped, press the ASSIGN button to open the screen. INPUT ASSIGN TRACK 2 REC indicator TASCAM DP-008EX…
-
Page 18: Record Vocals On Track 3
. If the input Ext. Input, LINE/Low source is set to , change it to Ext. Input/Mid . If the OL indicator Ext. Input, LINE/Low lights even when set to Ext. Input, LINE/ , lower the volume output from the guitar. TASCAM DP-008EX…
-
Page 19
TRACK 3 LEVEL knob to hear the mic sound through the headphones When you are finished checking, press the Stop (8) button to stop playback. TASCAM DP-008EX… -
Page 20: Creating A Stereo Master Track
Watch the (left channel) and (right channel) level meters on the display as you make these NOTE adjustments. The stereo master track will be created by mixing down the audio between the IN and OUT points. TASCAM DP-008EX…
-
Page 21
T rk T oo Short pop-up message appears and you will not be able to change the recorder to mode. MIXDOWN • You can use the LEVEL knobs to adjust the track and overall levels as you record. TASCAM DP-008EX… -
Page 22: Mastering The Stereo Master Track
Press the F4 [EXEC] button to open the mode selection screen. MASTERING NOTE If there is no stereo master track, a No Master pop-up message appears and you will not be T rk able to switch to mode. MASTERING TASCAM DP-008EX…
-
Page 23: Transferring The Stereo Master Track To A Computer
These data and settings cannot be recovered. TASCAM DP-008EX…
-
Page 24: Names And Functions Of Parts
ON. (See “Assigning inputs” on page 44.) • Turn phantom power ON only when using a condenser microphone that requires phantom power. • Do not supply phantom power to an unbalanced dynamic microphone. TASCAM DP-008EX…
-
Page 25: Function Buttons
TRACK ED IT On the screen, press this button INPUT ASSIGN to change the assignment. On the screen, press this button to TRACK MUTE turn track muting ON and OFF. TASCAM DP-008EX…
-
Page 26: Front Panel
Record (0) button, press this button to start Front panel ; MIC A / MIC B These are built-in omnidirectional microphones. They can be used as input sources for INPUT A/B when set to Internal MIC/Low Internal MIC/Hi gh TASCAM DP-008EX…
-
Page 27: Rear Panel
GUITAR. When connecting an electric-acoustic guitar with a built-in preamp or an active electric guitar, as well as when connecting an electric guitar with effect boxes between it and this unit, set the MIC/ LINE-GUITAR switch to MIC/LINE. TASCAM DP-008EX…
-
Page 28: Right Side Panel
“Connecting with a computer” on page 75.) ! DC IN 5V connector Connect a dedicated power adaptor (PS-P520, sold separately). @ Kensington security slot Bottom panel # Battery compartment cover $ Battery compartment The batteries (four AA) that power the unit are inserted here. TASCAM DP-008EX…
-
Page 29: Home Screen
Level meter for stereo outputs (L, R) One of the following icons appears depending on Shows the level of the signal output from the LINE the status of the recorder. OUT and PHONES jacks. Indicator Meaning Stopped Playing back Recording Searching backward Searching forward TASCAM DP-008EX…
-
Page 30: Menu Structure
Press and hold UN/REDO [HISTORY] Show the undo/redo history and select operations. page 49 REPEAT Repeat playback between the set IN and OUT points. page 53 IN/OUT Set the IN and OUT points. page 53 Record (0) + IN/OUT Enable and disable auto punch in/out mode. page 55 TASCAM DP-008EX…
-
Page 31: Screen Operations
F4 [t] button will open it. 0 In a submenu, you can press the F1 [BACK] button to return to the previous screen. 0 To return to the Home Screen, press the HOME button. TASCAM DP-008EX…
-
Page 32: Preparations
Leaving the batteries in could A list of SD cards that have been confirmed for use cause them to be used gradually and lose their with this unit can be found on the TASCAM website charge or even to leak. (http://tascam.com/).
-
Page 33: Using An Ac Adaptor (Sold Separately)
4 – Preparations Using an AC adaptor (sold separately) Shutting down Connect a TASCAM PS-P520 AC adaptor (sold Make the following preparations before shutting separately) to the DC IN 5V connector as shown in down the unit. the illustration. •…
-
Page 34: Preparing Sd Cards For Use
Depending on the SD card capacity, the partition setting can be changed in some cases. To do so, set the partition size using the item in the FORMAT menu before formatting. (See “11 – SD Card CARD Management” on page 72.) TASCAM DP-008EX…
-
Page 35: Connecting With Other Equipment
NOTE Before outputting sound, use the VOLUME dial of any external monitoring system (powered monitor speakers or an amplifier and speakers) connected to the unit. Failure to do so could cause loud noises that might harm your hearing. TASCAM DP-008EX…
-
Page 36: Adjusting The Contrast
Home Screen. use it in. Adjusting the contrast might make it easier to read. After completing the setting, press the HOME button to return to the Home Screen. TASCAM DP-008EX…
-
Page 37: Song Management
F2 [EXEC] button. appears as a confirmation Are you sure? pop-up message. Press the F3 [YES] button. The unit saves the current song before changing partitions. It then loads the last used song on that partition. TASCAM DP-008EX…
-
Page 38: Editing Names
• Press the F4 [DEL] button to delete the character at the cursor position. • When finished inputting or editing a name (title), press the F2 [EXEC] button to save it. TASCAM DP-008EX…
-
Page 39: Creating A New Song
(See “Viewing information” on page 71.) NOTE screen has four pages, INFORMATION including (1/3), (2/3), and (3/3). SONG CARD F /W Use the F3 [PREV] and F4 [ NEXT] buttons to change the page. (See “Viewing information” on page 71.) TASCAM DP-008EX…
-
Page 40: Copying Songs
) is less than the song Free data, copying is not possible. (If you try to execute it, a pop-up message No Disk Space appears to warn you that there is not enough free space in the partition.) TASCAM DP-008EX…
-
Page 41: Protecting Songs
If you try to execute a prohibited operation (edit, record, erase) on a protected song, pop-up message appears and the Song Protected operation is prevented. • To remove protection from a song, follow the above procedures but set item to PROTECT step 4. TASCAM DP-008EX…
-
Page 42: Basic Recording
Supplying phantom power to some types of ribbon mic or line signal. microphones could break them. Do not supply phantom power to a ribbon microphone if you are in doubt. • Battery consumption is faster when phantom power is ON. TASCAM DP-008EX…
-
Page 43: Monitoring Input Signals
MIN, the input source signal is too high, so lower the volume on the input source. 8 Stereo level meters (L/R) These show the stereo bus output level of this unit. Adjust the output level with the MASTER LEVEL Overload indicators knob. TASCAM DP-008EX…
-
Page 44: Assigning Inputs
After making the settings, press the HOME button to return to the Home Screen. NOTE When the equalizer for an input is ON, that input is shown on the Home Screen as in the illustration below. Icons when input equalizers are ON TASCAM DP-008EX…
-
Page 45: Using Input Dynamics Effects
DATA wheel to adjust their values. NOTE Press the F1 [BACK] button to return to the INPUT screen. SETTING LINK When , INPUT A and INPUT B are linked (default: OFF). When linked, the compressor responds to and affects both inputs. TASCAM DP-008EX…
-
Page 46: Using The Exciter
Home Screen. compressor to activate when exceeded. Range: -32dB (default) – 0dB RATIO Set the compression ratio. Options: 1.0:1, 1.1:1, 1.3:1, 1.5:1, 1.7:1, 2.0:1, 2.5:1, 3.0:1, 3.5:1, 4.0:1, 5.0:1, 6.0:1, 8.0:1, 16.0:1, inf:1 TASCAM DP-008EX…
-
Page 47: Using The De-Esser
While pressing and holding the Record (0) button, press the Play (7) button. The Record (0) button indicator lights red when recording starts, and the TRACK REC indicators stop blinking and stay lit. Press the Stop (8) button to end recording. TASCAM DP-008EX…
-
Page 48: Multitrack Recording
Recording additional tracks While pressing and holding the Record (0) button, press the Play (7) button. While listening to the playback tracks, make new recordings on other tracks. TASCAM DP-008EX…
-
Page 49: Undoing Operations (Undo)
In this case, the unit is not [HISTORY] button does not function, so single restored to the most recently conducted operation, undo and redo cannot be used. so the UN/REDO [HISTORY] indicator remains lit because further redo operations are possible. TASCAM DP-008EX…
-
Page 50: Erasing The Operation History
While pressing and holding the Stop (8) button, press the UN/REDO [HISTORY] button to open screen. HISTORY Press the F4 [CLEAR] button. A confirmation pop-up message appears. TASCAM DP-008EX…
-
Page 51: Recorder Functions
Bounce ! recorder enters mode, and the Home BOUNCE Screen reopens. NOTE When the recorder is in mode, BOUNCE BOUNCE appears highlighted at the upper left of the Home Screen. TASCAM DP-008EX…
-
Page 52: Confirming The Result
For example, when using the DATA wheel to increase the value in the seconds field, the number will change from 59 to 0 and the minutes value will increase by one. TASCAM DP-008EX…
-
Page 53: Repeat Playback
IN point. even though these F3/F4 button assignments do Playback continues to repeat between the IN and not appear. OUT points. The set times will be shown with a SET IN ! message as above. SET OUT ! TASCAM DP-008EX…
-
Page 54: Setting The Time Between Repetitions (Repeat Interval)
When the home screen is open, press the F1 button while pressing and holding the Stop (8) button to locate to the IN point. Press the F2 button while pressing and holding the Stop (8) button to locate to the OUT point. Foot switch (standard jack) TASCAM DP-008EX…
-
Page 55: Setting The Foot Switch Polarity
Auto punch in/out mode cannot be activated though recording without recording. when in repeat mode or if no REC button has been Press TRACK REC buttons to use auto punch in/ pressed. • out with those tracks. Auto punch in/out can be undone. TASCAM DP-008EX…
-
Page 56: Editing Tracks
The OUT point is the end of the part of the track that will be edited. Press the IN/OUT button to open the I /O SETTING screen, and press the F4 [OUT] button at the time where you want to set the OUT point. TASCAM DP-008EX…
-
Page 57: Track Editing Function Setting Items
(tracks that are being DESTINATION TRK copied to). Example of item DESTINATION TRK COPY TIMES Set the number of times that the copied track data will be pasted. Set the number between 1 and 99. TASCAM DP-008EX…
-
Page 58: Copy/Paste
• SOURCE TRK (“1”–“8”, “1/2”, “3/4”, “5/6”, “7/8”, “1–8”) This operation uses the following parameters. • IN/OUT/TO • SOURCE TRK (“1”–“8”, “1/2”, “3/4”, “5/6”, “7/8”, “1–8”) • DESTINATION TRK • IN/OUT/TO • COPY TIMES • DESTINATION TRK • COPY TIMES TASCAM DP-008EX…
-
Page 59: Move/Paste
This operation inserts recorded data into the • IN/OUT move destination track starting from the TO point. Therefore, the move destination track becomes longer. This operation uses the following parameters. • SOURCE TRK (“1”–“8”, “1/2”, “3/4”, “5/6”, “7/8”, “1–8”) • IN/OUT/TO • DESTINATION TRK TASCAM DP-008EX…
-
Page 60: Silence (Part Erase)
• DESTINATION TRK NOTE If you choose the same track for both the SOURCE item and the item and DESTINATION TRK press the F2 [EXEC] button, a pop-up Same T rack message appears and the operation is cancelled. TASCAM DP-008EX…
-
Page 61: Mixdown And Mastering
Adjust the level of the signal sent to the reverb effect from each track by using their REVERB knobs. The signals are sent to the reverb effect after the track equalizer. Press the REVERB button to open the REVERB screen. SETTING TASCAM DP-008EX…
-
Page 62: Muting Tracks
WAV file and exported to a computer where the sound can be processed further or combined with other recordings. (See “Exporting stereo master tracks” on page 81.) NOTE Only one stereo master can be made in a song at a time. TASCAM DP-008EX…
-
Page 63: Setting The Starting And Ending Points
At this point, if you start playback or recording, you will be able to hear the mixed track signals (including signals that will be recorded) through headphones or an external monitoring system (powered monitor speakers or an amplifier and speakers). TASCAM DP-008EX…
-
Page 64: Checking Stereo Master Tracks
RECORDER MODE wheel to return the recorder to MUL TI TRACK mode. If you are not satisfied with the stereo master track, you can create a new one. A new stereo master track will overwrite the previous one. TASCAM DP-008EX…
-
Page 65: Using Automatic Mastering
MASTERING TYPE This setting raises the sound pressure as much as possible. NOTE Undoing and redoing are not possible in AUTO mode. Switch to MASTERING MUL TI TRACK mode to undo or redo. MIXDOWN TASCAM DP-008EX…
-
Page 66: Using Manual Mastering
OFF. current playback position. When in mode, recording overwrites MASTERING the stereo master track. NOTE If the unit is stopped in the middle of recording, a stereo master track to that point will be created. TASCAM DP-008EX…
-
Page 67: Using The Mastering Compressor
Turn the automatic makeup function ON or OFF. When ON, the unit will automatically adjust the volume after compression so that it is not Multiband compressor example decreased. When this setting is at its default value, appears to the right of the value. TASCAM DP-008EX…
-
Page 68: Normalizing Master Tracks
You can use the clone track function to copy a stereo master track to another track. (See “CLONE TRACK (track duplication)” on page 60.) Exiting mastering mode Press the BOUNCE/MIXDOWN/MASTERING button to exit mode and return to MASTERING MUL TI mode. TRACK TASCAM DP-008EX…
-
Page 69: 10 — Miscellaneous Functions
Set the number of beats between 1 and 12 on the MIC /Low Internal MIC /Hi gh (default value: 4). screen. INPUT SETTING The accent falls on the first beat. LEVEL Set the metronome volume between 0 and 127 (default value: 100). TASCAM DP-008EX…
-
Page 70: Oscillator Mode
3min, 5min, 10min, 30min (default value) REC button of the track that has (INPUT A) IN A assigned to it. (See “Assigning inputs” on page 44.) After completing the setting, press the HOME button to return to the Home Screen. TASCAM DP-008EX…
-
Page 71: Restoring Preferences To Default Values
NOTE Press the F4 [NO] button to cancel initialization. CARD (2/3) page After completing initialization, press the HOME MTR partitions and capacities, FAT partition button to return to the Home Screen. capacity F/W (3/3) page system firmware version TASCAM DP-008EX…
-
Page 72: 11 — Sd Card Management
512 MB can be used with this unit. A list of SD 32GB 16GB cards that have been confirmed for use with this unit can be found on the TASCAM website (http:// 16GB 2GB, 4GB or 8GB tascam.com/). 2GB or 4GB •…
-
Page 73: Reformatting Mtr Partitions
Press the F3 [YES] button to reformat the MTR partition. NOTE • When reformatting finishes the menu CARD reopens. • After reformatting, one song is automatically created in the MTR partition. • To cancel reformatting, press the F4 [NO] button. TASCAM DP-008EX…
-
Page 74: Reformatting Fat Partitions
After initializing an SD card, it must be formatted NOTE again to be used with this unit. (See “Formatting • When reformatting finishes the menu screen CARD SD cards” on page 72.) reopens. • To cancel reformatting, press the F4 [NO] button. TASCAM DP-008EX…
-
Page 75: 12 — Exchanging Data With A Computer
Windows XP, Windows Vista, Windows 7 Backed-up data can be restored to a different 8 Mac OS X DP-008EX unit than the one that created it. In this Mac OS X 10.2 or later way, files can be freely exchanged between DP-008EX…
-
Page 76: Disconnecting
Depending on the OS version or OS settings you The “UTILITY” folder is used to update the unit’s might also be able to eject the “DP-008EX” icon system software, for example. by clicking an eject button next to it in the Finder Disconnecting window or by using a control key.
-
Page 77: Song Backup And Restoration
A screen appears that allows you to edit the file name (title) of the song selected on the SONG screen. BACKUP Edit the name (title) of the song being backed up as necessary. (See “Editing names” on page 38.) TASCAM DP-008EX…
-
Page 78: Restoring Songs
SONG RESTORE This screen shows the backup files on the FAT partition. NOTE (the file cannot be found) F i le Not Found pop-up message appears if there are no files on the FAT partition. TASCAM DP-008EX…
-
Page 79: Track Import And Export
(See “8 – Editing Tracks” on page 56.) • When importing stereo WAV files, it is necessary to have an open pair of tracks or a stereo track. When done importing, press the HOME button to return to the Home Screen. TASCAM DP-008EX…
-
Page 80: Exporting Tracks
Press the HOME button to reopen the Home Screen. Connect this unit to a computer. (See “Connecting with a computer” on page 75.) Use the computer to copy track files from the WAVE folder on the FAT partition to the computer. TASCAM DP-008EX…
-
Page 81: Exporting Stereo Master Tracks
Use the DATA wheel to select (highlight) the item, and press the F4 [t] EXPORT MASTER button to open the screen. EXPORT MASTER NOTE warning pop-up Master T rack Not Found message appears if there is no stereo master track. TASCAM DP-008EX…
-
Page 82: 13 — Mastering Compressor Settings
− R&B HipHop 3Band -20dB -13dB -19dB 8.0:1 2.0:1 6.0:1 +11dB +1dB +8dB − Basic Comp 1Band -16dB 2.0:1 +2dB Basic Limit 1Band -18dB 16:1 +2dB Hard Comp 1Band -24dB 2.5:1 +2dB Hard Limit 1Band -24dB 16:1 +1dB TASCAM DP-008EX…
-
Page 83: 14 — Troubleshooting
• When you press the Play (7) button while pressing and holding the Record (0) button to start recording, is at least one track in recording standby (REC indicator lit)? • Are inputs assigned to tracks? (See “Assigning inputs” on page 44.) TASCAM DP-008EX…
-
Page 84: 15 — Message Lists
The batteries have no remaining charge. This appears when the batteries have no remaining charge. Battery Empty Replace the batteries with new ones or use a TASCAM PS-P520 AC adapter (sold separately). The batteries have little remaining charge. This appears if you try to start recording when the batteries are low.
-
Page 85
In the clone track settings you have set the same track for both SOURCE TRK DESTINATION TRK The capacity of the SD card installed in the unit is too small for this unit to use. SD Size Error Use an SD card larger than 512 MB. TASCAM DP-008EX… -
Page 86
FX Busy FX Rx Failed If any of these errors occur, turn the the unit power OFF and restart it. I/F Error If these error message continue to appear, please contact the nearest retailer or TASCAM Mount Error representative. SaveParam Fail… -
Page 87: 16 — Specifications
Connector: 6.3mm (1/4”) TS standard jack Input impedance: For the latest information on compatible operating 10 kΩ or more systems, check the TASCAM website (http://tascam. (when INPUT A switch set to MIC/LINE) com/). 1 MΩ (when INPUT A switch set to GUITAR) Supported operating systems Standard input level: −10 dBV…
-
Page 88: Backup Memory
FootSW Polarity (JEITA standards used for recording and playback) Dimensions • Illustrations and other depictions may differ in part from the actual product. • Specifications and external appearance may be changed without notification to improve the product. TASCAM DP-008EX…
-
Page 89: Block Diagram
16 – Specifications Block diagram TASCAM DP-008EX…
-
Page 90: 17 — Commonly-Used Functions
17 – Commonly-used Functions This section is a brief guide to some operations on the DP-008EX which may not be immediately obvious from looking at the panel controls. • Button names are indicated like this: REPEAT. • MENUeCARDeFORMAT, meaning “press the MENU button, select the…
-
Page 91
INPUT SETTING/EQ/DYNeF3 input sound page 45 Use equalizer on a track “Track equalizers” on page 61 Use phantom power PHANTOM “Phantom power” on page 42 REVERB + EQ Mute the track playback sound “Muting tracks” on page 62 TASCAM DP-008EX… -
Page 92
DP-008EX TEAC CORPORATION Phone: +81-42-356-9143 http://tascam.jp/ 1-47 Ochiai, Tama-shi, Tokyo 206-8530 Japan TEAC AMERICA, INC. Phone: +1-323-726-0303 http://tascam.com/ 7733 Telegraph Road, Montebello, California 90640 USA TEAC MEXICO, S.A. de C.V. Phone: +52-55-5010-6000 http://teacmexico.net/ Río Churubusco 364, Colonia Del Carmen, Delegación Coyoacán, CP 04100, México DF, México…
Скачать
OWNER’S MANUAL
D01175820A
DP-008EX
Digital Multitrack Recorder
-
Инструкции по эксплуатации
1

Tascam DP-008EX инструкция по эксплуатации
(92 страницы)
- Языки:Английский
-
Тип:
PDF -
Размер:
7.4 MB
Просмотр
На NoDevice можно скачать инструкцию по эксплуатации для Tascam DP-008EX. Руководство пользователя необходимо для ознакомления с правилами установки и эксплуатации Tascam DP-008EX. Инструкции по использованию помогут правильно настроить Tascam DP-008EX, исправить ошибки и выявить неполадки.
Краткое содержание страницы № 1
D01092520A
DP-008
8-Track Digital Pocketstudio
OWNER’S MANUAL
Краткое содержание страницы № 2
IMPORTANT SAFETY INFORMATION CAUTION: TO REDUCE THE RISK OF ELECTRIC SHOCK, DO NOT REMOVE COVER (OR BACK). NO USER-SERVICEABLE PARTS INSIDE. REFER SERVICING TO QUALIFIED SERVICE PERSONNEL. The lightning flash with arrowhead symbol, within equilateral triangle, is intended to alert the user to the presence of uninsulated “dangerous voltage” within the product’s enclosure that may be of sufficient magnitude to constitute a risk of electric shock to persons. The exclamation point within an
Краткое содержание страницы № 3
IMPORTANT SAFETY INFORMATION 1 Read these instructions. Do not expose this apparatus to drips or • splashes. 2 Keep these instructions. Do not place any objects filled with liquids, • 3 Heed all warnings. such as vases, on the apparatus. 4 Follow all instructions. Do not install this apparatus in a confined • 5 Do not use this apparatus near water. space such as a book case or similar unit. The apparatus draws nominal non-oper- 6 Clean only with dry cloth. • ating power from the AC
Краткое содержание страницы № 4
IMPORTANT SAFETY INFORMATION Do not heat or disassemble batteries. Do • CAUTIONS ABOUT BATTERIES not put them in fire or water. Batteries This product uses batteries. Misuse of batter- could rupture or leak, causing fire, injury or ies could cause a leak, rupture or other trou- stains around them. ble. Always abide by the following precautions If the battery fluid leaks, wipe away any fluid • when using batteries. on the battery case before inserting new Never recharge non-rechargeable
Краткое содержание страницы № 5
Table of Contents Rear panel connections ………………….. 34 1 – Introduction …………………………..7 Right side panel connections…………… 34 Overview of this unit ……………………………. 7 Adjusting the contrast ………………………… 34 About this manual ………………………………. 7 Setting the backlight ………………………….. 35 Manual conventions ………………………… 7 Product parts ………………………………
Краткое содержание страницы № 6
Table of Contents Confirming the result……………………… 53 Disconnecting ……………………………….. 72 Locate and search functions ……………….. 54 Song backup and restoration ………………. 73 Direct locate function …………………….. 54 Backing-up songs ………………………….. 73 Return To Zero (RTZ) and Restoring songs …………………………….. 74 Last Recording Position (LRP) …………. 54 Track import and export ………….
Краткое содержание страницы № 7
1 – Introduction Thank you for your purchase of TASCAM’s Manual conventions 8-Track Digital Pocketstudio, the DP-008. This manual often refers to the DP-008 as • The DP-008 is designed to provide you “the unit” and the SD card as the “card.” with great sound in an easy-to-use compact When we refer to DP-008 features such as package, allowing you to concentrate on the • keys and connections, we display them like music, and not on the recording process. this: MENU. Before connecting and u
Краткое содержание страницы № 8
1 – Introduction Main unit …………………………………………….. 1 • This product is designed to help you record SD Card (in the unit) …………………………….. 1 • and reproduce sound works to which you USB Cable …………………………………………… 1 • own the copyright, or where you have AA alkaline batteries …………………………….. 4 obtained permission from the copyright • holder or the rightful licensor. Unless you Warranty card
Краткое содержание страницы № 9
1 – Introduction Cautions on installation The unit’s nominal operating temperature • is between 5˚ and 35° C (41° – 95° F). Do not install in the following types of • places. Doing so could degrade the sound quality and/or cause malfunctions. Places with significant vibrations or • that are otherwise unstable Near windows or other places exposed • to direct sunlight Near heaters or other extremely hot • places Extremely cold places • Places with bad ventilation or high • humidit
Краткое содержание страницы № 10
2 – Quick Start Guides 4 Close the battery compartment cover Playback and mixing after installing the batteries. First, we will play the demo song on the 5 Connect headphones to the PHONES included SD card. The SD card with the demo connector. song is shipped already installed but we will start by explaining how to insert an SD card here. Preparing to listen to the demo song 1 Open the SD card slot cover on the right side of the unit and insert the supplied Headphones SD card into the
Краткое содержание страницы № 11
2 – Quick Start Guides or insert the card. If you remove or insert 2 When the Home Screen is open, press the the SD card when the unit’s power is MENU key to open the MENU screen. on, the unit cannot shut down properly and all unsaved data and settings will be lost. These data and settings cannot be recovered. • Do not remove the batteries or disconnect the power cable while the unit power is ON. • The included alkaline batteries are for confirming operation of the unit and might not
Краткое содержание страницы № 12
2 – Quick Start Guides volume of all eight tracks at the same time. The standard position is around 2–3 o’clock. Use the LEVEL knobs to adjust the balance between TRACK 1–8. Use the VOLUME dial to adjust the final 5 Rotate the DATA wheel to select monitoring level. DEMO_008, and press the F2 (EXEC) key. The demo song loads and the SONG screen reopens. 6 Press the HOME key to reopen the Home Screen. 8 Use the PAN knobs to adjust the stereo position of TRACK 1–8. TIP • Press the stop (
Краткое содержание страницы № 13
2 – Quick Start Guides From recording to creating a master track Here, we will try multitrack recording. In the following example, we will use an electric guitar to record a rhythm guitar part on track 1 3 Use the DATA wheel to select CREATE, and and a lead guitar part on track 2. Then, we will press the F4 (¥) key to open the SONG use the built-in mic to record a voice on track CREATE screen. 3. Finally, we will mix the tracks down. In this section, we assume that you have already fo
Краткое содержание страницы № 14
2 – Quick Start Guides Connecting and setting the input sources 1 Connect an electric guitar to the INPUT A connector on the rear panel. On this screen you can set the input sources for both INPUT A and INPUT B. At first, the input source for INPUT A is already selected. 4 Use the DATA wheel to change the INPUT A input source to Ext.Input, LINE/ Low. Guitar 2 Set the MIC/LINE-GUITAR switch on the rear panel to GUITAR. 5 Press the F4 (¶) key to select the current input for INPUT B.
Краткое содержание страницы № 15
2 – Quick Start Guides This sets MIC B, which is the built-in mic to TRACK 1 in this example. on the right side of the front panel as the input source for INPUT B. Adjusting the input level and monitoring 1 Press the HOME key to return to the Home Screen. NOTE Internal MIC / Low and Internal MIC / High change the sensitivity of the built-in mics. Set it according to the loudness of the 2. Press the TRACK 1 REC key. The key subject being recorded. blinks showing that the track is in rec
Краткое содержание страницы № 16
2 – Quick Start Guides OL indicator NOTE • You can use the TRACK 1 PAN knob to adjust the stereo position of the signal when monitoring. • The input signal cannot be monitored if the REC indicator of the TRACK 1 that it is assigned to is not lit. Recording guitar to TRACK 1 When you play the guitar, the input level is 1 Press the playback (Á) key while shown by the A (INPUT A) and 1 (TRACK 1) pressing and holding the record (–) key meters on the display. to start recording. The TRACK 1
Краткое содержание страницы № 17
2 – Quick Start Guides Set which input (INPUT A or INPUT B) is to be the recording source for each track. In the initial setting, INPUT A (A) is assigned as the recording source for tracks 1, 3, 5 and 7, and INPUT B (B) is assigned as the recording source for tracks 2, 4, 6 and 8. 2 Press the TRACK 2 REC key to set the TRACK 2 SOURCE to A. TIP Use the TRACK 1 PAN knob to set the stereo position of the track signal. 3 Press the HOME key to return to the Home Screen. Record guitar to TR
Краткое содержание страницы № 18
2 – Quick Start Guides TRACK 2 REC indicator 7 Return to the start of the song again and press the playback (Á) key while pressing and holding the record (–) key to start recording. The TRACK 2 REC key stops blinking and stays lit constantly. You are recording again. Play your guitar! 5 Return to the beginning of the song and begin playback. Play the lead guitar part 8 When you are finished, press the stop along with the already recorded rhythm (ª) key to stop recording. guitar. 9 P
Краткое содержание страницы № 19
2 – Quick Start Guides recorded is input. OL indicator The input level of built-in MIC B is shown by the B meter on the screen. 3 Press the HOME key to return to the Home Screen. Raise the TRACK 3 LEVEL knob, MASTER LEVEL knob and VOLUME dial as necessary to hear the mic input through the headphones. 4 Press the TRACK 3 REC key. The key blinks showing that the track is in record standby. TRACK 3 REC indicator NOTE 5 Use the INPUT B TRIM knob to adjust the mic input level. Set the T
Краткое содержание страницы № 20
2 – Quick Start Guides if the input setting is Internal MIC / High, Mixing the tracks change it to Internal MIC / Low. If the OL indicator continues to light even when set to After you finish recording, the next step is to Internal MIC / Low, move the sound source make a stereo mix. away from the mic or lower the volume at 1 Use the LEVEL knobs for TRACK 1, 2 the sound source. and 3, to adjust the levels of the tracks and the balance between them. Use CAUTION the MASTER LEVEL knob to ad
Посмотреть инструкция для Tascam DP-008EX бесплатно. Руководство относится к категории Устройства звукозаписи, 6 человек(а) дали ему среднюю оценку 6.9. Руководство доступно на следующих языках: английский. У вас есть вопрос о Tascam DP-008EX или вам нужна помощь? Задайте свой вопрос здесь
Не можете найти ответ на свой вопрос в руководстве? Вы можете найти ответ на свой вопрос ниже, в разделе часто задаваемых вопросов о Tascam DP-008EX.
Какой вес Tascam DP-008EX?
Инструкция Tascam DP-008EX доступно в русский?
Не нашли свой вопрос? Задайте свой вопрос здесь