Недавно на форуме один из участников внес предложение о систематизации самых распространенных вопросов от начинающих игроков, дабы избавить их от насмешек и беспочвенного поливания грязью и упростить обсуждения на форуме, я решила взять это ответственное дело на себя.
Общие вопросы.
Что значит ppl?
Это означает количество игроков в игре. 8 ppl означает, что в игре находится 8 игроков, 5 ppl — 5 игроков и т.д. От количества игроков в сетевой игре зависят урон монстров и количество опыта, получаемое за их убийство. Чем больше игроков в игре, тем больше здоровья у монстров и тем больше за них дают опыта. Кроме того, при увеличении ppl на уровне сложности Nightmare и Hell увеличивается урон, наносимый монстрами. В одиночной и TCP/IP игре вы можете эмулировать количество игроков в игре. Для этого нажмите Enter и введите команду «players X» (в версии 1.10+ «/players X»), где X — количество игроков, от 1 до 8, которое вы хотите эмулировать.
Кто такой мул? Как его создать?
Мул — это персонаж, на котором хранятся вещи «про запас», то есть которые не используются этим персонажем, но могут пригодиться ему или другим героям позже. Фактически, мул — это склад вещей. Как передавать вещи между персонажами — читайте ниже. Для хранения вещей так же можно использовать программу ATMA или PlugY. Обе действуют только в одиночке или при игре по TCP/IP (т.е. при игре на серверах, в т.ч. и на battle.net, они непригодны)!
Как запустить несколько копий игры одновременно? Как играть без диска?
Скачайте утилиту D2Loader для вашей версии игры.
Технические вопросы.
Как установить патч на пиратскую версию игры?
Часть производителей пираток (например, Фаргус) по минимуму изменяют игру, поэтому на них абсолютно корректно встает официальный патч от Близзард.
Я хочу запустить сетевую игру, но не могу нажать кнопку «Host game». Что делать?
Вам надо установить статический IP-адрес.
Установка под Win XP:
«Панель управления» -> «Установка оборудования”. Запускается мастер, нажимаем «Далее». Мастер начинает искать новое устройство. После того, как ничего не найдено, он задает вопрос «А вы уже подключили оборудование к компьютеру?» («Have you already connected this hardware to your computer?») Говорим, чтодаинажимаем «Далее». Появляется список установленного оборудования. Прокручиваем его до конца и выделяем пункт «Добавление нового устройства», жмем «Далее». Выбираем «Установка оборудования, выбранного из списка вручную», нажимаем «Далее». Выбираем «Network adapters», нажимаем «Далее». В появившемся окне выбираем производителя — «Microsoft», сетевой адаптер — «Microsoft Loopback Adapter». Нажимаем дважды «Далее». На этом установка эмулятора сетевой карты завершена. Теперь этот эмулятор нужно настроить, для чего открываем свойства «Сетевого окружения», затем свойства «Подключения по локальной сети» в котором указываем IP-адрес и маску подсети. IP-адрес: «192.168.0.1», маска подсети «255.255.255.0».
Сетевая игра
Я новичок в сетевой игре. С чего мне начать?
1. Подключение.
После установки игры вы запускаете ее и нажимаете кнопку battle.net. Необходимо обратить внимание на кнопку Gateway. С помощью нее вы выбираете реалм, на котором вы будете играть. Реалмов четыре: Europe, Asia, US West, US East. Персонажи, которых вы качаете на реалме, не могут играть на других реалмах.
После этого вы подключаетесь к службе battle.net. Далее необходимо ввести имя аккаунта и пароль. Поскольку вы первый раз подключаетесь, ваш выбор кнопка «create new account». Имя аккаунта должно быть уникально в рамках реалма, поэтому часто возникают сообщения о том, что такой аккаунт уже есть, проявите фантазию, но не переусердствуйте, поскольку это имя, как и пароль, вам придется вводить постоянно, и если вы его забудете, то восстановить его будет сложно, может даже и не удастся. Количество аккаунтов не ограничено. Процесс создания персонажа ничем не отличается от одиночной игры, единственное, что имя персонажа тоже должно быть уникальным.
2. Канал.
Итак, вы в battle.net. Появляетесь вы героем 1 уровня на канале. Имя канала отображается вверху окна. Описание команд чата и назначение кнопок, выводиться по кнопке Help.
Тут я приведу только самые распространенные и необходимые команды:
/w *accaunt_name msg — посылает сообщение человеку играющего под определенным аккаунтом, сообщение идет в игру или на любой канал. Основное средство приватной связи.
/w char_name msg – то же самое, только сообщение идет определенному герою. Используется, когда вы не знаете имя аккаунта, а только имя персонажа. Обратите внимание, что «*» перед именем не ставиться.
/f add acc_name — добавляет аккаунт в список друзей (friends list)
/f list — показывает ваш friends list, с пометкой кто в игре, а кто нет. Если вы тоже находитесь в листе у человека, то указывается еще и имя игры, в которой он находиться.
3. Игра.
Нажав кнопку Join, вы можете увидеть список доступных вам игр. Вначале будут видны только игры на обычной сложности. Хардкорщики не могут играть в играх созданных героями “классики” и наоборот. Соответственно персонажи классики не могут играть в играх ЛОД. После убийства “нормального” Баала, вы будете видеть игры на кошмаре, но не видеть на нормале. Эта проблема решается созданием персонажа, который видит игры на нормале, вы заходите им на канал, ищите подходящую игру, выделяете ее имя, нажимаете clrl+c, имя запоминается в буфер обмена, заходите игровым героем, нажимаете join , затем в поле имени игры нажимаете ctrl+v и заходите в игру.
4. Создание игры.
Создание игры делается с помощью кнопки create. Там вы указываете имя игры, желательно писать что-то информативное. Если вы чистите коровник, то называйте ее cows, если выполняете квесты или проходите 2 акт, то «act 2 quest». Люди, которые будут присоединяться к вашей игре, поймут, что там собираются делать и довольно быстро соберется команда которая, например, одолеет Дуриэля. Игру можно сделать с паролем, тогда она не отображается в списке игр, и войти в нее не зная пароля нельзя. «Max number of players» указывает количество игроков, которые могут присоединиться к игре, максимальное значение 8. «Character difference» указывает разницу в уровнях персонажей, которые могут присоединиться к игре. Если у вас 20 уровень, и стоит разница в 5, значит к игре могут присоединиться герои 15-25 уровней. Выбор уровня сложности указывает уровень сложности создаваемой игры.
Иногда возникает сложность с квестами. Если вы присоединяется к игре, которую создал человек с уже выполненным квестом, то в этой игре выполнить его уже не сможете. Например, игру создал человек с уже выполненным квестом о Мефисто, а у вас он еще не выполнен, то даже если вы убьете Мефисто, то в портал в 4 акт вы не пройдете. Какие квесты можно выполнить видно в закладке quest. “Невыполнимые” квесты обозначены надписью «Cannot complete quest in this game». Так что если вы хотите выполнить убийство какого-нибудь актового боса в команде, игру придется создавать вам. При выполнении квеста он засчитывается всей команде. В команду можно вступать или выходить в любое время. Вступить можно по приглашению одного из члена команда. Все это управляется из закладки «Party» вызывается по кнопке «Р». Командная игра имеет много плюсов: вы сможете входить в Town Portal членов команды, на всю партию идет опыт от убитых монстров, но только если вы находитесь в одной локации.
5. Просьбы о помощи.
Начиная игру, вы не имеете ни вещей, ни денег. Как показывает практика, 10000 золота вам дадут почти всегда, нет проблем с получением way point. Вещей вам могут дать, а могут и не дать. Убер не дадут практически никогда. Чтобы повысить вероятность получения вещи в подарок, спрашивайте что-то конкретное. Например, меч с навыками или сопротивлениями. Просьбы типа “дайте мне каких-нибудь вещей”, обычно остаются без ответа, и это обоснованно. Заходя в игру, поздоровайтесь для начала…уважайте себя и оппонентов. Большинство народу в играх говорят только на английском, знание этого языка существенно облегчит вашу жизнь. Начиная играть, настоятельно советую обойтись без “такси”, и проходить игру самостоятельно. Вы приобретете, бесценный опыт игры, найдете вещей для одевания последующих героев и торговли, познакомитесь с людьми, приобретете новых друзей и знакомых. Садясь в “такси”, вы выходите очень слабыми, с низким уровнем, не имея вещей и возможности играть на последующей сложности. На меньших уровнях сложности не идет опыт, и играть не интересно. Идя в команде, не зевайте, кто успел, тот и съел. Если есть возможность, оставляйте в инвентаре свободное место 2х4, что бы поднять любую вещь. Если вам какая — то вещичка не нужна, а кто-то говорит, что она ему необходима, не жадничайте, попытайтесь поменяться или отдайте даром. Добро иногда не забывается. Обращаясь с просьбой, помните, что вам никто и ничего не должен. Если вам помогли, обязательно поблагодарите.
6. “Мулинг”.
Когда количество найденных вещей, превышает объем рюкзака, возникает проблема их хранения. Для этого заводятся, обычно на другом аккаунте, персонажи, которые называются мулы. Перекидывание вещей можно сделать следующими способами:
1. Создается запароленая игра на нормале, кто-нибудь из ваших друзей заходит в игру и стоит в ней. Вы скидывайте вещи, а потом заходите мулами и забираете их.
2. Друга можно найти не всегда, поэтому создается запароленая игра. В ней стоите не менее 5 минут, потом выходите и заходите снова. Если игра существует, то скидывайте вещи, потом заходите мулами и подбираете их. Этот способ основан на том, что когда в игре кто-то проводит, больше 5 минут, то она сохраняется какое-то время без игроков. Но передавать так хорошие вещи я бы не советовала, весьма рискованно. Вещи из разряда hellfiretorch & annihilus передавайте только через окно торговли, людям которым вы абсолютно доверяете.
7. Самый страшный враг – лаг.
Лаг — прекращение связи с сервером. Лаг может не опознаваться по значению пинга в игре (команда FPS). Самый лучший способ избежать смерти в лаге — выход из игры по esc, или alt+F4. Лаг можно опознать по следующим признакам:
1. На ваше приближение монстры не реагируют, а стоят на месте.
2. На монстров не действуют ваши удары.
3. Не идет расход маны при наложении заклинаний.
4. Резко повышается скорость наложения некоторых заклинаний (FO у волшебницы, например)
5. Самопроизвольно уменьшается здоровье и идет анимация блока.
6. Не идет анимация элементального урона. Не синеют от холода, не зеленеют от яда.
7. Не ставиться портал.
8. Пробегая какое-то расстояние, вы видите черное поле.
9. В городе нет некоторых NPC или с ними нельзя поговорить, нельзя открыть сундук или перейти на другую локацию через WP.
При лаге надо помнить, что длиться он может от нескольких секунд до выброса из игры вашего трупика. Если до попадания в лаг вы бежали по безопасной территории, то лучше остановиться и попытаться поставить портал или уйти в город через WP. Бывает так, что команды на движение проходят на сервер, а на экране вы бежите вовсе не туда. Лаг можно попробовать переждать или выйти из игры. Для персонажей невысоких уровней это не так актуально, но для героя 90+, а тем более на хардкоре, лучше выйти из игры, если успеете…
Что такое Closed Battle.Net?
Closed Battle.Net — закрытый сервер Близзард. На нем можно играть только персонажами, созданными там, все файлы конфигурации персонажа хранятся там же и возможности что-то “подкрутить” сводятся практически к нулю.
Что такое Ладдер?
Ladder — топ 1000 лучших игроков на Battle.Net. Он разделен на четыре части — LoD Softcore, LoD Hardcore, Classic Softcore, Classic Hardcore. В ладдер могут попасть только ладдерные персонажи. Чтобы создать такого, необходимо при создании поставить соответствующую галочку. Существуют ‘сезоны ладдера’, по истечении срока которых персонажи из ладдерных становятся обычными. У игры в ладдере есть одно преимущество — они могут находить некоторые вещи (а также им доступно больше рецептов для Horadric Cube), которые недоступны простым персонажам Battle.Net.
Как поиграть в интернете с пиратской версией игры?
Существует много серверов для игры с пиратской версией. Но на них гораздо меньше народу, чем на battle.net, соответственно они менее развиты. Для подключения к неофициальным серверам скачайте программу Bnet Gateways Configurator для настройки списка серверов. С помощью нее добавьте в список любой сервер. Затем в игре выберите созданный вами сервер и подключайтесь. Либо установите конфигурационный файл реестра.
Внимание! На большей части серверов существует не оригинальная версия, а своеобразный мод. В частности, на нашем сервере. Даже если по внешнему виду все соответствует оригиналу, как правило, изменены World Events (условия, при которых вызывается Uber Diablo), шансы выпадения вещей и рун с различных монстров и количество начисляемого опыта.
Список сокращений и сленга battle.net.
Общеупотребительные выражения
AFAIK — (As Far As i Know) — Насколько я знаю.
AFAIR — (As Far As i Remember) — Насколько я помню.
AFK — (Away From Keyboard) — Не за клавиатурой/Отошел от компьютера.
BRB — (Be Right Back) — Скоро вернусь.
BTW — (By The Way) — Между прочим/Кстати/Напоследок.
CU, CYA — (See You) — До встречи/Увидимся.
DND — (Do Not Distrub) — Не беспокоить.
FFS -(Fast Fast Speed) — Быстрее
GG — (Good Game) — Удачной игры
GGG -(Good Game Guys) — Хорошая игра, ребята
GL — (Good Luck) — Желаю удачи.
HF — (Have Fun) – В удовольствие.
IMHO(имхо) — (In My Humble Opinion) — По моему скромному мнению.
Jn — (Join) — Зайти в игру.
JK — (Just Kidding) — Просто шутка.
K — (O’kay) — Да/Хорошо.
LOL(лол) — (Laughing Out Loud) — Смеюсь до упаду.
LOL(лол) — (Lamer On-line) — Ламер в сети.
Newb — (Newbie) — Новичок.
NP — (No Problems) — Без проблем.
PP — (Party Please) — «Дайте, пожалуйста, партию». Просьба, чтобы игрока приняли в команду.
PPL(ппл) — (People) — Игроки. Часто применяют как описание количества человек в игре.
ROFL — (Rolling On Floor Laughing) — Катаюсь по полу от смеха.
RIP — (Rest In Peace) — Покойся с миром.
S? — (safe tp?) — Вопрос — Безопасен ли портал?
S — (safe tp) – То же самое, без вопросительного знака — Портал безопасен!
Slain(Слейн, Слэйн, Слив) — Смерть. («***** was slain by *****»).
Thx(10х) — (Thanks) — Спасибо.
W8 — (Wait) – Подожди
Основные аспекты игры
A#Q# — (Act #, Quest #) — Обозначение конкретного квеста из конкретного акта игры.
BN — (Battle.net) — Игровая сеть Blizzard.
CBN — (Closed Battle.net) — Закрытые сервера Blizzard.
Char — (Character) — Персонаж.
clvl — (Character Level) — Уровень персонажа.
ES — (Experience Shrine) — Святилище, повышающее на определенное время количество опыта за монстров в два раза.
HC(ХЦ, ХК) — (Hardcore) — Тип персонажа, которому «жизнь дается только раз».
ID — (Identify) — Свитки или книги опознавания предметов/Опознать что-либо.
IF — (Item Finding) — Поиск предметов.
ilvl — (Item Level) — Уровень предмета, уровень префиксов и суффиксов предмета.
lvl(лвл) — (Level) — Уровень.
Merc(Мерс, Мерк) — (Mercenary) — Наемник.
mlvl — (Monster Level) — уровень монстра.
MP — (Multiplayer) — Сетевая игра.
NM — (Nightmare) — Вторая сложность игры.
OBN — (Open Battle.net) — Открытые сервера Battle.net.
PK(ПК) — (Player Killer) — Убийцы игроков, (беспринципные подонки battle.net, бьющие в спину)
PKK(ПКК) — (PLayer Killer Killer) — Убийца PK.
PPKK(ППКК) – (Proffesional Player Killer Killer) — Мастер по уничтожению РК.
PvM(ПвМ) — (PLayer vs Monsters) — Истребление монстров.
PvP(ПвП) — (Player vs Player) — Игрок против игрока/Дуэль.
Q — (quest) — Квест/Задание.
Req — (Requirments) — Требования.
Rlvl — (Required Level) — Требуемый уровень.
SC(СК) — (Softcore) — Стандартный вариант игры/Не Hardcore.
Single(Сингл) — (Single Player) — Одиночная игра.
slvl — (Skill Level) — Уровень умения.
SP — (Single Player) — Одиночная игра.
Stun, StunAnimation(стан, стан-анимация) — Временное бездействие игрока (обычно не больше секунды) когда тот получает урон больше либо равный 1/12 своей жизни.
TP(ТП) — (Town Portal) — Свиток или книга Портала в Город/Зайти в Портал/Дать портал.
WP(ВП) — (Waypoint) — Телепорты, которые можно открыть на местности для дальнейшего перемещения по актам.
Характеристики персонажей
AR — (Attack Rating) — Уровень атаки.
CR — (Cold Resistance) – Сопротивление к холоду.
Dex(Декста, Декстра) — (Dexterity) — Ловкость.
Dext(Декста, Декстра) — (Dexterity) — Ловкость.
Dmg(Дамаг, дмг) — (Damage) — Урон.
DR — (Defence Rating) — Уровень защиты.
DRx% — (Damage Reduce by x%) — Урон снижается на х %.
Ene — (Energy) — Энергия.
Enr — (Energy) — Энергия.
Exp(Экспа) — (Experience) — Опыт.
FR = (Fire Resistance) — Сопротивление к огню.
HP(ХП) — (Hit Points) — Количество единиц жизни.
LR — (Lightning Resistance) — Сопротивление к молнии.
MP — (Mana Points) — Количество единиц маны.
PR — (Poison Resistance) — Сопротивление к яду.
SP — (Skill Points) — Количество доступных единиц для навыков.
StP(Статсы) — (Stat Points) — Количество доступных единиц для силы/энергии/ловкости/живучести.
Str(Стренджа) — (Strenght) — Сила.
Vit — (Vitality) — Живучесть.
Обозначения названий навыков и классов персонажей
Amazon
Ama(Ама, Амка) — (Amazon) — Амазонка.
Zon — (Amazon) — Амазонка.
CS — (Critical Strike) — clvl1, Passive and Magic Skills.
GA(ГА) — (Guided Arrow) — clvl18, Bow and Crossbow skills.
LF — (Lightning Fury) — clvl30, Javelin and Spear Skills.
MS(Мульти) — (Multiple Shot) — clvl6, Bow and Crossbow Skills
Valk(Валька) — (Valkyrie) — clvl30, Passive and Magic Skills.
Assassin
Asn(Асса, Ася) — (Assassin) — Ассассин.
Assa(Асса, Ася) — (Assassin) — Ассассин.
BoS — (Burst Of Speed) — clvl6, Shadow Disciplines.
DF — (Dragon Flight) — clvl24, Martial Arts.
TS — (Tiger Strike) — clvl1, Martial Arts.
LS — (Lighting Sentry) — clvl24, Traps
DS — (Death Sentry) — clvl30, Traps
Barbarian
Barb(Барб) — (Barbarian) — Варвар.
BO — (Battle Orders) — clvl24, War Cries.
IS — (Iron Skin) — clvl18, Combat Masteries.
LA — (Leap Attack) — clvl18, Combat Skills.
WW — (Whirlwind) — clvl30, Comabt Skills.
Druid
Dru(Дру) — (Druid) — Друид.
Arma — (Armageddon) — clvl30, Elemental Skills.
Oak — (Oak Sage) — clvl6, Summoning Skills.
Necromancer
Necr(Некр) — (Necromancer) — Некромант.
AD — (Amplify Damage) — clvl1, Curses.
BS — (Bone Spirit) — clvl30, Poison and Bone Spells.
CE — (Corpse Explotion) — clvl6, Poison and Bone Spells.
CG — (Clay Golem) — clvl6, Summoning Spells.
BG — (Blood Golem) — clvl18, Summoning Spells.
IG — (Iron Golem) — clvl24, Summoning Spells.
FG — (Fire Golem) — clvl30, Summoning Spells.
Decr(Декра) — (Decrepify) — clvl24, Curses.
IM — (Iron Maden) — clvl12, Curses.
LR — (Lower Resist) — clvl30, Curses.
Paladin
Pal(Пал) — (Paladin) — Паладин.
pally(Пал, Палыч, Палли) — (Paladin) — паладин.
BH — (Blessed Hammer) — clvl18, Comabt Skills.
Conc — (Concentration) — clvl18, Offensive Auras.
Fana — (Fanaticism) — clvl30, Offensive Auras.
FoH — (Fist Of Heavens) — clvl30, Combat Skills.
HF — (Holy Freeze) — clvl24, Offensive Auras.
Sorceress
Sorc(Сорка, Сора (как же я ненавижу эти два слова…)) — (Sorceress) — Волшебница.
CM/FM/LM — (Cold/Fire/Lightning Mastery) — clvl30
ES — (Energy Shield) — clvl24, Lightning Spells.
FO(Форб) — (Frozen Orb) — clvl30, Cold Spells.
FW — (Fire Wall) — clvl18, Fire Spells.
GS — (Glacial Spike) — clvl18, Cold Spells.
SF — (Static Field) — clvl6, Lightning Spells.
Tele — (Teleport) cvl18, Lightning Spells.
TK — (Telekinesis) — clvl12, Lightning Spells.
TS — (Thunderstorm) — clvl24, Lightning Spells.
Обозначения монстров и их характеристик
Andy(Энди, Анда, Даша) — (Andariel) — Босс 1-го Акта.
Baal(Баал) — Босс 5-го Акта.
Bartuc — (Bartuc The Bloody) — Один из противнейших приспешников Баала в 5-м Акте, т.к. чаще всего MLEB (см. ниже).
Big D – (Diablo)-(Дракон, Ежик, Ершик) — Босс 4-го Акта.
Bremm(Брэм) — (Bremm Sparkfist) — Босс 3-го Акта.
CEB — (Cold Enchanted Boss) — Монстр, к атаке которого добавляется урон холодом. После смерти атакует навыком Frost Nova.
Doll — (Stygian Doll) — Монстры 3-го Акта на местности Durance Of Hate. Взрываются при смерти. Часто бывают причиной смерти даже сильных героев.
FEB — (Fire Enchanted Boss) — Монстр, к атаке которого добавляется урон огнем. После смерти он взрывается (Corpse Explotion).
Heph(Геф) — (Hephasto) — Босс 4-го Акта.
Izzy(Изи) — (Izual) — Босс 4-го Акта.
LEB — (Lightning Enchanted Boss) — Монстр, к атаке которого добавляется урон молнией. При получении урона атакует навыком Charged Bolt.
Little D(Дурка, Дурик) — (Duriel) — Босс 2-го Акта.
Meph(Меф) — (Mephisto) — Босс 3-го Атка.
MLEB(Млеб) — (Multishot Lightning Enchanted Boss) — Монстр, к атаке которого добавляется повреждение молнией. Также атакует навыком Charged Bolt при получении урона. Multishot увеличивает количество зарядов Charged Bolt. Если монстр обладает дальнобойной атакой, увеличивается и число ее зарядов.
Описание предметов
3DS — (3 Diamonds Shield) — Гнездовой (Socketed) щит с тремя вставленными в него Perfect Diamond’ами.
AF(Ариец, Арреат) — (Arreat’s Face) — Уникальный классовый шлем варвара.
Buriza, Buri(Бурка) — (Buriza-Do Kyanon) – Уникальный арбалет.
CCB — (Cruel Colossus Blade)
CCS — (Cruel Colossus Sword)
EH — (Eaglehorn) — Уникальный лук.
GF — (Дедушка, Батька) — (Grandfather) — Уникальный меч.
HoZ, Zaka — (Herald Of Zakarum) — Уникальный классовый щит паладина.
IK — (Immortal King) — Вещь из Immortal King’s set’a.
Levi — (Leviathan) — Уникальная броня
LoH — (Laying of Hands) — Перчатки из set’a «The Disciple».
PS — (Perfect skull) — Совершенный череп.
SoE — (String Of Ears) — Уникальный Demonhide Sash, пояс.
Shaft(Шафт) — (Shaftstop) — Уникальная Mesh Armor, броня.
SoJ(Содж) — (Stone Of Jordan) — Уникальное кольцо. Основная валюта в Battle.net.
SS (Шторм) — (StormShild) — Уникальный щит.
Tarn — (Tarnhelm) — Уникальная Skull Cap, шлем.
TR — (TalRasha) — Вещь из TalRasha’sSet’a.
Twich — (Twichthroe) — Уникальная StuddedLeatherArmor, броня.
VG, Gaze(Гейз) — (VampirGaze) — Уникальный GrimHelm, шлем.
WF — (Windforce) — Уникальный лук.
Описание свойств предметов
CR, FR, LR, MR, PR — (Cold/Fire/Lightning/Magic/PoisonResist) — Типы сопротивлений.
DR — (Damage Reduce by) — Свойство, понижающеефизическийурон.
Dual Leech — Life и Mana Leech в одном флаконе.
IAS(ИАС) — (Increase Attack Speed) — Увеличение скорости атаки.
ITD — (Ignore Target Defence) — Игнорированиезащитыцели.
FCR — (Faster Cast Rate) — Увеличение скорости наложения заклинаний
FHR — (Faster Hit Recovery) — Увеличение скорости восстановления персонажа после удара.
LL — (Life Leech)
MF — (Magic Find) — Свойство, повышающее процент падения из монстров или сундуков/бочек/урн rare, set или Unique вещей.
MDR — (magic Damage Reduced by) — Свойство, понижающее магический урон, нанесенный персонажу.
Локации игры
AS — (Arcane Sanctuary) — акт 2
Bloody — (Bloody foothills) — акт 5
cats — (Catacombs) — акт 1
CotD — (City Of The Damned) — акт 4
CS — (Chaos Sanctuary) — акт 4 (пристанище Diablo)
DoH — (Durance Of Hate) — акт 5
RoF — (River Of Flame) — акт 4
Pit — (The Pit) — акт 1 (подземелье в Tamoe Highland)
Tombs — (все 7 Tal Rasha’s Tombs) — акт 2
LK — (Lower Kurast) — акт 3
Bazar — (Kurast Bazaar) -акт 3
Trav(Trava) — (Travincal) — акт 3
WK — (Обычно имеют ввиду все 3 уровня Worldstone Keep Levels + Throne of Destruction) — 5 акт
Другие термины
Bloodrun(бладран) — Убийство всех монстров в Bloody Foothills для получения опыта.
Mephrun(мефран) — Убийство Мефисто ради вещей.
Baalrun(баалран) — Убийство приспешников Баала и его самого для получения вещей/опыта.
Cowrun(коуран, ферма) — Убийство коров в секретном уровне для получения опыта/вещей.
Sewersrun(Северс-ран) — Долгие блуждания по Sewers ради опыта.
Gamename///Password — Имя игры///пароль к игре. Так обычно договариваются, в какой игре встречаться, или просто куда сейчас идти. ( /// — просто разделители). Допустим, если видим «Jn Rus1///1» значит надо войти в игру с именем Rus1 и паролем 1.
Next — Перейти в следующую игру. Например, если в данной момент вы в игре Rus1///1 то надо перейти в Rus2///2. Обычно используют этот термин при бладране, кауране, баалране.
SnE — Save And Exit
Холодильник — Наемник из второго Акта Nightmare. Defensive. С аурой Holy Freeze.
Кактус — Наемник из второго Акта Nightmare. Combat. С аурой Thorns.
Усилитель, Усилок — Наемник из второго Акта Nightmare. Offensive. С аурой Might.
Такси — Помощь в прохождении. Обычно заключается в том, чтобы «довезти» игрока до 5 акта и оставить его там качаться. На сложностях nightmare & hell зачастую осуществляется “за hf” (Hellforge – 2 квест в 4 акте). Проводник в уплату “такси” забирает руну, выпавшую там после разбиения Камня Души Мефистофеля.
Гамбля — (Gamble) – Азартная игра с торговцами.
Каков трафик за час игры?
В среднем 3 мб/ч. От 1 при простое до 5 при баалране на 8 игроков.
Вопросы по персонажам
Как переименовать персонажа?
Стандартными средствами никак. Разве через программу ATMA или редактор персонажей (см. выше). Также можно открыть d2s файл любым hex-editor’ом и исправить все встречающиеся имена персонажа. Но этот способ годится только если количество букв в старом и новом имени одинаково.
Как мне развивать своего персонажа? Какие навыки качать?
Посмотрите руководства в интернете. Они зачастую не идеальны, но дадут вам понятие о классе персонажа и методах его развития.
Какой герой самый сильный?
Некорректный вопрос. Все зависит от игрока и целей, для которых создается персонаж.
Чем мастерство холода (СМ) у волшебницы отличается от огненного и мастерства молний? Как оно действует?
СМ понижает сопротивление к холоду у противника, а огненное и мастерство молний увеличивают урон от заклинаний. Например, у монстра сопротивление к холоду 25%, а у вас СМ раскачан до 22 уровня (-125%), то у монстра сопротивление к холоду будет:
25+(-125)=-100% и вы будете наносить удвоенный урон. У монстров сопротивление не может быть меньше -100%. СМ не действует на монстров с иммунитетом к холоду.
Вопросы по предметам
Как передавать вещи между персонажами в одиночной игре?
1) Используйте АТМУ.
2) Техника простая — вам нужно запустить две копии игры одновременно, создать TCP/IP игру одним персонажем и зайти в нее другим. После этого, переключаясь Alt+Tab’ом, вы можете передавать вещи между этими двумя персонажами. Для запуска двух копий игры одновременно используйте D2Loader.
Где лучше всего искать руны?
Самое лучшее место для поиска рун все-таки “адская” The Countess (Графиня в 1 акте). Она может дать руны до Lo включительно (увеличенный шанс только рун до Ist). Кроме того, руны можно искать на коровьем уровне.
Можно ли вынимать из оружия или доспехов уже вставленные в них камни, руны, джевелы?
В версиях до 1.10 нет. В более поздних версиях есть специальный рецепт, позволяющий освободить сокет в предмете уничтожив уже вставленными камнями/рунами (вещь + руна Hel+ свиток портала)
Что такое СОДЖ (SoJ)?
Stone of Jordan(SoJ) — это уникальное кольцо, которое дает +1 ко всем навыкам, увеличивает количество маны и добавляет урона молнией. Выпадает он очень редко и просто так его найти практически невозможно. Однако если специально бегать на некоторых монстров достаточно долго, то “ищущий да обрящет”. Самый большой шанс выпадения SoJа — у Андариэль (актовый босс первого акта) на уровне Nightmare (второй уровень сложности). SoJ порой служит в качестве условной единицы измерения стоимости других вещей в игре.
Что такое абсорб? Как он работает?
Абсорб – это модификатор нейтрализации, коэффициент поглощения на самых различных предметах. Бывает процентный и единичный. Абсорб действует следующим образом: вначале прошедший по вам урон поглощается, а потом прибавляется такое же количество к здоровью. Верхняя граница для % абсорба это 40. Абсорба к яду не существует.
Самые распространенные предметы-поглотители:
Dwarf Star, Raven Frost, Blackoak Shield, Hellmouth, The Rising Sun, Wisp Projector, Blackhorn’s Face, Thundergod’s Vigor.
Почему мне в одиночной игре выпала ладдерная вещь?
Ладдерные вещи падают в одиночке, открытых серверах и TCP-IP играх
Где берут элитные руны от Vex и выше? Где стоит их искать?
Они могут выпасть из уникальных монстров, особенно из миньонов Баала. Кроме того их можно сварить в кубе из более мелких.
Влияет ли уровень героя на то, какая руна упадет в Адской Кузнице?
Нет. На это влияет только уровень сложности, на котором выполняется квест. (на кошмаре максимум Um, в аду Gul).
В чем заключается баг с ботинками Marrowwalk для некроманта?
Баг состоит в следующем: вы не вложили ни одного очка в Bone Prison, но этот навык имеет уровень 33. Потому он является хорошим бонусом для Bone Armor. Вложив хоть одно очко в BP, эффект от ботинок теряется. Баг действовал только в версии 1.10. В версии 1.11 был исправлен.
Как составлять рунные слова?
Руны надо вставлять в том порядке, в котором они перечислены. Использовать надо только обычные предметы с гнездами и учитывать, что если в слове, например, четыре руны, а в болванке пять гнезд, — оно не сработает. Магические, редкие, сетовые и уникальные вещи для этого не подходят.
Вопросы по монстрам
Как попасть в коровник?
Чтобы попасть в секретный коровий уровень (в просторечии — коровник) Вам необходимо убить Баала на данном уровне сложности. После чего пойти в первый акт, положить в куб ногу Вирта (Wirt’s Leg), выпадает из трупа Вирта, лежащего в верхней части Тристрама, и полный том порталов(Tome of town portal) и нажать «Тrancemutate’. Откроется красный портал в коровник. Повторять операцию можно пока вы не убьёте Коровьего Короля (Cow King). После этого портал на данной сложности открываться перестанет.
Кто такой Убер Диабло? Зачем его надо убивать?
Диабло-клон (в народе клоун) — это суперуникальный монстр 110 уровня, единственный в версии игры с 1.10. Он всегда дает только одну вещь — Annihilus. Когда и где его искать — никто заранее не знает. Просто ждите сообщения ‘Diablo walks the earth!’ и бегите к ближайшему уникальному монстру — тот может стать “клоуном”. Убить очень сложно. Он чрезвычайно силен и быстр. Появляется он только в Battle.Net для ладдерных героев на месте первого уникального монстра, к которому вы подбежите. В одиночке его нет, но можно сделать возможным с помощью программы Plugy.
Правда-ли, что для вызова Убер Диабло нужно продавать SOJ`и?
Да. Но на самом деле их никто не продает — слишком дорогое удовольствие. Дело в том, что на сервере стоит счетчик, который автоматически с периодом добавляет единицу к количеству уже проданных колец. Кроме того, на неофициальных серверах, как правило, установлен другой критерий для World Event’а (т.е. появления Uber Diablo), чаще всего это продажа достаточно низкоуровневых рун, сетовых колец или, как было раньше на нашем сервере, flawedgems. Это прописано в информации к серверу при входе в игру.
Вопросы по MF (MagicFind)
Что такое MF и для чего он нужен?
MF — это целенаправленное уничтожение какого-либо монстра в игре с целью поиска какой-то вещи (вещей). Ключевое слово здесь — целенаправленное, т.е. мы уничтожаем монстра не в процессе прохождения игры, а специально для поиска определенной вещи (вещей). Со стороны процесс выглядит примерно следующим образом: заходим в игру, бежим к нужному монстру, избегая по возможности схваток с другими монстрами, убиваем его и рассматриваем находки, подбирая нужное. Одна такая итерация называется magic run. Это достаточно нудное занятие, но оно того стоит, т.к. случайно (в процессе игры) хорошие вещи выпадают очень редко. Однако и в этих забегах есть своя прелесть, они похожи на азартную игру, каждый раз по пути к монстру роятся мысли: «Интересно, на этот раз выпадет хоть что-нибудь толковое?»
Каких монстров надо убивать, чтобы выпали хорошие вещи?
Приведенное выше определение не значит, что нужно бегать к первому попавшемуся монстру. Вы, конечно, можете бегать и к фаллену из первого акта, вот только хороших вещей от него не дождетесь. Для того, чтобы узнать, к кому бегать, нужно четко представлять как определяется какие вещи выпадут из убитого монстра. Вкратце можно сказать, что не всякий монстр может выкинуть любую вещь и то, какие вещи монстр может бросить, определяется такими его характеристиками как Level (уровень монстра) и Treasure Class (класс сокровищ, которые может дать монстр) и не зависит от уровня игрока.
Теперь немного о «жадности» монстров. Она определяет вероятность выпадения высококачественных предметов, т.е. сколько забегов на данного монстра в среднем нужно сделать, чтобы выпал конкретный предмет. Чем «жаднее» монстр, тем больше придется бегать. Наименее жадные монстры — актовые боссы (Мефисто, Баал и т.д.). И, наконец, последняя интересная характеристика — nondrop. Она определяет вероятность того, что монстр не выкинет ни одного предмета. Чем меньше nondrop, тем больше вещей кидает монстр и наоборот. У разных монстров разные вероятности выброса различных типов предметов (оружия, брони и т.д.). Поэтому, если вы ищите что-то конкретное, советую вам предварительно выяснить вероятность выпадения этого предмета из разных монстров. Это можно сделать с помощью специальных программ или в интернете с помощью специальных он-лайн калькуляторов. Например, графиня из первого акта хорошо бросает руны, а Андариэль (Nightmare) имеет самый большой шанс выпадения SoJ’а. Также необходимо учитывать, сколько времени будет занимать забег. Например, монстр А имеет вдвое большую вероятность выпадения вещи Х, чем монстр Б. Однако один забег до А занимает в три раза больше времени по сравнению с забегом к монстру Б. Понятно, что быстрее вещь Х выбить с Б.
Итак, наиболее оптимальные монстры это — актовые боссы на уровнях сложности Nightmare и Hell и высокоуровневые монстры на уровне сложности Hell. Чаще других бегают на Мефисто (акт 3, босс), Баала (акт 5, босс) и Пиндла (акт 5, уникальный монстр). Забеги на конкретных монстров очень часто называют по имени этих монстров — Мефран, Баалран, Пиндлран.
Отдельно хотелось бы сказать про Мефисто. Этот монстр, наверное, больше других пострадал от налетчиков, и является самым популярным монстром для забегов. Это объясняется тем, что до него не нужно долго бежать (через портал в Durance of Hate 2), его достаточно просто убить и он не очень “жадный”. У меня один мефран (Hell) волшебницей 95 уровня занимает около 30 секунд. Но помните, что Мефисто кидает далеко не все вещи.
Как игрок может влиять на качество находок?
Для игрока существует только одна возможность повлиять на качество — увеличить свой коэффициент MF. Это можно сделать с помощью вещей с модификатором «X% better chance of getting magic items». Этот модификатор увеличивает качество вещей, т.е. вероятность того, что брошенная вещь будет уникальной, сетовой, редкой или волшебной. Например, если у монстра вероятность бросить волшебную вещь равна 2%, а ваш MF равен 50%, то окончательная вероятность выпадения волшебной вещи составит 2% * 50%/100 = 3%. Коэффициент MF суммируется со всех ваших вещей. При MF большем 100% начинает действовать пенальти, т.е. в приведенную формулу вводится понижающий коэффициент s». Можно сделать вещи с таким модификатором и самостоятельно. Самый простой способ — вставить в сокеты совершенные топазы (в броне, щитах и шлемах дают +24%MF) или руны Ist (+30%MF в оружие, 25%MF в шлемах/броне/щитах). Также очень полезны маленькие талисманы с суффиксами «Fortune» (3-5% betterchanceofgettingmagicitem) и «Luck» (6-7% betterchanceofgettingmagicitem).
Коэффициент MF можно сделать больше 1000, однако такой персонаж будет несбалансированным и им будет проблематично кого-либо убить. Вообще, чем больше MF — тем слабее персонаж. Есть одна хитрость, которая позволяет увеличить MF не в ущерб боевым характеристикам — это вторичное оружие. Дело в том, что при расчетах учитывается тот MF, который имел игрок в момент нанесения последнего удара по монстру. Поэтому монстра бьют боевой связкой, а перед самой его смертью переключаются на вторичку, которой добивают. Еще больше увеличить MF можно за счет наемника — если последний удар нанесет он, то в расчетах учитывается ваш MF + его MF.
Каким персонажем бегать?
Этот вопрос не имеет однозначного ответа. Все зависит от того, к кому бегать, как много времени занимает забег, сколько монстров придется убить предварительно, чтобы добраться до цели. Многое зависит от индивидуальных предпочтений игрока. К тому же у новичка, как правило, нет особого выбора среди персонажей. Можно посоветовать следующее — бегайте тем персонажем, который не будет постоянно гибнуть, у которого забег занимает как можно меньше времени, который имеет наибольший коэффициент MF.
На этой странице руководства Diablo 2 Ressurected вы найдете игровые советы, которые помогут вам начать игру быстрее и лучше. Большинство советов нацелены на любителей серии, но ветераны несомненно, найдут что – то для себя, что новая версия полна изменений и улучшений геймплея по сравнению с оригиналом.
Первые шаги
Здесь вы найдете несколько советов для любителей серии, только начинающих свое приключение:
- Получите снаряжение – в самом начале наденьте все, что сможете найти, потому что основным снаряжением обычно является только оружие (и, возможно, щит).
- Ключ во время боев – использование сочетаний клавиш. Смена навыков, быстрое пополнение маны и здоровья – вот залог победы в схватках с многочисленными противниками и боссами. Подробности можно найти на странице управления.
- Первое оружие – метательный нож. Для любого не-мага, и даже для тех, у кого еще нет навыков. Первые минимум 5-10 уровней можно быстро убивать простыми метательными ножами (только для метания, в рукопашном бою они намного слабее). Атаки быстрые, меньшие враги такие как надоедливые Падшие, все еще находятся в пределах вашей дальности атаки, когда убегают. По желанию, копья тоже хороши, но у них всего 30 выстрелов, а у ножей – 120. Однако вы должны следить за количеством – когда они закончатся, вы не сможете использовать их также в рукопашном бою. Вы можете пополнить их у Чарси в лагере, используя значок ремонта.

- Вы можете получить снаряжение из высшего акта. Это делается через азартные игры. В каждом городе вы найдете торговца, который предлагает неопознанные предметы, часто гораздо более высокого уровня. Так как это «рулетка», вам часто придется потратить много денег, но у вас есть шанс получить вещь, с которой вы не расстанетесь очень долго. В первом лагере таким торговцем является Гид. Вы можете обновить список предметов, поговорив с продавцом или нажав кнопку в правом нижнем углу панели.
- Попробуйте пройти определенный этап (победить босса, найти новую точку телепортации или обыскать локацию) за одну игру. Перезапуск игры оживит всех побежденных противников на пути.
- Смерть стоит денег. Каждая смерть требует от вас «отдать» часть сэкономленных денег – также положить в бардачок. Их стоит потратить на Hazard.
- Все торговцы предлагают одинаковые цены на товары, приобретенные у игрока.
- В акте указаны максимальные отпускные цены, которые трейдеры готовы платить за товар (в первом акте – 5000, а затем каждые 5000+ в следующих актах); храните такие предметы в перчаточном ящике для продажи в следующем акте за большие суммы.
- Часто вы можете выполнять миссии в акте в любом порядке. Некоторые из них предлагают интересные бонусы, которые стоит оставить на потом. Подробную информацию об этом можно найти на страницах пошагового руководства.

- Если вы используете оружие, такое как дротики или метательные ножи, вы можете сражаться с ними, метая или уколовшись. Однако следует помнить, что если количество оружия упадет до нуля, вы не сможете выполнять с ним какие-либо функции, включая рукопашный бой. Информация о конечном количестве оружия отображается перекрещенными стрелками в правой части экрана.
- Никогда не выбрасывайте метательное оружие после израсходования заряда. Если это оружие базового уровня, вы можете объединить два оружия, чтобы пополнить заряд. Это не касается специального и магического оружия. Метательные заряды можно за небольшую плату пополнить у местного кузнеца, в Лагере Разбойников это будет Чарси. Вы сделаете это на панели ремонта инвентаря.

- Если вы знаете, что вам грозит опасная встреча с боссом или большой группой врагов, стоит заранее открыть портал, чтобы избежать смерти путем побега.

- Под клавишей A вы можете проверить статистику вашего персонажа. Интересно, что здесь также будут показаны параметры атак с использованием магических / активных в данный момент умений. Переключаясь между своими способностями, вы можете проверить их эффективность друг на друга и против атаки по умолчанию.
- Открытые порталы исчезают после того, как вы умираете / закрываете игру – вы не можете быстро перейти к последней локации или ускорить фарм на боссов.
Деньги и добыча
Здесь мы сосредоточимся на эффективном зарабатывании денег и на предметах, которые вы найдете в мире:

- Цвета предметов – определите их особенности, прежде чем брать их: белый – базовый, без магических свойств, синий – предметы с дополнительными функциями, такими как улучшение характеристик или более быстрое восстановление баланса, серый – есть место для драгоценных камней / рун (они можно магическим образом улучшить), желтый – специальные магические предметы, которые гарантируют более одного бонуса, зеленый – зеленые предметы создают наборы – наборы, которые по завершении предлагают мощные бонусы. Однако найти весь набор – непростая задача.

- Увеличьте шанс найти магические предметы, экипировав предметы, которые увеличивают шанс получить магический предмет. Бонусы являются накопительными и их можно найти на любой предмет. Также: вы можете использовать Топаз и надеть его на шлем или броню с пустым местом, чтобы дать этому предмету этот бонус.
- Найдя ценное оружие, которое можно продать за 5000 в первом акте, за 10000 во втором и т. Д., Вы можете оставить его на потом – если у вас есть место в бардачке. Это максимальные суммы, за которые торговцы готовы купить предмет в данном акте – они стоят больше, и вы получите больше в лагере следующего акта.
- Падение звуков. Вы быстро заметите, что нужно обращать внимание на звуки, когда дело касается капель. Иногда бывает трудно увидеть выпавший из сундука небольшой камень или кольцо. Высокий металлический звук приучит всегда искать ценный предмет.
- Тратьте деньги и не беспокойтесь об этом слишком сильно. Основное использование денег на более поздних этапах игры – покупка предметов на большие суммы в виде азартных игр – вы покупаете предмет, не зная его параметров, надеясь, что он будет чем-то полезным. Обычно это не так. На ранних стадиях игры деньги могут показаться соблазнительными, но больше всего вы заработаете, не собирая лишние предметы и не возвращаясь время от времени в лагерь. Всегда покупайте то, что, по вашему мнению, вам нужно прямо сейчас: свитки портала, зелья. Уже во втором акте груды золота, найденные рядом с врагами, часто составляют 100 монет.
- Дополнительным аргументом против копить деньги является тот факт, что ваша смерть стоит процента от ваших денег, включая те, которые спрятаны в хранилище.
- Наиболее ценную добычу можно найти в ящиках, под камнями и т. д. Особенно драгоценные камни, амулеты / кольца и талисманы. Ценные предметы редко выпадают после победы над обычными противниками. Поэтому не пропускайте ни один из этих объектов. С каждого мини-босса (цветного противника) выпадает хотя бы один синий предмет. С сюжетных боссов (также меньших по размеру из одиночных квестов) часто выпадает желтый или несколько синих предметов.

- Не собирайте все – постоянное возвращение в город для продажи малообеспеченных вещей не имеет смысла. На первых этапах можно даже не поднимать многочисленные, но не очень многочисленные стопки монет. Соберите: любые нестандартные ампулы, любые виды украшений, самоцветы и руны, магические предметы (обычно вы их замечаете из-за необычных цветов), трости, жезлы, скипетры (обычно самые ценные бесцветные предметы) и неопознанные предметы и метанительные ножи изначально (~ 500 шт. золото). Избегайте поврежденных предметов, даже если они высокого класса, вы не получите за них много от торговца.

- Если вы не используете дополнительный слот для оружия, чтобы носить больше предметов, вы можете использовать их. Это всегда дополнительный лук, бердыш или щит, который в противном случае может занять много места в вашем инвентаре.
Оборудование и предметы
Здесь вы можете прочитать несколько интересных фактов об одежде, которую вы носите:

- Обладая более совершенным поясом, вы увеличиваете количество доступных слотов для быстрого доступа к эликсирам . Первые два класса имеют 2 ряда квадратов.

- Большая часть снаряжения требует от вас определенной силы или ловкости . Некоторые из них зарезервированы только для избранных классов. Лучшее снаряжение имеет множество дополнительных бонусов. В оружии вас особенно интересуют: класс – многие навыки владения оружием позволяют вам использовать их только при использовании соответствующего класса оружия; скорость – общее практическое правило заключается в том, что чем медленнее оружие, тем сильнее (при сравнении оружия одного уровня). Вам решать, предпочитаете ли вы быстрые или сильные атаки. При выборе следует руководствоваться навыками и количеством маны, либо бонусами к атаке.

- Восстановление баланса – важный параметр, когда ваш персонаж находится в ближнем бою. Влияет на то, как быстро вы наносите следующую атаку после того, как она прервана из-за атак противника.

- Шанс найти магический предмет – одно из лучших улучшений снаряжения, которое вы можете найти на амулетах, доспехах, кольцах и талисманах. Это позволит вам быстрее находить интересное снаряжение на каждом уровне, особенно редкие предметы. Это также улучшит ваше финансовое положение.

- Эфириальные предметы – эти предметы не подлежат ремонту. У них часто есть интересные параметры, но когда они уничтожаются, вы теряете их навсегда.
Механика игрового процесса
Diablo 2 Ressurected – это игра в жанре hack’n’slash. В механике есть некоторые особенности, которые позволили игре оставаться популярной и необычной во времена оригинала. Наиболее важные особенности игры, о которых вам следует знать, если вы не знакомы с оригиналом, заключаются в следующем:
- Карта мира создается при запуске новой игры. Порядок расположения, ключевые места и объекты, а также связи между областями остаются неизменными (хотя переходы между областями меняют свое местоположение).
- В случае смерти вы возвращаетесь в лагерь / город, откуда можете отправиться собирать потерянную добычу на теле вашего героя. Вы не теряете свое снаряжение – все экипированные предметы и принесенное золото остаются на месте гибели; тем не менее, вы не пропустите штраф (в виде% наличных денег на руках / в буфере обмена),
- Каждый раз, когда вы запускаете игру, монстры (включая боссов) появляются снова. Это позволяет вам легко генерировать огромное количество добычи и постоянно развивать своего героя, когда вы не можете преодолевать препятствия на своем пути. Однако, если, например, вы откажетесь от битвы с боссом и выключите игру, вам придется победить всех врагов на пути к нему. Установить порталы тоже пропадут.
- Каждый акт в игре – это особый закрытый мир со своими характеристиками, но больше всего – экипировка в магазинах и дропы на определенном уровне. Вы заканчиваете выступление? Не покупайте новое оборудование. В следующем мире это обычно мало что стоит.
- Один раз за игру вы можете сбросить навыки и характеристики вашего персонажа – (с Акарой после первой миссии Злого жилища ) стоит сделать это как минимум Уровень 30, когда вы знаете, как вы хотите вести дальнейшее развитие своего персонажа с доступом ко всем навыкам.
Welcome to Tristram, traveler. Whether you’ve been there before or it’s your first time, Diablo II: Resurrected isn’t going to give you a warm welcome, unless you consider the embrace of a burning demon warm, that is. This remake of the classic action RPG that took over the world of PC gaming over two decades ago has returned and is just as brutal and devilish as ever. The new coat of paint brings a fresh breath of life to this dying world, but the core of the game remains as it was all those years ago. Some mechanics and design decisions have aged better than others, but there’s no denying this is a terrific way to reintroduce the Diablo style of game to a new generation.
Contents
- Choosing your class
- Learn some shortcuts
- Always have tomes and potions
- Hire some help
- Think carefully about your Skill Points
- What each stat means
- Don’t sell valuable loot early
Starting out a new action RPG is already hard enough, let alone one designed 20 years ago. Newer takes on the genre, and even the sequel Diablo 3, have refined a lot of the rough corners this influential game had. If the name wasn’t a big enough clue, Diablo II: Resurrected is a tough-as-nails game. If you step foot in the wrong area unprepared, the hoards of monsters, demons, and other nightmares won’t hesitate to rip your character apart. To make your opening hours go a bit smoother, check out this beginner’s guide to Diablo II: Resurrected.
Further reading
- The best video game remakes of all time
- The best video game series revivals
- The best video game sequels
Choosing your class

Before you even get a glimpse at the world, Diablo II: Resurrected will present you with the most important decision in the game: What class will you pick? Each hero class comes with a brief description to tell you their general style, but there’s a lot more not told that you should consider before committing to any of the seven options presented to you. No class is bad, so don’t think you can pick wrong here, but each does cater to a different style of player. Here’s a quick rundown of what you need to know about each class to make the best choice.
Amazon
The Amazon class is a balanced class that uses spears for close-quarters combat but can fall back and use bows or crossbows, or even hurl javelins from range. Her main benefit above other classes is her movement speed. The Amazon can run circles around foes, which makes her perfect for kiting mobs of enemies around an area. This also makes her AOE abilities much more effective if you can corral a group and unleash a devastating hit on all of them at once.
The Amazon’s three skill branches are Javelin and Spear, Passive and Magic, and Bow and Crossbow. Javelin and Spear focuses on dishing out raw damage with said weapons but also pairs with poison and lightning elemental damage. Passive and Magic will make your Amazon much more of a tank, buff your damage, and give you the ability to summon a Valkyrie to fight alongside you. Bow and Crossbow will make you a ranged monster, leading to fire and ice effects and an insane rate of fire.
Assassin
Originally not part of the base game, but included in an expansion pack, we can now pick the Assassin right off the bat in Diablo II: Resurrected. This is a tricky class, but in the right hands can pull off some awesome feats. They’re naturally quick and utilize many indirect forms of attacking, like laying traps and spells. They’re one of the squishiest classes on the list but also have an incredibly useful skill to open locked chests without needing a key.
The Assassin skill trees are Martial Arts, Shadow Discipline, and Traps. Martial Arts will help the Assassin’s melee options deal decent damage and add in some elemental effects. You still won’t want to be tanking hits going down this route, and instead will use one high-damaging attack to instantly kill an enemy. Shadow Discipline is your buff branch. Here, you can give yourself better speed and things of that nature, but also summon some help to draw aggro off yourself. Traps are just what you expect. Set down different traps, such as sentries, to automatically deal damage to enemies that get too close.
Barbarian
Okay, so some classes are more complex than others. The Barbarian is probably exactly what you think he is. If you want to rush in, let the demons surround you, and bash them into dust while shrugging off their hits, the Barbarian is your pick. He can dual-wield any weapons you hand him, hits hard, and comes with plenty of buffs for himself and your party to stay alive and kicking.
Skill-wise, the Barbarian can go down the Warcries, Combat Masteries, and Combat Skills branches. Warcries are the Barbarian’s buffs, but there are also some that help him draw and disperse aggro from himself. Later on, you will get buffs for life, mana, and stamina for yourself and your party, plus the useful Find Item skill. Combat Masteries just makes you that much stronger with whatever weapon you put points into. Unlike other classes, you can build your Barbarian to be lethal with any weapon in the game, if you invest in it. Combat Skills are where you can get the flashy moves that hit hard, such as Bash and Double Swing, which are two great early-game skills to wipe out low-level enemies and bosses.
Druid
A Druid may not immediately come to mind when you think of who you’d want to play as when facing off against the embodiment of evil and their forces, but the Druid’s magic is nothing to sneeze at. Another class that’s not part of the base game, he is something of a mixed class as well, but in a unique way. He has summoning skills, but also strong melee options if you want, or need, to get in close. Because they can do so much, you’ll want to focus on one or two aspects to be effective by the late game.
The Druid’s skill trees are broken down into Elemental, Shape Shifting, and Summoning. Starting with Elemental, this branch gives you, well, elemental skills that are great for exploiting enemy weakness. These are particularly useful when you get deeper into the game and encounter more enemy types that are immune to specific elements. Shape Shifting lets you transform yourself into either a bear or a wolf, and then learn new skills for that specific transformation. This is the path you’ll want if you want to build into a melee build, with the bear form being more of a tank and the wolf DPS. Summoning is a popular branch for Druids since there are summoning options to support just about any build.
Necromancer

The Necromancer is a tricky class, especially for beginners. This class is very squishy and is not built to tank hits. However, while it can’t take much abuse, played right, the Necromancer can dish out some of the highest damage of any class. This class turns the tides of how Diablo II: Resurrected normally plays, with you getting swarmed by enemies, and has you creating your own small army of soldiers to do the fighting for you. But, you will need to create some dead bodies before you can rise them to fight for you, so his real potential needs time to snowball before it becomes unstoppable.
Our three skill branches are Summoning, Poison and Bone, and Curses. Summoning is the Necromancer’s bread and butter. These skills allow you to form armies of skeleton warriors, mages, and various types of golems. You can also bring back fallen enemies, as mentioned before. This branch is so strong that you could make a great build only by putting points here. Poison and Bone give you some really strong attack spells, such as Corpse Explosion, which detonates any dead bodies on the field, or Bone Spear for direct, piercing damage. Skills in the Curses branch are great supplements for your build. Here, you can learn powerful debuffs that weaken enemies, make them blind, slow them, and plenty of other afflictions.
Paladin
On the opposite end of the spectrum from the Necromancer, at least thematically, is the holy Paladin class. These men of faith use their skills to provide buffs to themselves and your party with passive auras. They lean more on the tanky side of things with high defense but can be outfitted to smite down foes with strong high DPS as well. The Paladin was considered one of, if not the strongest class in the original, and that remains true for the remake. You might feel a bit underpowered in the early game, but this class scales extraordinarily well.
The skill tree breakdown for the Paladin is Defensive Auras, Offensive Auras, and Combat Skills. Defensive Auras are, well, exactly that. They are useful from beginning to endgame since the new abilities scale really well. Early auras are basic, but later on, you can regain health and magic or even buff speed. Offensive Auras, again, are mostly self-explanatory, though they are primarily active skills rather than passive. They can obviously boost you and your team’s damage but also add in elemental damage to exploit weaknesses. Combat Skills are where your fun abilities will be found. There are AOE attacks, single-target attacks, and all that good stuff. Just don’t spread yourself too thin here to make sure your damage output doesn’t lag.
Sorceress
Last but not least is the Sorceress. This spell caster is one of the most popular classes from the original game, and we expect the same in Diablo II: Resurrected. She’s fast and fragile but can unleash overwhelmingly powerful elemental spells. She’s able to use just about every elemental spell type in the game, plus has a teleport ability to get you out of danger if you find yourself cornered. If you’re able to keep your distance or are with a companion who can tank, the Sorceress is a fantastic glass cannon-style class.
We’ll be looking into the Cold, Lightning, and Fire branches of the Sorceress here. Cold will grant you spells that carry with them freezing effects, plus spells that make cold spells more effective on targets, and even some defense buffs for yourself to help stay alive. Lighting is the killer here and what you will rely on most heavily if you go into the endgame content. Chain Lightning alone is worth adding to any build just for how beautifully it melts entire gangs of enemies. Either way, you should at least invest in this branch for the Teleport spell. Fire is our last branch, and early on, looks like it would be your most powerful option. That, unfortunately, doesn’t last, as resistances in later stages will drastically reduce your fire spells’ effectiveness. But there’s still good stuff in here, such as a spell that buffs a teammate’s weapon with fire damage or one that increases your magic regen.
Learn some shortcuts

Let’s be honest, if you’re not fighting something in Diablo II: Resurrected, you’re probably wishing you were. As an RPG, there’s a lot of management you will need to do outside of combat between missions. This time used to be a drag in the original, but thankfully, this remake has added some much-appreciated shortcuts that can cut down your time in menus and shops.
Starting with shops, here are a few quick tips to speed up your transactions. First, to sell an item with a single click, just hold Control and then left-click on the item in your inventory to sell it right away. Next, when buying items, rather than repeatedly buying individual items like potions that you know you want a bunch of, just hold Shift and right-click the item to buy a stack of 20 all at once. This is great for things like potions and scrolls.
While you’re managing your items, just hold Shift and left-click on whatever you want to send it straight to your belt.
Finally, make looting way easier by hitting your Alt key after every fight. Instead of having to pixel hunt between the corpses and new environments for gold and items so you don’t miss any, this will highlight every item still on the ground so you can spot them right away. It also has the added benefit of actually telling you what an item is before you pick it up, so you can just leave any useless junk on the ground instead of picking it up only to have to dump it later.
Always have tomes and potions
Scrolls and potions should have dedicated space reserved for them in your inventory basically at all times. Potions probably don’t need any justification. They will heal you and restore your magic, which you will obviously want. Scrolls, though, have much more specific and important uses. The Town Portal scroll in particular is going to be one you use most often in Diablo II: Resurrected. But having a ton of scrolls will easily fill up your inventory before you even set off on your mission, so consolidate them with Tomes. One Tome can hold 20 scrolls, vastly cutting down on inventory clutter. Get at least one for Town Portal scrolls, and ideally a second for Identify scrolls.
Hire some help

One mechanic that is very easy to miss out on or just forget about is the option to hire a mercenary to fight alongside you. Each act of the game has different mercenaries you can pay to join you on your missions. They’re by no means as strong or useful as another human player, but they do a fine job of at least drawing aggro if you’re playing by yourself. Now, these mercs are going to die, there’s no getting around it, but you can at least equip some potions and spare gear on them to make them last a little longer. If you’re, say, a Sorceress class, then having something to tank for you is way better than nothing.
You can start hiring mercenaries after beating the Blood Raven quest by talking to Kashya. Once hired, they’ll follow you until they inevitably bite the dust.
Think carefully about your Skill Points
Leveling up is one of the most exciting things about RPGs like Diablo II: Resurrected, but don’t let that adrenaline surge you get when you see the number go up lure you into spending your points without thinking first. Even if you haven’t played the original, you know how leveling up works here. Kill enemies, complete quests, earn XP, and level up. Each time you level up, you will get five Attribute points and one Skill Point to spend. Your Attribute Points will go into increasing your stats, which we’ll go over below, and your Skill Point will let you unlock new class-specific skills.
Skill Points will go into one of the three branches of your class’s skill tree we covered earlier. Each branch has a total of 10 skills you can unlock inside, meaning there’s a grand total of 30 skills per character class. However, this isn’t the kind of RPG where you will eventually get and use everything. Instead, you will want to invest points into the skills you’re going to rely on to make them stronger until they’re at max level.
Now, you can stock your Skill Points to spend them later, but there’s really no reason you should. The logic is sound on paper since there are skills that can’t be unlocked until you reach a certain level, but Diablo II: Resurrected accounts for this. Skill Points you unlock can only be used on skills that you could get when you are at that specific level. For example, if you’re eyeing a sweet skill that requires you to be level 10, and you have a point you’ve been holding since level 5, you won’t be able to use it on that skill.
Here’s the rub with Skill Points and Attribute Points. Once they’re set, you basically get one do-over outside of restarting the game. You will get your one option to refund any points you’ve spent after beating the Den of Evil quest during act 1 and speaking to Akara. Once you use this chance, the only other possible way to redo your character without starting fresh is to beat the game on Hell difficulty. If your build is bad enough that you want to respec it, odds are you won’t be able to overcome that challenge anyway.
What each stat means

Now that we’ve exhausted talking about skills, let’s go over what your attributes are. These four stats will not only impact your stats to some extent but are more important for meeting certain gear requirements. Here’s how they break down:
Strength: This is the most important stat for melee and tank builds. Most weapons and armor will come with a strength requirement you need to meet to equip them.
Dexterity: This is the equivalent to strength, but for a wholly different set of gear. Things like shields and ranged weapons benefit from higher dex. You’ll need it if you want to excel with weapons like bows, daggers, spears, and things of that nature.
Vitality: Every class should allocate at least some points to vitality, raising your HP and stamina. Even if you’re a Sorceress who never intends on getting touched, upping your vitality will give you enough stamina to keep yourself away from danger. The extra HP you get at the same time is just a bonus in that case, but alone is going to be required as you get further and further into the game.
Energy: This stat is the least versatile. All energy really does is give you more mana, which might sound important, but there are just so many other ways to boost your mana. You can equip gear or just drink mana potions to refill your mana without having to dump precious points into the stat. If you do put points into energy, don’t go overboard.
Don’t sell valuable loot early
The final tip is quick and easy. Don’t let all that old loot burn a hole in your pocket. If you have, say, a great weapon you no longer need in act 1, don’t just sell it straight away. Dedicate some space to keeping the most valuable items you find and hold them until you cross over into the next act of the game. Prices those items will sell for can double if you just hold out until the next chapter. Also, remember to make sure any item you’re selling is fully repaired. That will also drive prices way up in your favor.
Editors’ Recommendations
-
FJX Imperium: best loadouts for Warzone 2.0 and Modern Warfare 2
-
Call of Duty: Warzone 2.0 is getting a new mode and overhauled DMZ in Season 3
-
Modern Warfare 2 is bringing back an iconic Call of Duty sniper
-
How to find the Giant Squid in Hogwarts Legacy
-
Modern Warfare 2: Atomgrad Episode 2 Raid Guide
| This page is a Rat’s Nest! This article does not meet the standards of the Diablo Wiki and needs a clean up. |
This walkthrough will guide you through Diablo II (Act I-IV) and the Lord of Destruction (Act V) expansion. This walkthrough will also assume that you are playing the single player version of Diablo II. If you are playing on Battle.net, by LAN or with a mod, this walkthrough will not be useless to you, but there may be things such as muling, and getting help from other players (as well as things such as speed grinding with Tristram runs) which may modify your playstyle a bit. It also provides general information. For advice specific to particular classes for particular monsters such as Duriel, check the individual articles as many of them have tactics geared toward individual character classes.
Getting Started
After selecting a class from the Character Screen, you find yourself in the Rogue Encampment. These initial starting points in each Act are referred to as «towns» or «sanctuaries.» While within the borders of these areas, players and monsters can inflict no damage. In these towns there are characters with whom players can interact with to obtain quests and buy/sell/repair/gamble or hire mercenaries, depending on their purpose within the town walls. Each character has information of varying importance, and when playing the game for the first time, they often give useful tips for succeeding in quests.
In the Rogue Encampment, Charsi and Gheed will sell basic armor and weapons. Charsi also performs the additional service of repairing weapons and armor. Akara will sell staves, wands and sceptres in addition to scrolls, tomes, potions and other magical items. Akara will also heal the character and their minions as well as activating the first quest. As in the original Diablo, the player starts with just a weapon and possibly a shield, depending on the character class, as well as a Scroll of Identify and a Scroll of Town Portal. All starting items sells exactly for 1 Gold Piece, so if you come into any weapon or shield more useful than your starting one, you can just drop the starting item in the ground instead of going into town to sell it.
Compass Directions
Some parts of this walkthrough will use compass directions, so to avoid confusion, north will be toward the upper right hand corner of the screen.
Some Advice for First Time Players
In order to defeat the foes of the game, a player will need to make best use of all the items found or purchased. Rather than inundate the reader, the list below is a few tips for helping the player through Normal difficulty.
- A stack of Javelins, Throwing Knives or Throwing Axes, specially ones with Replenishing Quantity, can be helpful to a Paladin or Barbarian (or similarly melee character) as a switch item, as the base damage is high enough to reliably kill anything in the first parts of the game. In particular, this covers for a lack of ranged options in the Paladin arsenal.
- Armor frequently sells for more gold than other items. Initially, however, a full stack of any kind of throwing potion, Throwing Knives and Throwing Axes can net a player around 500 gold pieces. These stackable items can help take the sting out of the initial money problems.
- Rings, Jewels, Amulets and Small Charms sell quite well for the whole game
- Wands, Staves, Scepters and (to a lesser extent) Orbs with added skill bonuses will sell for a significant amount more than a regular item. If the number and quality of skill boosts is significant enough, even ethereal ones will sell for a significant amount.
- Ethereal items are stronger than regular items, but can’t be repaired in town and sell for a lot less than regular items, so, unless they get a self-repairing or self-replenishing property, or they’re a caster item like wands or orbs that will never be used in melee combat, their use for the player is limited.
- Healing Potions and Mana Potions doesn’t heal instantly, but heals thorugh some seconds. Although this can give you extra mana to use with skills, it can prove a problem with health when surrounded by monsters.
- Rejuvenation Potions, otherwise, heals instantly for a percentage of you Maximum Health and Mana and can be used when in a pinch. Three Rejuvenation Potions can also be transmuted into a Full Rejuvenation Potion, which heals all health and mana, once the Horadric Cube is obtained.
- Antidote Potions not only cures any poison effect, but also increases poison resistance temporarily.
- Similarly, Thawing Potions not only remove’s chilling effect, but also increases cold resistance and even maximum cold resistance temporarily.
- Do not overlook the usefulness of your Hireling. They can initially be trouble because they die often, but they all have three or four slots that can be fitted with items, depending on which Act they are hired in. A well-tended hireling can greatly assist your efforts. You can also give them Thawing, Antidote, Healing and even Rejuvenation Potions when they’re in trouble by dropping them on their portrait or pressing shift while left-clicking.
- Items doesn’t lose durability when used by hirelings, so it’s a good idea to give them good ethereal items.
- Some items, including ethereal items, can have Sockets. These can have Gems, Runes and Jewels inserted into these sockets.
- Keep in mind that Gems and Runes can be transmuted into better ones once the Horadric Cube is obtained in Act II and can be stored in your stash meanwhile, so it might be a good idea to save these unless they’re clutching your stash and inventory or you’re having difficulty somewhere.
- Through most of Normal Difficulty, cold damage will slow most monsters by 50%, which makes it attractive for any character to have weapon that inflicts cold damage, even if that duration is only a few seconds. The easiest way to do this is to insert a (most often a chipped) Sapphire into a weapon with sockets, though a Small Charm with cold damage is often used as well. As characters develop, casters like most Sorceress and Necromancer builds will focus more on items which grant skill bonuses, but can benefit by giving their hireling an item which will deal cold damage.
- Spellcasters can put Sapphires or Skulls in their armor and helmet to help with mana in the early stages.
- Similarly, melee characters can put Rubies and Skulls on their armor and helmet to help with health in the early stages.
- Topazes have the best average damage until monster resistances come into play, a weapon with three chipped topazes or one chipped sapphire and two chipped topazes is cheap and can outrank other weapons for quite a while. An ethereal one is also a good option for your hireling early on.
- If you find a Gem Shrine, it can be used to upgrade a non-Perfect Gem from your inventory, so it’s wise to leave only the best non-perfect Gem you have in your inventory, even if you need to go back to town to get it and store the other ones, before activating it. If you have no gem with you, it’ll drop a random chipped gem.
- Regularly check the vendors to look for something useful. Charsi is not the only vendor in town: Gheed or Akara can also have something that might be useful.
- Players should not be afraid to let go of their first finds if there is an item found which is to better benefit. Many novice players hang on to pieces of Isenhart’s Armory or Cathan’s Traps long after their useful range and discovering all too late that the completed set is underwhelming because it was meant for a much lower level character.
- Melee Characters should not overlook the benefits of the Crushing Blow and Cannot be Frozen attributes.
- Start saving items which will boost resistances for the next Act. These do not necessarily need to be worn at all times, but by scouting for items now, it will save grief from particular monsters with elemental attacks which tend to be difficult, if not lethal without some resistance boosting for further on in the game.
Attribute Distribution
Attributes are a set of values that determine a variety of statistics. For instance, the value of strength determines the (naked) amount of melee damage a player does and how heavy the armor and weapons they can equip. Every time a character levels they receive five attribute points that can be spent on either Strength, Dexterity, Vitality, or Energy.
Initially, Strength and Dexterity are only increased to meet the requirements of better and better gear, and the remaining points are sunk into Vitality. Later on, there is variation on this scheme, but for the first five to ten levels, splitting the points between Strength and Vitality is a smart idea. For some characters like the Bow Amazon, increasing dexterity when necessary is a good idea. Later, there may be variation on this theme, but for the beginning, it is a safe investment. Energy is considered a dump stat, even for spellcasters, because it only increases Maximum Mana and nothing else. Maximum Mana also increases with level and certain equipment, mana regeneration and leech are also common item atributes and mana potions aren’t expensive and are commonly dropped by monsters, contributing to the stat becoming less and less eficient latter on, so it’s only good to invest in it if your build depends on Maximum Mana, like a Melee Sorceress with maxed Telekinesis and Energy Shield.
Skill Distribution
Skill points are used to access new spells or abilities called Skills. Every time characters level up, they receive one skill point. Some skills require a certain minimum level before a player can access that skill; for instance, a Necromancer can not learn Clay Golem until level 6. In addition, some skills require one or more prerequisite skills; for instance, a Druid cannot learn Feral Rage until level 12 and after acquiring the Werewolf skill. Some skills add bonuses to other skills called Synergies which boost other skills.
Skills increase in power as more points are invested into them and while it is better to specialize, every character has their «one point wonders» where the skills are useful with a single or low point investment, especially at lower levels. With this in mind, take a look through the builds and the character information sections for information on what suits a particular playstyle and take into consideration what will make the character effective. For example, the Necromancer has Summon Resist, which grants a large initial resistance bonus to his minions. Extra points invested in this give very diminished bonuses, so many players (providing they are playing a minions-based build) will invest a single point in it, relying on item bonuses to boost it. Another is Leap Attack, which will allow a Barbarian to jump over most obstacles practically a screen width away for the cost of a single skill point.
Act I
In the town, Warriv will be the first person to approach the character. Kashya will not be far away, but she won’t let you hire anyone until you’ve finished the Sisters’ Burial Grounds quest, or are higher than level 8. You can talk to Charsi and Gheed, but you will be broke, so you’ll be unable to buy anything from them. Lastly, talking to Akara will task you with the first quest.
Head out into the Blood Moor and follow the road to your first quest. A player can choose to kill all the monsters in the area for the experience points or skip them and progress with the quest. Whatever you choose to do, the road will eventually split and not too far away from that fork in the road, you will discover a cave called The Den of Evil. If the cave happens to be a little too distant, you will eventually encounter a rogue named Flavie. Since you have wandered this far, it is a good idea to carefully wander into the Cold Plains and activate the waypoint here. This will save travelling all the way back once the quest is completed.
Magic armor and weapons are a bit of a gamble to bring back and sell at this part of the game as they can sell for less than the cost of an identify scroll, (specially the case with ethereal or class-specific items, and even worse when the item in question can’t have innate skill bonuses like the Assassin Katars), so until 5000 gold or so has been earned (which won’t take that long) pick up the Identify scrolls to better evaluate whether something is worth selling in town. Extra mana and healing potions are good, but it is unwise to fill your inventory with them. Rings, amulets, jewels and chipped gems also sell for decent amounts of gold should you decide not to keep them. Wands, staves, sceptres and orbs are also worth a significant amount if they have skill bonuses.
The player may also opt to hang on to the second best armor, helmet and the best bow in their stash so gold does not need to be spent immediately on the Hireling’s equipment. A player can also buy a Long Bow from Gheed unless a better one is found before then.
Before you enter the cave, you can allocate any points you have to your stats and skills. If you are unsure, take a look at the builds section to get a general idea of what skills would be good choices. There are also some «one point skills» on every character worth taking, and the respecialization option will be helpful if you make a serious mistake in skill allocation. Keep in mind, however, that respecs are not infinite, so do take some care before choosing to reset your character’s points.
Quest 1: The Den of Evil
This quest is optional. You can complete Act I without this quest done.
This quest is quite straightforward: Kill all the monsters in the cave. It is also optional, but the reward is a good one.
Encounters
Fallen, Fallen Shamans, Gargantuan Beasts and Zombies. Fallen Shamans will rarely waste time in resurrecting slain Fallen, so make them a priority. If they have too many minions, you can choose to kill a few monsters to disperse the crowds of Fallen should they be interfering with you trying to remove the Shamans. There are times the Shamans will resurrect Fallen off screen, and slow your completion of the quest.
There is a superunique Zombie called Corpsefire. He can be quite a bit of trouble to a beginning player. The best way to fight him is alone, so either draw him off specifically or draw off the nearby monsters so attention won’t have to be diverted from him.
Other Advice
Continue to clear out the cave, perhaps needing to backtrack as the Fallen Shamans might have resurrected a Fallen out of the player’s view. Once every monster in the area is defeated, a short piece of music is played, and beams of light will be seen as through the caves. You can return to town either by town portal, walking back or by continuing on to activate the waypoint in the Cold Plains. At any rate, speak with Akara, and she will award a bonus skill point as well as make available an option to reset the stat and skill points of the character, which can be redeemed at any time, but is only awarded once per difficulty level outside of creating a Token of Absolution.
A good investment at this point would be a Tome of Town Portal, as the walk to the burial grounds can be quite long. As well, obtain a belt of some sort if you have not already, as it will double the number of potions available.
Video
Diablo II (2000) — Den of Evil -4K 60FPS-
Quest 2: Sisters’ Burial Grounds
This quest is optional. You can complete Act I without this quest done.
Once the Den of Evil is complete, Kashya will have the next quest available to you. A being known as Blood Raven is raising up an army of Zombies in the Burial Grounds, and Kashya wants you to stop her. The Burial Grounds are found next to the Cold Plains, and are reachable by following the road next to the waypoint. The road has three destinations: a dungeon called the Caves, the Stony Field and the Burial Grounds themselves, so there may be significant running around before you find them. The next area, the Stony Field, has the waypoint created in a random place upon generation, so it is often a better idea to backtrack for now than to venture forward into the next area to find it.
Encounters
There will be the same monsters that you had in the last quest as well as a form of Corrupt Rogues called Dark Hunters and Dark Spearwomen. This area also has a superunique Fallen Shaman named Bishibosh who has the ability to resurrect nearby Fallen Shamans if they are slain, so if you encounter him, either make him a priority or avoid him altogether. If you find the mobs of Fallen to be too much, you can try killing a few of them to disperse them temporarily while you eliminate Bishibosh.
Once you reach the Burial Grounds, it would be preferable to skirt around the cemetery walls and defeat the Hungry Dead and Skeletons, as Blood Raven will frequently run all over the place, causing the player to deal with them anyway. Blood Raven is a superunique Corrupt Rogue Archer, and can make it tough for beginning characters. She prefers to stay at range and will often raise Hungry Dead to distract the player. However, if you keep focused on her, you should eventually be able to defeat her.
Video
Diablo II (2000) — Sisters’ Burial Grounds -4K 60FPS-
Quest 3: The Search for Cain
This quest is optional. You can complete Act I without this quest done, though there are benefits later in the game to completing it.
Once you return to town, Akara will grant the next quest. She will tell you that it is necessary to find Deckard Cain in order to better face the evil that has befallen the monastery. He can be found in Tristram, which is too far to reach by foot, so you are tasked with activating the portal in the Cairn Stones, found in the Stony Field. You will need to touch them in a certain order, which is written on the bark of the Tree of Inifuss. Finally, although it is not mandatory to complete this quest, Deckard Cain will identify all items in your inventory at no charge.
Entering Tristram
The Stony Field
It is not a difficult task, but there will be a lot of walking involved. Firstly, look at your character’s skill/stat points and allocate as you need. Outfitting your rogue with a few items is also helpful. Return to the Cold Plains and follow the road to the Stony Field. Continue to follow the road to the entrance of the Underground Passage, engaging enemies as necessary, but before you enter the cave, take some time to explore the area and find the waypoint, as you will have to return to the area to finish the quest. While you are following the road, you will likely discover the circle of stones that will activate the portal and their guardian, Rakanishu, who will be detailed in the encounters section.
Encounters
The Stony Field will have Moon Clan Goatmen, Hungry Dead, Skeletons, Fallen, Fallen Shamans and Dark Archers. There will also be a new enemy called a Carver, who is slightly tougher than their cousins the Fallen, and fortunately in this area, they won’t have Shamans to raise them once they are slain. There is also the Lightning Enchanted Carver Rakanishu, memorable as the charged bolts he often emits when struck can do lethal damage at low levels. While it doesn’t hurt to bulk up somewhat on lightning resistance, using potions when necessary and fleeing to town are also effective if you should be in danger of soaking too many of them. There are also Foul Crows and their spawners, the Foul Crow Nests. They can be quite tough to destroy in the beginning, but it is usually wise to at least attempt as they will spawn several Foul Crows before self-destructing..
The Underground Passage
Once you’re ready, return to the cave and head inside. The monsters in the passage are not terrible in themselves. Continue to search around for the exit. There is a second level to this area, but you will have to face Carver Shamans, and the loot from the golden chest at this point will likely not be worth the bother of tangling with the monsters in this area. Once you’ve found the exit, place a Town Portal here before going out to ensure that if you die that you won’t have to walk all the way from the waypoint in the Stony Field.
Encounters
Skeleton Archers and Vile Hunters are quite fragile, as are the Fallen and the Carvers. There are also the Misshapen, who can do significant damage, but they are also quite fragile. The area, however, can be dangerous because monsters will often spawn in groups of five or six. The Fallen are often prone to fits of cowardice, so if you plan to engage Fallen, consider removing the Shamans as soon as possible.
The Dark Wood
There are two goals in the Dark Wood. One is to find the Tree of Inifuss and obtain the scroll. The second is to find the waypoint for this area to cut down on walking through the last two areas. Once you have the scroll, speak with Akara, who will decode the order, then return to the Stony Field to open the portal by touching the stones until they all glow and the red portal opens after a big lightning show.
Encounters
The area is a bit thick with enemies, with Skeleton Archers, Vile Hunters, Carvers and Carver Shamans being common. The tree itself is guarded by a unique Brute called Treehead Woodfist. He spawns with the attributes Extra Strong and Extra Fast, which makes him a difficult foe alone, let alone with three other minions he spawns with. Although he can drop nice loot, killing him is not a necessity and can be dealt with by activating the waypoint first, opening a Town Portal near the tree and leading the mob to the waypoint. Once in town, use the Town Portal to return to the tree.
Tristram
Once inside Tristram, all that is necessary is to find Cain’s Gibbet, which can be found on the automap to be on the right hand side of the center of the village. Just click on it, wait for Cain to stand up, and walk through the portal. There is no necessity to clear the area, but many players under level 15 will find that Tristram is a good place to gain experience points.
Encounters
There will be mobs of Carvers and their Shamans, Returned and/or Skeleton Archers as well as the possibility of Night Clan goatmen. There will always be a group in the middle of town which are always Champion level monsters. Griswold, the old blacksmith from the first game will be here as an enemy, who always spawns with the Cursed ability, which can cause all victims within a certain radius to be under the effects of an Amplify Damage curse.
Video
Diablo II (2000) — Search for Cain -4K 60FPS-
Quest 4: The Countess
This quest is optional. You can complete Act I without this quest done.
Black Marsh
To complete Act 1, continue on from the Dark Wood into the Black Marsh. There is a waypoint here as well as an opportunity to gain plenty of treasure. During your search in the Stony Field for the waypoint, you may have discovered a pedestal for a book which would activate the fourth quest on your list. It can also be activated simply by finding the dungeon known as The Forgotten Tower in this area. Like all the other quests in this act, it is not necessary to complete them, but the loot that can be found at the bottom of this tower can be of a lot of assistance. She is often farmed for this purpose as she reliably drops runes. While many consider gold to be worthless, a beginning player can make use of the large amount of gold that can be found at the bottom of the tower. Keep in mind that these runes have level requirements which means they can make something temporarily unusable until you have a high enough level to use it.
Encounters
The marsh has carvers and carver shamans, Night Clan goatmen, Returned, Blood Hawk, Blood Hawk Nests and Vile Archers. The tower has a new Fallen called a Devilkin which, luckily, has no corresponding shaman in this area. There are also Night Clan goatmen, Vile Archers and Ghosts, which can drain mana from your character if they score a hit on you.
The boss, known as the The Countess, has a reputation for dropping runes, which many players collect and fabricate armor and weapons with. She can be found in a chamber with a number of minions. If you are in melee with her, be sure to keep your health globe full as her fire enchanted property can cause significant damage to any character at close range.
Tamoe Highland and The Outer Cloister
Continue following the road from the Black Marsh into the Tamoe Highland. You can continue to follow it until you finally reach the Monastery. There is a waypoint in the middle of the Outer Cloister of the Monastery. There are three branches in this area, but only one of them has a door leading to the next area.
Encounters
In the Tamoe Highland, there are Devilkin as well as Carvers and their respective Shamans to be found in this area. There are Dark Stalkers, Returned Archers, Returned Mage which throw fire bolts as well as Night Clan goatmen. In the Cloister itself, there are Devilkin and their respective Shamans to be faced, Black Rogues and Yeti.
Video
Diablo II (2000) — The Forgotten Tower -4K 60FPS-
Quest 5: Tools of the Trade
This quest is optional. You can complete Act I without this quest done.
Barracks
The barracks is quite a litmus test as your first encounters are a cluster of Devilkin and their respective Shamans. Because of the number of objects in the first room, the Devilkin Shamans can be effectively hidden, resurrecting their comrades with impunity while the player has to navigate around barrels and boxes to kill the shamans. Like the Underground Passage, monsters can be spawned in large numbers so don’t hesitate to make a retreat to a less occupied room if you find the area to be too difficult to engage everyone at once.
Encounters
Devilkin and their Shamans pose a significant nuisance. There are also Death Clan goatmen, Black Rogues and Bone Archers and also Bone Mages who hurl firebolts at you. There is also The Smith, who guards the Horadric Malus with a small horde of allies. He can be a difficult opponent because he hits quite hard, but by retreating into a clear area and/or escaping to town when in severe danger, he can be defeated much more easily than the Butcher from whom he was inspired. Failing that, you can open a town portal close to the room where the Malus is, and draw the Smith to the Outer Cloister, use the waypoint and from town, return to the area to face the cluster of monsters that are left.
Giving the Horadric Malus to Charsi is rewarded by imbuing one plain non-magical item into a random rare. The reward for this quest can be saved until later, even after you’ve completed the difficulty level. Many players use Circlet-type items as these can be generated with a very wide range of useful modifiers.
The Jail
The jail is a continuation of the Barracks in terms of scenery and tactics. There are also iron bars which will impede everything but Teleport or the Barbarian’s Leap and Leap Attack skills. This can be a boon if your opponents are melee based, but those enemies who have ranged attacks may find this to be more of a problem than assistance.
Encounters
The first level of the Jail has the same monsters as the previous one with the addition of mana-draining Wraiths. At low levels and later difficulties, they will be quite dangerous to engage without some way to regain mana, but upon being able to leave Act 1, they will be little more than a nuisance.
Jail Level 2 has the potential to add Dark Ones, as well a super-unique monster and his allies which are always found on this level, Pitspawn Fouldog. Pitspawn and his allies have a cold attack, which will slow you down greatly if you happen to be a melee-based character. He is also Cursed, which makes his attacks particularly dangerous with mobs nearby. Upon death, Pitspawn will also release a Frost Nova, which is particularly dangerous due the long duration of freezing, especially on later difficulty levels. This can be helped by a Thawing Potion, some by items with the Thawing attribute or ignored by wearing an item with the Cannot Be Frozen attribute. Stacking Cold Resistance wil help to reduce the damage, but will do nothing to the duration of chilling. Note that the Thawing Potions increases cold resistance temporarily.
Jail Level 3 adds Bone Mages with lightning attacks as well as the rest of the abovementioned monsters.
Video
Diablo II (2000) — Tools of the Trade -4K 60FPS-
Quest 6: Sisters to the Slaughter
Inner Cloister and Cathedral
Once you emerge from the Jail, there is a waypoint in the center of this area. This area and the Cathedral are pretty straightforward and the maps never change. From here, work your way down to the next waypoint, found on Catacombs level 2.
Bone Ash in the Cathedral
Encounters
There can be a few monsters in the Inner Cloister such as Tainted, Black Rogues, Dark Ones and Bone Mages. The Cathedral adds a new monster, the Dark One Shamans. As always, concentrating on eliminating them first will make things much easier as their resurrection range is pretty far. There is also a superunique monster named Bone Ash who may be tricky because he’s cold enchanted, but as long as you are either using a ranged weapon or have your life globe near full, you have little to worry about if you’ve saved him for last. If you’re having trouble dealing with him, remember that Antidote Potions and Thawing Potions increases poison and cold resistance temporarily and can be given to your hireling.
Catacombs
The right-hand wing of the Cathedral will have a staircase to the labyrinthine Catacombs. There are not a lot of tips to be offered, there are times the exit to Level 2 will be right next to the stairs. There are other times it finally shows up as you’re finished discovering the entire map.
On Level 2, there is a waypoint to be found on the level. It’s always a good idea to tag this one as there can be a lot of walking saved in future sessions. Level 3 is pretty unremarkable save for the possibility of better quality loot. In level 4 you will find your goal, Andariel, and there will be information in the proceeding section regarding her.
Encounters
Several new monsters make appearances. Spiders called Arachs, Vampires known as The Banished, Tainted who are called Afflicted as well as those named Tainted, Zombies called Ghouls, and Rat Men, who aren’t seen again until Act III. In fact, the only thing that seems to be held over from the other areas are the Dark Ones and their respective Shamans.
Once you manage to reach Catacombs Level 4, take the time to open a town portal near the stairs and clear out the first two rooms. Concentrating on the Shamans will save you a lot of work as the density of their appearance will make it quite likely to have 1-2 slain Dark Ones resurrected per second. The third chamber usually has a good sized mob of monsters waiting for you on the other side. Simply retreat into the previous chambers if the pack should be too much to handle. Eliminate the remaining Dark Ones, but take some care to avoid activating Andariel. You can use a ranged weapon to kill that annoying shaman that is up the path that leads to Andariel’s throne, and walk around that path in a half circle to avoid activating the boss encounter so you won’t have your attentions split between Andariel and raised Dark Ones.
Andariel
Andariel has a significant weakness. Her minus 50% fire resist, that means that fire damage hurts her 100% more than someone with 0% fire resist. Using skills and items that do fire damage is a good idea. Lure her towards the door, so you don’t attract the attention of the monsters that are hiding in the area behind her. It is quite common to lure her into the room with the blood pool, and run circles around the pool while you occasionally stop to hit her with an attack. Andariel has formidable poison attacks, but luckily, this damage takes time, and quite often, you can flee to town before you can be killed by a follow-up attack. Your poor hireling, however, will likely succumb quite quickly.
Fighting Andariel
The purple Rejuvenation Potions fill your mana and life orbs instantly, while healing potions regenerate your life orb quickly over time. In most cases, the healing potions are used to keep the life globe from being drained too quickly and the rejuvenation potion can be saved for those emergencies to avoid dying while fleeing to town to heal and restock. If you take an Antidote Potions as soon as you’re poisoned, she will likely follow up quickly with another poison attack, but the temporary resistance bonus may be useful. Usually, the Antidote potions are used to help keep your hireling alive if she happens to be in a decent position to avoid the poison cloud.
Once she’s dead, gather and sell your loot, talk to Warriv and proceed to Act 2.
Video
Diablo II (2000) — Sisters to the Slaughter -4K 60FPS-
Act II
You will arrive in the bright and arid town of Lut Gholein. Like Act 1, as long as you are within the town borders, you will be safe from monster attacks and hostile party members (save for a single bug involving an Amazon and a Necromancer.) There are vendors and NPCs which provide some atmosphere as well as clues to your quests. Cain is also found here, and on the off chance you decided not to rescue him, he’ll charge to identify items for you.
If you have the expansion pack installed, you can take your rogue Hireling with you to Act 2. At this stage in the game, however, many players choose to hire a new mercenary from Griez. While the rogue can be a viable hireling, they often require specialized equipment that is rarely available to a character this early in the game. The Desert Mercenary tends to be the more popular choice. In spite of being a melee-oriented minion, he does more damage, is more durable and can also activate his own paladin aura based on his type. While many choose the Combat Hireling which has a Prayer aura, the Defensive Hireling may also be of use with his Defiance aura. If you prefer using the rogue, however, you can always hire one again if you should choose to do so.
Be sure to check the vendors once in a while as they may be selling gear which may be better than what they are equipped with. Just as with the rogue, keeping him well maintained and giving him healing potions when he’s wounded badly enough will make them very helpful.
Once you’re ready to continue your pursuit of Diablo, the first quest would be a good start as the reward is another skill point. You are tasked to kill Radament the Fallen who can be found at the bottom of the town’s sewer system. On the other hand, the Horadric Cube may be of more interest as there are formulae such as combining gems, potions and low runes which may be of more help at the moment. The choice will be yours. The quests will be followed in order, however.
What to look out for
At this point, all characters should continue to build on resistances. The boss fights have attacks that are still very potent, but having these resistances maxed out will take some of the pain out of facing them. Keep on the lookout for helmets, jewellry, boots, belts and gloves that will have bonuses to fire and lightning. With poison attacks, you generally have time to flee to town if poison is overcoming the effects of your healing potions. Cold resistance is helpful, but cold damage is generally pretty minor. The problem with cold damage is the side effect of being greatly reduced in speed.
Melee characters can look out for ways to add Crushing Blow and the Cannot be Frozen attributes to their equipment. If they are not fortunate to have found unique items, there are runewords which can be easily manufactured such as Rhyme and Strength. Don’t be worried about finding anything by the end of Act 2, these items are by no means necessary to complete the game, but characters having these attributes will find they help a lot, especially in boss fights. Other possible useful items that use low runes would be Steel, Stealth and Malice.
Characters like the Sorceress, Trapsin, Elemental Druid and Necromancer can look out for items that grant bonuses to their primary skills.
While the Bowazon should be on the lookout for a bow with a good balance between speed and damage, putting a single point in Slow Missiles, Critical Strike and Penetrate as they become available is a good idea.
Attribute distribution
The mantra is «Vit to the max, Strength only to carry gear and Dexterity enough to get 75% block.» At this stage in the game, however, saving 10-20 points for a suddenly great item is not going to wreck the character. The choice is yours, however, and many people choose to max out on their vitality after gaining a Strength score of 45, saving the items in their stash until they have gained enough levels to sufficiently equip an item. Bowazons usually split their scores between dexterity and vitality, however, because damage and accuracy are important to the build. Adding to energy is, however, regarded by many as something to avoid, even for mana-intensive builds, instead ensuring there are enough potions on their belt to continue usage of their skills.
Radament’s Lair
This quest is optional. You can complete Act II without this quest done.
There are two entrances to the sewers. One is near Greiz, and the other is near the docks. The sewers have 3 levels, the stairs to level 2 are usually closest to the docks entrance, and there is a waypoint on Level 2, which is convenient, but usually only a priority for multiplayer or completists.
Upon entering the sewers, follow the right hand wall. The stairs should be somewhere to the right side, if you have to take a left turn and start going in that direction for more than one screen, then the stairs have likely been placed to the other side of the exit, so turn back and follow the left hand path instead. On rare occasions, the stairs will be at a completely different location, and you will have to explore most of the area. Level 2 is much less predictable, the stairs and waypoint could be near each other or not, but always found on the outer side of the dungeon.
Radament the Fallen will be located in level 3, always on the outer side so do not burden yourself with searching out the middle of the map hoping to find him. You can tell when you are near, due to the presence of Horrors, who will be colored black as opposed to red. Some of these can also be spawned as mages.
Encounters
The monsters found in the sewers are not dangerous in themselves. Like the Underground Passage, what makes them difficult is the fact that they are frequently spawned in clusters of five or six. The fire arrows skill used by the burning dead can be significantly more dangerous than at later parts of the game where you have had an opportunity to bulk up on your resistances, and like Fire Bolt, a player will take damage from it unless it misses your character completely. You can choose to find a few fire resistance items that will help make it a little less painful, but for the most part; you may spend significant time making runs to Andariel to find items which will help you in this regard.
If you are not prepared to do so, you can choose to withdraw a bit when you spot mixed melee/range enemy types, causing the melee foes to follow you out of range as the archers only occasionally move from their spawn location. This will make the melee-oriented monsters easier to defeat as you will not be taking damage from fire arrows. Once your melee opponents are eliminated, ranged characters can simply keep giving their hireling potions to compensate for the damage while pelting the skeletons with their best ranged attacks. Melee-oriented characters can try zigzagging in half-circles in an attempt to avoid being hit by their fire arrows, also feeding healing potions to their hireling as necessary.
Although Radament is a formidable opponent, what makes him more dangerous is the sheer number of minions and the fact he can quickly raise them to fight again. The simplest tactic is to draw off as many minions as you can to a safer area where they are out of range of his resurrection ability. If your character has access to a skill that destroys corpses, such as find item (find potion will not work on skeletons), corpse explosion, raise skeleton or carrion vine, this is also a viable tactic, but its usefulness is generally limited to higher difficulty levels.
Once you have his forces pared down to something manageable, buy you can buy several antidote potions in town and drink them immediately, checking your character screen for your poison resistance. When it is high enough for your liking, the top value being 75%, proceed to do the same with your hireling to minimize the damage potential of his poison cloud attack. Radament is quite tough, so it can take a while. Remember most of all that discretion is the better part of valor, so if he gets a few lucky hits in on you and might kill you or kills your hireling early in the battle, don’t hesitate to retreat to town and prepare again.
Radament drops a book that grants +1 skill point, best used immediately as the skill point doesn’t go away and the book takes up 4 inventory boxes. The scroll in the Golden Chest starts the The Horadric Staff quest, but you can ignore it and just start the quest anyway.
Video
Diablo II (2000) — Radament’s Lair -4K 60FPS-
Quest 2, Part 1: The Horadric Cube
This part of the quest is not exceptionally difficult, but the amount of searching involved give many players reason to grouch about it being the worst Act in the game. It is a common complaint by people who play online as they exploit a bug in Act III which allows them to escape having to wander through the jungles to complete Khalim’s Will. This aside, you will simply have to wander through the next two areas to find a dungeon called the Halls of the Dead, which is found somewhere in the Dry Hills.
The Rocky Waste
This is the first of the of five wilderness areas of Act II. It has a single dungeon, often overlooked because the experience levels and drops in this area aren’t rich enough to encourage people to spend more time here.
Encounters
You will encounter many new foes here. Saber Cats, Spear Cats, Undead Scavengers and Cave Leapers are pretty much «stock» foes and won’t pose a problem unless encountered in large groups. The last two are a bit special, and have certain abilities which are unique. The Scavenger can fly short distances, and while in the air, cannot be damaged by any weapon. The Leaper will be annoying because while they don’t do a lot of damage they frequently jump all over the place and get knocked back whenever hit.
The Dry Hills
This area is much the same as the first. You will search for a dungeon here to retrieve the Horadric Cube which you will, in all likelihood, find very useful. First, however, you may wish to find the waypoint first as it will save you from having to walk out of the dungeon once you’ve completed the first part of this quest. The dungeon also has a waypoint on level two, but as mentioned before, there is potential to save a lot of walking by getting the one in the Rocky Waste first. It may also be split into two elevations with a single staircase located somewhere in the borders between the two.
Encounters
The Dry Hills is the first place you will encounter the Scarab Demons. They are all Lightning Enchanted like Rakinishu and will frequently emit Charged Bolts when struck. They tend to do a lot of damage which is why looking for items to buff up your character’s resistances was mentioned at the beginning of the walkthrough. if you have forgotten to allocate points for a while, you should spend some on Vitality once you’ve entered this area.
There are some new foes in the dungeon. There are Sarcophagi which spawn a form of mummy called a Decayed. Although it has a lot of durability, they aren’t too difficult to overcome, and standing directly in front of the door can often prevent them from spawning.
The dungeon will be your first encounter with Greater Mummies, called Hollow Ones. Like Radament, they have a skill to resurrect slain skeletons and lesser mummies as well; they can breathe a poison cloud. They also have a missile attack called an Unholy Bolt, which is similar to Holy Bolt, but will cause damage to anything it considers an enemy. If the enemies are not generated in large numbers, simply charge in; slay the Greater Mummies and then deal with the minions. If the number of minions is too great, simply withdraw to a safer part of the dungeon out of range of their resurrection skill and return to deal with the Greater Mummies without distraction.
On Level 3, there is a superunique saber cat called Bloodwitch the Wild and her minion pack guarding the Horadric Cube along with a few other monsters. Since her and her minions are melee oriented and quite fast, you may choose to fight them at the doorway or run a bit down the hall so you can keep from being overwhelmed. Defeat the rest of the foes and open the chest in the chamber to retrieve the loot and the Cube. Your character can only have one in their inventory, so you will not have to waste your time returning here with the intention of getting another.
Quest 2, Part 2: The Horadric Staff
The Far Oasis
This is another wilderness area and like the previous, it may have two elevations. There is a single dungeon in the area, as well as a waypoint. It is generally a good idea to find the waypoint first, even if the entrance to the Maggot Lair is found before it as it will shorten the amount of walking you will have to do after obtaining the Staff of Kings from the bottom of the Maggot Lair. If you do happen to find the Maggot Lair first, leave a town portal near the entrace to the Lair and continue on to find the waypoint.
The Maggot Lair is unlike any other area in Diablo II; it is extremely cramped, in most hallways there is only room for one character to maneuver. Close combat characters have a strategic advantage as they cannot be outflanked, but ranged characters may find it annoying to find monsters right behind corners. The AI of most of these creatures also doesn’t lead them to follow you beyond corners and the hireling only recognizes what is directly in front of them. In multi-player, characters should mind to keep some distance between them and the player in front of them, so that that player has a chance to retreat if things get difficult for him.
Following the right hand path in Level 1 of the Maggot Lair leads to the way down fastest. In level 2, the map has a bias toward the left hand path. The boss fight for level 3 is found most frequently by remaining in the middle of the map and going as far north as possible.
Encounters
Death Beetles, Swarms and Sand Maggots make up the bulk of the monsters found here. While the Beetles are difficult, the other two monsters will be found to be little trouble. The Swarm’s stamina drain isn’t effective at this difficulty level. The Sand Maggots do little damage and their poison attack is similarly weak. They can, however, lay eggs which can spawn a number of young, which are hardly more than an annoyance. It is often best to eliminate the eggs first so your attacks will not have to be divided. There is a superunique in this area called Beetleburst, who is made deadlier by the fact he has a minion pack that is tougher than the regular beetles in this area.
The Maggot Lair has the same monsters, and it is little more than an annoyance to have to deal with most of them. The boss, Coldworm the Burrower, however is a case to herself as she is always Cold Enchanted, and with the hefty amount of life she has, it will be in your best interest to either engage her at range or ensure your health globe is close to full before laying the killing strike. While she can spawn fully grown Sand Maggots (who can in turn lay eggs to spawn young), this difficulty level makes them a negligible threat.
Video
Diablo II (2000) — The Horadric Staff -4K 60FPS-
Quest 2, Part 3: The Viper Amulet
Quest 3: The Tainted Sun
These quests work hand in hand, so they will both be handled in this section.
Once you have returned to town to restock and sell unwanted loot, you can utilize the waypoint to return to the Far Oasis. Continue searching the bordering of the area for a passage to the Lost City. After 3-5 seconds, every area in Act 2 will be reduced to minimal light. You can talk to Drognan about this, and he will suggest that the spell can be undone by travelling to the Claw Viper Temple.
As before, finding the waypoint may not be necessary, but it will likely save significant walking. Afterward, simply find the narrow passage in the border of the area to find the Valley of Snakes and enter the tomb within. Your goal is an altar on the second level of the Claw Viper Temple. Clicking on it will cause the Amulet of the Viper to drop, thus completing the third quest and your adventure into the wilderness surrounding Lut Gholein for the time being. Daylight will once again function normally.
Return to town, empty your cube, place the Viper Amulet and the Staff of Kings within, and transmute them into a Horadric Staff. Speak with both Drognan and Cain, and the palace will be opened to you.
The Lost City
This area is remarkable for an increase in what appears to be ruins of old houses. The dungeon found here, the Ancient Tunnels is known to be a good place to run in Hell Difficulty, but for the time being, it will earn you more to continue on to the completion of your quests.
Encounters
You will encounter another variety of Sand Raider called a Marauder, and have the power to Enchant themselves to augment their physical damage with fire. Players can also often encounter Night Tigers and the poison grenade flinging Night Slingers. They make weak opponents, they can be quite distracting as poison damage can tend look cumulative. There are also zombies who inflict poison damage called Plague Bearers. Finally, there are more annoying Leapers named Tomb Creepers, and while they don’t have a lot of life, they can be immune to damage until they touch down.
The Claw Viper Temple
Once inside, it is a maze very similar in appearance to the Stony Tomb where you retrieved the Horadric Cube. While the stairs can be most often found in the upper left of the map, there is still a good possibility that it can be found anywhere in the area. Upon entering Level 2 of the temple, your objective will be the altar in the middle, but pay attention to Fangskin, as he and his minions can gang up on you and possibly make it impossible for you to clear the area due to the sheer number of Charge attacks.
Encounters
The usual enemies will be Lesser Mummies called Embalmed, skeletons called Bone Warriors and Greater Mummies named Guardians. As mentioned with other Greater Mummies, they will waste little time in resurrecting their fallen minions. You will also encounter two varieties of Claw Viper, the Salamander and the Claw Viper. Their charge skill can be often augmented with a cold attack which makes them quite deadly in groups larger than two. The damage can often be quite heavy which is why it is recommended to withdraw to a safer place than charge into a group of these creatures. The only fortunate thing is that Claw Vipers don’t have a lot of life.
Level 2 is very small, and it has a nasty Lightning Enchanted super unique, called Fangskin. He and his minions are usually in the lower right corner of the room, and often it is best to clear out the left hand side of the map so your character can have some place to run if you attract the attention of the entire group rather than one or two. As with Corpsefire, attracting the attention of the minions or Fangskin himself will make it easier to defeat them, but don’t forget that he can release strong Charged Bolts. While it is not necessary to defeat him, it would be very difficult to simply run up to the altar and kick it over to grab the amulet.
Video
Diablo II (2000) — Tainted Sun -4K 60FPS-
Into the The Palace
Harem and Palace Cellar
The Palace and Cellars are always the same. The first level, the Harem, is small and clear of monsters, stairs can be found to either side. The next level has encounters, but is not terribly difficult and if the player chooses to, they can run past these foes to the stairs. The stairs up occupy opposite corners of the map, as the stair down occupy the remaining two corners.
In The Palace Cellar, the stairs down occupy opposing corners, as do the stairs up. The quickest route will be to follow the outside walls of the area, and retreat/charge into battle as necessary, depending on your foes. The first level has a waypoint nbear the middle, and it will be your decision as to whether or not to activate it. The Sorceress’ Telekinesis skill can activate it and the Barbarian can Leap through the bars. The second level is the same as the first, where the stairs down can be found in opposing corners and can’t be missed if the player follows the outside walls of the area. On level 3 the exit is found in the middle of the area and can be considered a difficult area because you’ll have to fight a lot of monsters to get to the portal.
Encounters
This area will commonly have Baboon Demons called Dune Beasts, Sand Raiders called Invaders, Blunderbores and Skeleton Archers that will fire Magic Arrows. There will also be Skeletal Mages found in the Cellar areas. Blunderbores may not have obscene amounts of life, but their stun ability can cause a lot of trouble when encountered in groups. The skeleton archers are also not a difficult opponent when encountered in groups less than three, but mobs of them can quickly quill their opponents to death. As the player fights their way to the portal, the skeleton’s elements of attack will change from floor to floor. Near the portal on level 3, there is a Fire Enchanted superunique Sand Raider called Fire Eye. At this point, his explosion capability isn’t severe, but don’t let your health globe be too low when you land the killing blow should you be close enough to take damage from it.
The Arcane Sanctuary
The Arcane Sanctuary has 4 wings leading from the middle. One of them has the Summoner with the pedestal that will activate the portal to the next area. While many people will note that it is always the last one explored, it is entirely due to Murphy’s law. Each wing has a distinct twist to it. Probably the best strategy is to pick the one you find the most enjoyable first, and the least enjoyable one last. If it is the correct one, less enjoyable ones are skipped. The upside is that each false ending has a pad with a lot of gold plus 3-5 chests full of loot.
Encounters
The Arcane Sanctuary is home to Vampires called Ghoul Lords, Goatmen from the Hell Clan and Spectres. The Goatmen are quite standard for difficulty, the Specters will drain Mana, but will only be a threat in large groups, and the Vampires will tend to hang back and use missile attacks and their Fire Wall skill. There can also be Lightning Spires which will fire Lightning Bolts at long range and use Nova when an opponent is within melee range. While durable, they are easier to overcome than the Fire Towers located elsewhere in this Act.
The Summoner has plenty of tough offensive skills. He has access to Glacial Spike, Frost Nova, Fire Wall and can cast Weaken. Also, you need to take very narrow stairs to reach him, which may provide a bottleneck if has melee oriented minions. The best way to approach him is to first lure some of the normal critters away, then kill the summoner as fast as possible. He has low HP, so eliminating him should be easy once you can get attacks on him. There are tips in the article about him.
Video
Diablo II (2000) — Arcane Sanctuary -4K 60FPS-
Act 2 Ending
The Canyon of the Magi and Tombs of Tal Rasha are often run repeatedly from levels 15-20. The false tombs, all have a Golden Chest guarded by a boss pack. The real tomb is much larger than the false ones, but one of the false ones is also rather large compared to the others, that one houses the Super Unique Ancient Kaa the Soulless, a nasty Lightning Enchanted Greater Mummy.
Encounters
The tombs usually only have 3-4 different types of monsters inside, but they have plenty of variety: Preserved Dead, their Sarcophagi, Unravellers, Apparitions, Ghoul Lords, Steel Scarabs and Gorebellies.
Before entering Tal Rasha’s Chamber prepare for a big fight with an act boss. Because Duriel does a lot of damage, being able to quickly use healing/rejuvenation potions is a must when engaging him even if it is just to give your hireling a bit more time. Make sure you have some town portals for trips to town, and be prepared to lose your hireling. Keep in mind you can give your Hireling potions from your belt with a hotkey (Shift+ Potion Number) as there may not be time to pick a potion and drop it on their portrait before Duriel disposes of them.
The article on Duriel will have information based on what character you’ve chosen. Once he’s defeated, Talk to Tyrael and go back to town. Talk to Jerhyn, then Meshif to open the way to Act III. Although if this is your first playthrough, you probably want to listen what all the NPCs have to say about your success anyway.
Act III
When you first enter the Kurast Docks, you will be greeted by Hratli, if you leave town, Hratli will be near his forge in the upper right corner of town. Unfortunately, you can no longer buy non-magical weapons and armor in act 3, so you’ll have to find them if you need them or periodically return to Act 2, but keep in mind there is a limit to the quality of socketed armor and weapons.
In town, there is Hratli, who sells keys, armor and weapons. Ormus, who like Drognan will sell potions, tomes and scrolls in addition to staves, sceptres, wands and a small selection of armor. Alkor will vend stamina, thawing and antidote potions. Asheara will not only buy and sell weapons and armor, but she will also hire out mercenaries called the Iron Wolves. Early on in the game, and through most of Nightmare, they are quite viable, but often fall out of favor due to the prominence of monsters with immunities.
Attribute distribution
While saving twenty points or so is not a bad idea, having a strength score of at least 60 is a good idea due to the fact plated belts offer the largest potion capacity. While keeping 20 points for emergencies is not a bad idea in and of itself, do not be afraid to spend points in Vitality. While Dexterity can boost the chance to block, only a bowazon should have their dexterity higher than their vitality. Spending in energy is generally frowned upon due to the fact mana potions are easy to find, however, putting occasional points in Energy shouldn’t wreck a build.
What items to look for
What was stated in Act 2 about items applies in Act 3. Boosting resistances for all characters is important, mostly because it is an easy way to take a lot of pain out of many attacks. Lightning tends to be the most important due to its often high damage. Fire also tends to be quite lethal at this time. Cold resistance is good, but what makes cold damage dangerous is the chilling effect. Poison resistance is often ignored because if it happens to be bad enough, there is usually time to retreat to town to cure it.
Each playstyle will have particular attributes to look out for. Melee, for example will find bonuses to attack speed, faster hit recovery and life/mana leech to be helpful attributes, as well as some source of cold damage to take advantage of the slowdown caused by cold damage (although Cannot Be Frozen and Crushing Blow are also desirable, you will likely not discover items with these attributes before Act 5). Close-range casters such as elemental druids and hammerdins should definitely look for Faster Hit Recovery, mana bonuses and Faster Cast Rate items. Casters and summoners can keep an eye out for items that will boost their skills. Amazons can also invest in Increased Attack Speed, mana/life leech and having some source of cold damage, whether that is a charm, gem or weapon attribute.
Make a habit of picking up every Ring, Amulet, and Charm you find. Not only do they sell well, the blue rings and amulets ones can be transmuted in the cube for a random ring/amulet, sometimes providing an item worth using. Smaller Mana Potions are cheaper and at this point, perform just fine.
While some frown upon hirelings, a well maintained one can mean the difference between easy and difficult. They can distract difficult opponents which gives you time to inflict a lot of damage before your opponent realizes the trouble they are in. Rogues will provide a lot of benefit with Increased Attack Speed, Life Leech and cold damage, even if they use a frost arrow attack often. The Desert Mercenary will benefit from not only strong armor and a good spear/polearm, but also Faster Hit Recovery, Increased Attack Speed and Life Leech as well as resistances. Iron Wolves will benefit most from items that have Faster Cast Rate and generic +skills, but most choose to stick with the Desert Mercenary, especially in later difficulty levels if only because minions and hirelings are immune to Corpse Doll explosions.
Quest 1: The Golden Bird
This quest is optional. You can complete Act III without this quest done.
After leaving town, Diablo in the «wanderer form» will taunt you by vanishing and leaving a pack of Flesh Beasts behind. In the course of your travels a Unique or Champion monster will drop a Jade Figurine. It can be brought to Meshif, then bring the Golden Bird he gives you to Alkor. Click on Alkor again so he gives you an Elixir called Potion of Life, which will provide 20 extra HP. While it most often happens early in game, it can also happen much later on.
Video
Quest 2 & 3: Blade of the Old Religion and Khalim’s Will
Quest 2: Blade of the Old Religion
This quest is optional. You can complete Act III without this quest done.
After completion of the Golden Bird, many simply continue on in the jungle as the quest does not need activation to be completed, and is often done so unless the player is playing online and exploiting a bug where they can get through Act III by simply killing the Council in Travincal and having someone activate a Town Portal inside the Durance (usually the final waypoint.)
You are tasked officially by Hratli to seek out a magical dagger which will prevent the jungle and its denizens from overrunning the docks. It is found nearby the entrance to the Flayer Dungeon in the Flayer Jungle. It is an altar that when clicked will spawn a group with a unique or champion monster. When slain, they will drop the Gidbinn. Pick it up and speak with Ormus back in town. After speaking with Asheara, he will give you a randomly generated rare ring.
Quest 3: Khalim’s Will
Khalim’s Will, Part 1: Khalim’s Eye
The jungle areas are a bit annoying to navigate, not only are the areas generated randomly, they also hook up to each other in random ways. Sometimes the Flayer Jungle is connected to the Spider Forest and other times you must go through the Great Marsh. Sometimes the Great Marsh is a side area that can be skipped. Try to at least find the waypoint of the area you are in before stopping. The first two goals is to find the two dungeons with the quest items hidden in the jungle. One is the a webbed cave called the Spider Cavern found in the Spider Forest and the other is the dungeon in the Flayer Jungle.
The Spider Cavern is almost always found first, and is located in one of the side paths in the Spider Forest. There is an identical looking cavern in this area called the Arachnid Lair which is usually found next to the waypoint, but can be ignored if you so choose. Inside the Spider Cavern cavern you will find the Super Unique Sszark the Burning, who will also drop the Golden Bird in some cases. There is a sparkling chest nearby in the southern corner containing Khalim’s Eye. Pick it up, and save it for later.
Encounters
You will encounter Cloud Stalkers, blue Blood Hawks, who are fortunately to be found without their spawners. While their charge attack and their regular habit of fleeing when severely damaged can be annoying, they’re hardly difficult, even when encountered in groups. There will be Fetishes, bigger brothers of the Rat Men you may have encountered in Act I and their respective Shamans to be found here as well. While the Fetishes are pretty weak by themselves, in hordes of ten or more, they can be a significant problem. There will also be Giant Mosquitoes called Suckers, a new foe who will drain stamina, which for now will be little more than an annoyance. Lastly, there could be Thorned Hulks which can be formidable in that they can use their own version of Frenzy and can stun you due to the damage they can do.
The Shamans can be quite dangerous if a bit fragile. They are not as active as the Fallen Shamans for resurrecting their slain comrades, but their Inferno does a lot of damage, and if you are surrounded by a horde of fetishes, you will have to soak the attack. It can be dodged somewhat by walking in half circles around him when he casts it, so do not hesitate to retreat a bit so their minions cannot surround you and leave you no place to run.
Szzark the Burning is always spawned with the ability to curse his opponents, and given the large number of minions he has, be a little careful when engaging the pack.
Khalim’s Will, Part 2: Khalim’s Brain
It will save the player significant grief to find the waypoint to the Flayer Jungle if the Flayer Dungeon is found first, cast a portal by the dungeon and return to town once the waypoint is found to get back there quickly. Otherwise the player will have to walk back out of all three levels of the Flayer Dungeon. The dungeons are all biased towards the left hand path. Level 3 only has 3 layout variants and one is chosen at random per map generated. The area itself is not generated; each variant is always the same.
Encounters
The Jungle is home to both Flayers and Soul Killers as well as their respective Shamans. You may also occasionally encounter Tentacle Beasts who inhabit the water and can often lob venomous missiles free from inpunity by melee characters. There are also Frog Demons called Slime Princes who can also lob poison at range. The upside is that they are quite easy to kill.
In addition to the monsters encountered in this jungle area, the dungeon is home to an undead version of the Fetish which will explode on impact. In normal difficulty, it represents a minor threat, but in later difficulties, the damage from one or two of these is enough to kill even a slightly damaged character. This damage is physical, so it can be blocked. Minions also take no damage from this explosion, and many a solid adventurer makes use of the Desert Mercenary (a barbarian hireling or any of the «minion skills» would also suffice) to kill this kind of enemy. It would also be wise to engage them at range if minions are shunned by the player. The Super Unique Witch Doctor Endugu guarding the Golden Chest with Khalim’s Brain can be tricky. It is best to first lure the melee Flayers out of the room and kill them outside to avoid being surrounded.
At the end of the jungle areas, you will find the ruined city of Kurast guarded by the Super Unique Stormtree, but he shouldn’t be too big a problem, especially if you use a nearby bridge to prevent being flanked and knocked around by his minions. Given the amount of wandering involved in the jungle, tagging the waypoint in Lower Kurast would be advised before quitting your session.
Kurast
Quest 4: The Tome of Lam Esen
While the location of the waypoints are random, the 3 Kurast areas are still easy to navigate, and the exits should be easy to find, always at the upper side, either upper left or upper right. From the Lower Kurast waypoint, make your way toward the right hand part of the screen into to the Kurast Bazaar, activating the waypoint here, then move on to Upper Kurast and find its waypoint, then finally to Travincal using its waypoint to move back to Kurast Bazaar. Search around in the Bazaar until you find the Ruined Temple, although it is possible that you’ll find the Disused Fane, which doesn’t have the quest item, simply keep looking, and the dungeon will surely reveal itself.
In the Ruined Temple, the large chamber in the middle of this small dungeon has a book stand, clicking on it will drop the tome you seek. Bringing Lam Esen’s Tome to Alkor completes the quest and grants you 5 extra attribute points.
Encounters
In the general area of Kurast, there will be varieties of Baboon Demons, Zealots and Faithful. These foes are all moderately intelligent and will tend to flee if they take a lot of damage. There will also be varieties of Thorned Hulks as well as Zakarum Priests who can cast Blizzard and heal your foes. You can decide to retreat out of range then engage them when they’re alone, or attack them directly. There may also be varieties of Vulture Demons and/or Leapers which, while not difficult, can be annoying because of their ability to take to the air and escape damage.
Travincal has Vampires that cast Meteor, and the Zakarum Priests that cast Blizzard, not to mention the healing ability. Do exercise some caution here as the spells can cause a lot of damage on your way to activating the waypoint in Travincal.
For the Ruined Temple, it is best to first clear the side chambers, and the entrance hall before wandering into the chamber with Battlemaid Sarina, who guards the tome. Once you are sure no creature will be attacking you from behind, carefully enter the big room, and wait for the creatures to come to you. Fighting them in the bottleneck formed by the doorway is strategically the best place, so don’t hesitate to retreat to the opposite side of a doorway to avoid being outflanked by a group of extra fast opponents.
The Extra Fast Super Unique Battlemaid Sarina and her gang shouldn’t be to much trouble, as long as you don’t also have to deal with Meteor casting Vampires. The red colored Brutes called Wailing Beasts can be a bit of trouble if there is a large group of them spawned near the doorways. The Spider Magui have a strong poison attack, but at this stage it will just be somewhat of a nuisance as you can just retreat to town and talk to Ormus if the poisoning is too severe.
Khalim’s Will, Part 3: Khalim’s Heart
Walk outside and find the entrance to the sewers. There is a chance there are Dolls in this area, although keeping minions and/or a full inventory of potions on your belt will help should that menace be apparent. While you can run past most mobs here in search for the stairs to level 2, some choose to clear the area just in case they need to backtrack.
Level 1 is a huge area and while the entrance to Level 2 is usually along the outer edge, it can also be in the middle on a rare occasion. There is a lever in this area which turns into the stairs, granting you access to Level 2. Level 2 is very small, The Golden Chest with Khalim’s Heart is along the left hand side, just proceed with caution. Click on the chest, grab the heart and retreat back to town after looting the chamber.
Encounters
The sewers can be home to skeletons, mummies, greater mummies, Fiends, one of which is always the Super Unique Icehawk Riftwing and his pack who guard the lever. There can also be undead Bone Fetishes who can cause significant damage due to their ability to explode on dying, and can be quite lethal if two or three of them are killed in rapid succession. Keep in mind that having a well-maintained Desert Mercenary is often a good choice because hirelings and minions are immune to their damage, and can also be blocked as the damage is entirely physical. Also, having corpse-destroying skills like Redemption, Carrion Vine, Corpse Explosion or Find Item will ruin the corpse and prevent its resurrection should a Horadric Ancient be in the vicinity.
The Council
Quest 5: The Blackened Temple
It is best to first clear a part of Travincal before engaging the High Council of Zakarum. At this stage of the game, you may need room to withdraw and not face the entire Council at once. Your target is in the grand building on the side opposite to the entrance of the area.
While one could choose to clear the entire area, the place that will serve best is in the middle of Travincal. Once this area is clear of encounters, advance toward the temple. Hydras should appear if the player has attracted the attention of Council Members, and perhaps a few of them might decide to engage you. Withdraw to an area that you’ve cleared should too many of them charge you at once. Once you’ve defeated them, take Khalim’s Flail, place the organs in the cube and transmute it into Khalim’s Will. Equip it and take a swing or two at the Compelling Orb. Once it is smashed, a staircase will be revealed and open the way to Mephisto’s lair.
Encounters
The random monsters you will encounter are Zealots, who have an annoying habit of fleeing from you once they take a lot of damage, Heirophants, who should be eliminated quickly due to their ability to heal your foes and their Lightning and Blizzard skills. There are also vampires here named Night Lords who can cast Meteor. Upon destruction of the Compelling Orb, the Zealots will flee from you upon sight.
You will find placed monsters near the temple itself. There are four Water Watchers in the pools near the entrance of the temple, as well as Council Members, three of whom are unique. Toorc Icefist is cold enchanted and will detonate a Frost Nova upon death. You may want to carry a thawing potion or two just to help get rid of the prolonged effect of being chilled. Geleb Flamefinger is fire enchanted and had a reputation of being lethal when his body exploded upon death, although this has been nerfed since, and Ismail Vilehand who can inflict an Amplify Damage curse which makes him dangerous if you’re fighting a number of foes.
Many will return here due to the fact it is an easy area to reach once the Travincal waypoint is obtained and the three super unique monsters have a better than average chance to drop decent loot and an unusual amount of gold which can be used for gambling or resurrecting your hireling.
Quest 6: The Guardian
It is generally quicker to follow the left-hand wall for the first two levels. It will also save a lot of walking to discover the waypoint on level 2. Level 3 is always the same, and is generally easier and quite profitable to defeat all foes here. First clear the entrance room following the left-handed wall, to make sure that if creatures are spawned here, they won’t be adding to your grief while you engage the rest.
Encounters.
The Durance itself can be home to Vampires called Dark Lords and Blood Lords, both of whom can cast Meteor. The former can spawn in the first two levels while the latter is found in level 3. Blunderbores called Maulers can also be found in the first two levels and while they possess a stun attack, they are also somewhat slow and can easily be put into hit recovery, just don’t allow yourself to face too many at one time. There are also mummies called Cadavers which spawn a Poison Nova upon dying, but generally speaking is merely an annoyance than a legitimate threat. Lastly, Stygian Dolls can be one of the monsters that you can face, and although they are problematic due to the hefty amount of damage they can do upon death, having a high block or a minion/hireling to distract them and land the killing strike while the player helps whittle down their health bar and stay out of range of the explosion a lot easier to manage.
On level three, Vampires, Stygian Dolls, Council Members and Mephisto are the only monsters that spawn in this area. The first, Bremm Sparkfist, can be found in this area is either on the small stroke right in front of the door in the middle or on the stroke to the right side of the pool of blood, depending on where he is, either lure him out and defeat him in the entrance room, or first clear some creatures to the left of the doorway a bit, then engage him. The other 2 Council Members, Maffer Dragonhand and Wyand Voidbringer are respectively in the right and left part of the level. Check the individual information and decide which would be easier to defeat, or you can kill both for the loot and the experience points.
Once you are done with all that, you can approach Mephisto in the middle of the back room. Either get up close quickly, and he won’t use his skull orb as often, don’t forget to retreat to town as necessary should you run out of potions. More often than not, he becomes fixated on a minion such as a hireling or a Golem and will allow you to attack with little opportunity for retribution. He can, however, change his mind, so keep your health and that of your minion at least half full.
Another tactic is the moat trick. Lure him towards the moat and quickly move around to the other side; if done correctly, he will be effectively stuck on the other side of the river. You can move to just out of range (find some mark where he won´t attack you), and attack him with the right ranged attack, from off screen, as long as you have a lock on him.
Be sure to check the article for additional information, and don’t forget to go through the portal before quitting your session, otherwise you’ll have to repeat this section again.
Act IV
You begin the game’s fourth and shortest Act in the Pandemonium Fortress, along with the following four NPCs:
- Tyrael: The Archangel accompanies you to the edge of Hell. He will assign your quests. He also can resurrect your mercenary.
- Jamella: She serves multiple functions: the healer (restores health and mana), the gambler, and a merchant who sells armor, weapons, Healing Potions, and Mana Potions.
- Halbu: In addition to selling weapons and armor, Halbu also repairs your equipment.
- Deckard Cain: He follows you to every town for the rest of the game and will identify items for free, if you freed him in The Search for Cain.
Attribute Distribution
While saving twenty points or so is not a bad idea, having a strength score of at least 60 is a good idea due to the fact plated belts offer the largest potion capacity, while melee-oriented and close range casters may wish to go higher depending on what armor they are able to find. While keeping 20 points for emergencies is not a bad idea in and of itself, do not be afraid to spend points in Vitality should you find that your enemies take large chunks out of your health globe. While Dexterity can boost the chance to block, only a bowazon should have their dexterity higher than their vitality. Spending in energy is generally frowned upon due to the fact mana potions are easy to find, however, putting occasional points in Energy shouldn’t wreck a build.
What items to look for
What was stated in Act 2 and Act 3 about items applies in Act 4. Boosting resistances for all characters is important, mostly because it is an easy way to take a lot of pain out of many attacks, and the massive damage Diablo’s elemental attacks could very easily end in tragedy, especially in hardcore. While lightning is still painful should Burning Souls spawn in the Plains of Despair, fire is no less a danger.
Again, each playstyle will have additional attributes to look out for. Melee, for example will find bonuses to attack speed, faster hit recovery and life/mana leech to be helpful attributes, as well as some source of cold damage to take advantage of the slowdown caused by cold damage. Cannot Be Frozen and Crushing Blow are also desirable, it is often difficult to discover those items or their components before Act 5. One could do repeated runs to the Countess and other bosses to find Amn, Tir, Shael and Eth runes, especially if someone is playing solo on hardcore. Amn and Tir will make Strength in a 2-socket melee weapon, while Shael and Eth in a 2 socket shield will grant Rhyme.
Close-range casters such as elemental druids and hammerdins should definitely look for Faster Hit Recovery, mana bonuses and Faster Cast Rate items.
Casters and summoners can keep an eye out for items that will boost their skills.
Amazons of either bow or javelin can also find value in Increased Attack Speed, mana/life leech and having some source of cold damage, whether that is a charm, gem or weapon attribute.
While some frown upon hirelings, a well maintained one will mean the difference between life and death. They can distract difficult opponents which gives you time to inflict damage before they bring their attention on you. Rogues will provide a lot of benefit with Increased Attack Speed, Life Leech and cold damage, even if they use a frost arrow attack often. The Desert Mercenary will benefit from not only strong armor and a good spear/polearm, but also Faster Hit Recovery, Increased Attack Speed and Life Leech as well as resistances. Iron Wolves will benefit most from items that have Faster Cast Rate and generic +skills.
Quest 1: The Fallen Angel
This quest is optional. You can complete Act IV without this quest done.
The Outer Steppes
Starting in this area, it´s best to stay close to the edge to limit the amount of monsters you’ll encounter. If you are strong enough, this is a good area to grind for experience points from level 20-29, just don’t be afraid to withdraw if you should wind up swarmed by too many monsters. If you should really wind up in over your head and have a huge mob of enemies at the entrance from the Pandemonium Fortress and no way to reach your corpse to retrieve your gear, you can simply quit and try your luck again.
Encounters
Mana-draining Finger Mages called Doom Mages which have missiles that will chase you for a significant distance before sputtering out, but do so little damage that they could be ignored; these enemies are quite fragile as well. There are also Corpulents who will consume corpses and launch globs of entrails that can cause serious damage. There is also a form of Leaper here as well as the first level of Oblivion Knights, Doom Knights, who do not have a missile attack like their brethren, but can cause some serious damage to the poorly equipped; Megademons named Venom Lords which have a high level Inferno as well as being capable of serious melee attacks as well as having a lot of hit points. Lastly, there is also the possibility of encountering a Vile Mother called a Flesh Spawner who can not only dish out damage, they can also take significant damage and spawn minions which can overwhelm players and distract some builds like the Zealot.
The Plains of Despair
When you find stairs to the Plains of Despair, the player can choose to look for Izual, or continue on to next area City of the Damned and activate that waypoint. You will know that you are close to him, when the Quest log will start to shine. General information on Izual will be listed in the Encounters section just below, and be sure to visit the article on him to read additional information for defeating him. Again, stick to the sides, have good elemental resistances and don’t be afraid to withdraw when necessary, this area might be a little long to complete, but it is not impossible if you don’t try to rush to the next exit or to discover Izual. Visit Tyrael after you speak with Izual’s freed spirit, and he will bestow you 2 free skill points.
Encounters
High lightning and fire resistance come recommended in this place as there are monsters which tend to use heavy damage fire and lightning-based effects. Wisps called Burning Souls and any the foes from the last area have a possibility of spawning here.
Like any boss, get Izual alone by killing the monsters around him first, or manage to retreat to a safe area to focus on him. His damage is low, but has a huge amount of hit points. It won’t hurt to take along some thawing potions as he can emit frost novas, which have a very potent chill effect, as it is doubtful you are fortunate enough to have found or constructed some item that will grant immunity to freezing.
Quest 2: Hell’s Forge
This quest is optional. You can complete Act IV without this quest done.
The City of the Damned
The City of the Damned will typically have the stairs somewhere in the middle of plains. Next to the stairs there will be a waypoint, so don´t forget to get it. As with the previous areas, it is not recommended to rush around looking for the exit, but to use the terrain to your advantage as it will make it easier to withdraw should you encounter a large mob of foes.
Encounters
The Demons you encountered in Act 1 will be found here, appropriately called the Damned, with a lightning attack that matches their bite. There are also upgraded versions of Vile Mothers, Regurgitators, Finger Mages, Oblivion Knights, and Venom Lords. Of note is the Abyss Knight will tend to hang back and use a ranged elemental attack which is indicated by the glow on their hand; orange for a fire attack, green for a poison bolt, etc.
The River of Flame, Part 1: To the Waypoint and Back.
In the River of Flame, the path to the Chaos Sanctuary will be found almost always to the north. Continue progressing in a northerly direction until the waypoint is discovered. Most often, Hellforge will be discovered when you backtrack toward the east. It is not unheard of, however to find its location to the west of the waypoint.
The forge is inhabited by the superunique boss Hephasto who needs to be defeated to obtain the hammer that will shatter Mephisto’s Soulstone. After killing him, click on the forge, and if you have Mephisto´s soulstone in your either inventory or stash, it will be placed on the forge. Then equip the hammer from smith and smash the stone. After doing so, various gems and a rune will drop from of the forge.
Encounters
In this area, players can encounter more monsters from the previous area: Abyss Knights, Stranglers, Pit Lords, and more powerful versions of Vile Mothers called Grotesques and Regurgitators named Maw Fiends. A few monster types from Act 2 appear here as well. Blunderbores called Urdar with powerful attacks as well as Blood Maggots which will chip away at the health of the player and their allies with poison attacks and minions from the eggs that they will spawn.
Hephasto has a number of enchantments, one of which being a random offensive aura. It is recommended to engage him alone rather than deal with minions who might be supported by whatever aura is manifested by him. Upon death, he will drop some random items and the Hell Forge Hammer if the Hell Forge quest is not completed.
Quest 3: Terror’s End
River of Flame, Part 2
Now head to the River of Flame waypoint and go past Hadriel to the moat passage. This is a random maze, but is not incredibly wide. Usage of Teleport or other mobility skills like Leap Attack can make this simpler, but there are notable monsters, so take that into consideration while you ply your way across the passage.
Encounters
The same monsters the player encountered in the previous area can also be found in this part as well. The «fighter-mage» version of the Abyss Knight, Urdar and Grotesques tend to be the most difficult monsters, but if a player is willing to withdraw when it looks like they will be overwhelmed, this section should not be overly difficult.
The Chaos Sanctuary
Built like a cathedral, the Chaos Sanctuary is shaped like a Latin cross, with side passages near the far end. The most secure route is to clear all the monsters on both sides of the obstacles as you make your way to the middle of the area with the large pentagram in the floor. The finger mages have a habit of hovering inside the obstacle which can be quite annoying if you are depending on minions for support. There are 5 seals to be broken to trigger the final encounter: Two on the left, two on the right, and one can be found behind the star. Continue to clear the area, withdrawing to a safer area should the numbers of monsters prove intimidating, and open them as you discover them. Off to the left, one of the seals will release a group of storm casters, their leader being the Grand Vizier of Chaos. The lone seal to the north will release Abyss Knights, lead by Lord de Seis. Finally, one of the seals to the right of the area will spawn Pit Lords who are lead by the Infector of Souls. After killing them all (which can be tough for some characters), The screen shakes and brightens a bit and Diablo will say: «Not even death can save you from me!» He will appear suddenly in the middle of the pentagram with one short objective for the character: Kill Diablo. Depending on the player’s luck, skill and determination, Diablo will be defeated and the character will be able to move on to the next difficulty level. If the expansion is installed, the player can take a portal that Tyrael opens to move on to Act 5 to destroy the third Prime Evil.
Encounters
The player will encounter Storm Casters and Venom Lords in the Chaos Sanctuary. They will also find Oblivion Knights in the form of Doom Knights often supported by a caster aptly named the Oblivion Knight. The latter monster has the following skills: Necromancer curses (one of which was Iron Maiden, but was removed in a recent patch), a missile attack in the form of an element related to the color of the aura around its hands or a Bone Spirit that will track its victim for a long time and do fairly significant magic damage.
As mentioned above, one seal on each side will generate a group led by a super unique monster, the other seal on each side will not do anything more than light up. Of the three groups, The Infector of Souls is often the harder one if you have one seal that is reached by twice turning a corner, as it is quite difficult to evade being mobbed by a group of extra fast Inferno-casting demons capable of also inflicting significant physical damage. In this case, if you do not have the advantage of mobility to escape, retreat to town and take a walk from the waypoint. Lord de Seis can be a contender for toughest as he usually spawns with a Fanaticism aura and often runs away should the player attempt to engage him close. The perk to facing the Oblivion Knights is that even with the benefit of a Fanaticism aura they are often quite a bit slower than Infector’s group and so you can evade them to take them in smaller numbers at a time and out of range of his aura. If you save the group you dislike for the last and break all the seals before killing its leader, defeating that miniboss will cause all monsters in the area to suddenly die and the game will spawn Diablo in the middle of the large pentagram. Don’t forget, however, that you can prepare yourself if you were running low on potions, etc. before facing him.
Diablo, for practically any player with gear found by playing just that character will likely find it the toughest fight in the game. The first time, that is. While there is plenty of advice based on your play style, it boils down mostly to «attack and be ready to evade based on what attack he’s attempting to use. Retreat to town whenever you are in danger.» Once you’ve gone on and gained ten levels, Diablo won’t be quite as difficult to overcome as he was the first time. The article on Diablo also has additional tips based on what character you are playing.
Act V
Taking the portal from Act IV will transport you to the foot of Mount Arreat in the village of Harrogath.
The NPCs that will assist you are:
- Larzuk: He is the main source of armor and weapons. He can also repair damaged equipment.
- Malah: She is the town healer, restoring your health and mana for free. She is also the potions vendor, as well as the merchant for Town Portal Scrolls, Identify Scrolls, keys, and spellcaster items, such as Wands, Staves and Scepters.
- Qual-Kehk: Talk to Qual-Kehk to hire a Barbarian Mercenary, or to resurrect your Mercenary if killed in combat.
- Anya: When she appears in Harrogath, upon completion of the Prison of Ice quest, she is a secondary source for armor and weapons, as well as the town gambler.
- Nihlathak: During his brief time in Harrogath, he is the town gambler.
- Deckard Cain: He follows you to every town for the rest of the game and will identify items for free, if you freed him in The Search for Cain. If not, he will identify each item for 100 gold.
Quest 1: Siege on Harrogath
This quest is optional. You can complete Act V without this quest done.
Although Larzuk can activate this quest, it can be completed without ever speaking with him. He tasks you to prove your mettle by killing the monster in charge of the siege on Harrogath. It´s quite a long walk, but during normal difficulty it should not prove to be overly difficult, if tedious. Perhaps the simplest way to navigate is to stay close to one side of the area, navigating up steps and blockades, engaging enemies as the player sees fit. You will encounter a narrowed pass half way through the area, and finally a long staircase to the next area, the Frigid Highlands.
This quest is completed by killing Shenk the Overseer located on the farthest side of this area, creating a shower of elemental attacks to rain down and all monsters within range of these attacks will likely die. You can continue up the stairs where there will be a waypoint that will provide quick transit to town.
Return to Larzuk for your reward — he will add sockets to an unsocketed weapon, helmet, body armor or shield of your choice. Like the Malus quest, do not feel obligated to use the reward if there is nothing particularly good in your possession at the moment and simply return to redeem the quest when you do (for example, putting a socket in Cleglaw’s Claw would be a bad decision, as its usefulness is pretty much tapped out by now). This quest can add a socket to rare, set and unique items. It can also be used to put a random number of sockets in superior white or superior stock ethereal items, something that cannot be done with the Horadric Cube.
Encounters
The monsters in Act V are certainly unique in their abilities and add variety as well as atmosphere. Firstly, the player has allies, for however long by randomly encountering barbarian warriors who, in spite being hoplessly outnumbered will fight valiantly. They can benefit from party-friendly skills such as Life Tap, Battle Orders and Prayer, but unlike your hireling, cannot benefit from healing potions. Without assistance, their lifespan is often very short.
The player can encounter several monster types with unique abilities. Although the Enslaved are pretty run-of-the-mill melee oriented monsters, a player can also encounter quick Demon Imps which teleport and throw fireballs, and are also thankfully low on hit points. There are also Death Maulers, who can also utilize a melee attack, but earn a reputation for their ranged attack which is firing tentacles in the ground to erupt and damage a distant target. As long as their target is moving, this does not prove to be a problem, as they will erupt at a destination based on where their target was when the attack was initiated. If someone is caught in one place, however, could prove to be fatal if Maulers are encountered in groups.
There is also the chance to encounter Lashers, apparently commanding the legions of Enslaved. They are fairly durable, but are not directly dangerous. They can grant the Enslaved with a damage buff, or mutate them into a minion that can explode for a significant amount of damage, and also has a chill effect that will last for a second or two. They also have other skills such as Attract and an ability to heal Enslaved, although these are used much less often. Lastly, there are demonic catapults which will rain down random elemental attacks. They are extremely durable, but at melee range, they are quite helpless and can be easily dispatched upon closing in on their location. The suicide minions can be quite dangrous, but take a half second to explode, so remaining mobile can cause them to ineffectively detonate. Party minions and hirelings also take no damage from the effect.
There are two super uniques the player can encounter in this area. The first is Dac Farren, a Cold-Enchanted Demon Imp halfway through the area and Shenk the Overseer, a Lasher. Shenk, will be surrounded by a large crowd of Enslaved minions, and he will waste no time making mobile explosives out of them.
Quest 2: Rescue on Mount Arreat
This quest is optional. You can complete Act V without this quest done.
You may have noticed, that after entering the Frigid Highlands, the Quest Log started to shine. Talk to Qual-Kehk for more information. You are asked to free 15 soldiers in Frigid Highlands. Simply roam through Highlands and look for fortresses in which are wooden prisons with 5 barbarians inside. Simply destroy the cage door, and barbarians will take town portal to get away. Find 3 of these cages and return to Qual-Kehk for a reward. He will give you three runes — Tal, Ral and Ort. If you decide to place them into a 3-socket shield in order of: Ral-Ort-Tal, you will create an Ancient’s Pledge Rune Word which can provide good resistance bonuses, but a player can certainly choose not to use the runes immediately and save them for something else. Additionally, you are able to hire barbarians in Harrogath from now on.
Encounters
You can encounter two types of Demon Imps and a Monster called a Crush Beast that allows them to use more damaging fire attacks by letting them sit in the basket mounted on their backs. They can annoy the player with their war stomp that causes the screen to shake as well as a significant melee attack. As in the previous area, there are also fortified towers that also let the Demon Imps utilize more powerful fire-based skills and provide significant damage absorption before collapsing. As well, Death Maulers and Enslaved can also be found in this area.
This area hosts three super-unique monsters: Eldritch the Rectifier who can always be encountered a short distance from the waypoint in this area as well as Sharptooth Slayer, an Overlord with a number of Enslaved minions always found near one of the prisons. The third is a Death Mauler called Eyeback the Unleashed, always found at the end of the area, just before the Plateau.
Quest 3: Prison of Ice
This quest is optional. You can complete Act V without this quest done.
This quest will activate on completion of the previous one, but can be accomplished without ever talking to Malah. She says that the alchemist Anya has been missing and wants you to find her. Although she has no clues to her location, the quest log tells the player to search the Frozen River underneath the Crystalline Passage to find her. Continue to the Arreat Plateau, and although it is not necessary, tagging the waypoint in this area can dramatically shorten your travel time should you wind up dying in one of the areas further on.
At the farthest end of the Plateau, the player will encounter the entrance to the Crystalline Passage, a subterranean area which needs to be passed through to complete the next quests. There is also a waypoint here which would be worth finding as it can sometimes be a long walk from the Plateau, or worse, from the Frigid Highlands. The entrance to the dungeon that makes the Frozen River is always guarded by a pack of champion monsters, and like the stairs in the Catacombs of Act 1, are never to be found against a wall. There will also be an exit somewhere in this area to the next subterranean area named the Glacial Trail.
The Frozen River itself is a random, winding maze which looks like the Crystalline Passage. Anya will be found at the end of this maze, and will ask you to help her. Return to town and speak with Malah, ensuring that you have an open box in your inventory for the special thawing potion which will remove Nihilathak’s curse. Return and click on Anya, she will activate her own town portal and escape to Harrogath. When you return to town, Malah will have the reward of a permanent +10% bonus to your resistances. It takes the form of a 2 x 2 scroll and is activated like the Book of Skill that Radament drops. Speak also with Anya, she will reward you with a rare class-specific item for your character.
Encounters
The Arreat Plateau in normal difficulty has very few types of monsters. The player will face Lashers and Slayers, slightly more potent versions of the ones found in The Frigid Highlands. There may also be Demon Imps if their spawners exist here as well as a superuniqe Crush Beast named Thresh Socket to be found at the end of the area.
In the Crystalline Passage, there will be found a few brand new monsters. There will be Frozen Horrors who have an Arctic Blast attack as well as a melee attack and always shatter when killed as well as a possibility of encountering a Wendigo-like creature called an Abominable who can do massive damage as well as inflict cold damage and knockback. There are Succubi named Stygian Harlots often cast a curse that halves the victim’s defense or a curse that causes the victim to damage themselves when their maximum mana is greater than their maximum life. There can also be encountered a Minotaur-like monster named a Moon Lord who can not only do significant damage, but can also activate a Frenzy skill to make themselves much more dangerous.
Lastly, the Frozen River is home to many monsters, but mostly varieties of the ones found in the Crystalline Passage. Aside from monsters very similar to the previous areas, it will be possible to encounter a self-resurrecting zombie called a Rot Walker who can charge and knock the player around. Avoid attracting the attention of a group and it won’t be terribly difficult. If they resurrect themselves, however, they can be killed again for loot and experience unless their corpse is ruined.
There is one superunique and his pack guarding Anya’s prison. Frozenstein is always spawned with the mods Cold Enchanted and Mana Burn, so keep that in mind when you reach the end of the cavern.
Quest 4: Betrayal of Harrogath
This quest is optional. You can complete Act V without this quest done.
This can be one of the most dangerous quests in Diablo II where one-hit fatalties can happen surprisingly often. The red portal Anya opens will bring youto Nihlathak’s Temple. It is recommended to simply run into the temple entrance before the corpses of Prowling Dead awaken and potentially make you victim to multiple charge attacks. Take the entrance to the first halls. Find the stairs, but be a little careful as there can be large groups of Prowling Dead who may be able to stunlock a player if they decide to charge in rapid succession.
In the Halls of Pain there is next entrance, but a waypoint as well. Consider taking this waypoint more than any other waypoint in game, because once taking this waypoint and completing this quest, the red portal will no longer be open for you, and killing Pindleskin for loot (because he’s a level 85 monster in Hell difficulty and can technically drop any item in the game) will be a much more difficult option. When playing online, however, Nihlathak can drop the Key of Destruction, an item for Über Tristram. It will depend on character and priorities, if the chance to find keys is more important, then it would be recommended to take the waypoint and save some time when «farming» keys.
When you finally find the entrance to the Halls of Vaught, The area looks like big cross, where the entrance is in the middle. On the one end of the four beams of cross, there is Nihlathak with his army of hell spawns. To save the player some time (especially on Hell difficulty), there is a clue to his location that can be determined by the placement of a particular wall tile that looks like a pair of red eyes.
A quick guide to finding the correct hallway.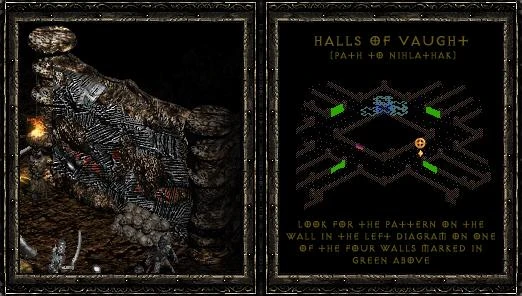
Whenever the tile appears in one of the areas marked with the green panel, he can be found down that particular section.
Upon his defeat, he will die in quite a spectacular fashion and a portal will open to the surface. Anya will reward you with the ability to personalize an armor or weapon of your choice and close the red portal. When playing on Battle.net, keep in mind that personalized items will not trade for as much as an item without a character’s nametag.
Encounters
The temple entrance has two types of Reanimated Dead, the Prowling Dead scattered all around the grounds, and the single group of Defiled Warriors lead by Pindleskin. The Halls of Anguish can have Night Lords as well as Prowling Dead. Though the Prowling Dead are not dangerous by themselves, they are often encountered in groups of four to six and have a habit of chaining charge attacks. Continue on to find the Halls of Pain, home to Unholy Corpses, but also have Death Brawlers and Putrid Defilers. Find the stairs and discover the Halls of Vaught, where Nihlathak is waiting for you.
He has a variety of skills, namely Summon Minion, Teleport and Arctic Blast, but in Nightmare and Hell, he is most famous for his Corpse Explosion ability which can take out even a strong character in two shots. In Normal difficulty, ranged attacks, avoiding slain monsters or some means of consuming corpses can help mitigate this problem, especially if you try to remain close to him and keep your attacks focused. In later difficulties, the area becomes too cluttered with organic landmines and makes it terribly risky, so the player can attempt to remain focused on Nihlathak and keep an eye on your minions/hirelings to make sure that they are also focused on Nihilathak (such as the sorceress using teleport and ensuring that their hireling is not trying to kill a minion). Another suggestion, especially with area-of-effect skills is to have an item with the «Slain Monsters Rest in Peace» attribute such as Nature’s Peace to ensure that anything slain by the player isn’t going to be turned into a one hit fatality. Your minions don’t count as part of that, so keep an eye on them to make sure that they don’t kill anything before Nihlathak is slain. Having corpse-consuming skills will work, but they are not foolproof so use extra care to make sure that there are none near you.
Quest 5: Rite of Passage
Take a breath, restock your potions and ready yourself. Return to the Crystalline Passage and proceed to the exit that will take you to the Glacial Trail. There is a dungeon that might be worth exploring, but that is optional. Like the Passage, there is a waypoint here which should be activated to cut down on travel time should the character die en route to the next area. Continue on (or return) to the exit and begin the trek through the Frozen Tundra. Laid out like the Bloody Foothills and Frigid Highlands, there will periodically be sections with mazelike walls and destructible barriers. Outside of the waypoint, there is a stock dungeon here like the other overland areas marked by a red portal, but there is nothing out-of-the-ordinary to be found here. Once the player reaches the end of the area, you will be returned to another subterranean area, the Ancient’s Way. There is a waypoint which should be activated if the Ancients should prove too much for the character, but its dungeon, the Icy Cellar is completely optional.
Once the waypoint is activated and the exit is discovered, return to town and prepare. When you are ready, return and activate a town portal outside the exit should the Ancients be lucky and suddenly kill the character. The Summit is a small area with three statues and an altar in the middle. Click on the altar, their monologue will start, and upon reaching the end of their speech, the statues will turn into opponents and perhaps the toughest battle in the game will begin. General strategies will be mentioned in the encounters section below, but more class specific information will be given in the articles on the Ancients should the player be seeking it.
When the dust settles and the player defeats the Ancients, they are awarded a very significant experience bonus, enough that a level 23 character can lose a part of it due to the cap on how much can be gained in a single encounter. If someone has walked through the game, this should not be an issue, but people who are rushed through will often wait until they have gained level 24 before attempting this quest. Those in a bigger hurry still need to be at least level 20 to successfully complete this quest. Once this quest is complete, the portcullis on the other side of the area will be unlocked and the players can begin their final quest of the game.
Encounters
In the Glacial Trail, the player can encounter Abominables, Death Slashers, Frozen Terrors, and the Reanimated Hordes. Follow previous advice regarding these monsters. Generally speaking, avoid having large groups of these monsters attack you at once and the trouble should be minimal. There is a unique Reanimated Horde and his minions somewhere named Bonesaw Breaker.
In the Frozen Tundra, the only monsters to be encountered are Demon Imps, Crush Beasts and Catapults so while it may be annoying, the encounters shouldn’t be too difficult. The Ancient’s Way is home to more Death Slashers, Frozen Terrors called Frozen Horrors, Succubi and Moon Lords.
In terms of general strategy when fighting the Ancients, it is a good idea to attempt to separate one of your foes from the other two. There is an exception: summoner necromancers, who should have sufficient minions to keep them from being too much at a time, as long as curses are properly applied. Although mileage will vary, Madawc or Korlic are usually the first ones to break away. As long as there is some source of cold damage and/or some sort of stun effect as smite or knockback, repeated hits will render them mostly harmless. Talic’s Whirlwind skill may not be as dangerous as it is in Nightmare or Hell difficulty, but the skill has multiple hits, so if you are engaging Talic in melee, take a few seconds to stop attacking when he breaks out that skill and let as many hits as possible be rendered as misses. If the player has a melee hireling, having as many healing/rejuvenation potions in your inventory and giving them to him as necessary can help take the edge off the difficulty of this encounter. As well, keeping that hireling maintained with the best items that you can make all the difference when you face the Ancients.
Quest 6: Eve of Destruction
With the Ancients defeated, the player can take a moment to restock their character and allocate stat/skill points as necessary before venturing too far into the Worldstone Keep. Inside, it will be the same situation as it was in the Ancient’s Way: Keep large groups from overwhelming you, utilizing crowd control measures or withdrawing to a safer area should you wind up in that situation. Explore the area, keeping a lookout on the map for reddish markings of the staircase platform. It will be similar with Level 2, only there is a waypoint to be found, and it would be recommended to find it before moving on to Level 3. Avoid standing in one place for too long in this area, as Baal will activate traps of lightning and poison, punctuated by his trademark laughter, and while the traps will cause significant damage to stationary characters, this is much more for atmospheric tension than it is an attempt to kill the characters. The only thing of note for Level 3 will be the stairs to the Throne of Destruction.
While the final leg of this journey can be most easily handled by staying in the middle corridors, as the Blood Lords will attempt to engage you in melee, and the Stygian furies will ignore you if you move out of sight unless they decide to close with the player. It can, however, be cleared as there will be good experience to be gained from characters with level 35-45 and being able to withdraw to these areas may be desirable should the minions in the Throne of Destruction be too much to defeat. The chamber can be quite a difficult place for a solo character walking the game, so a player may decide to draw foes into the lower part of the chamber or even further so foes may be engaged without the Decrepify curse that Baal will regularly cast to further hinder melee/minion based character builds.
Once the chamber is cleared of monsters, the final stage begins. Baal will unleash five waves of opponents representative of the previous four Acts and a final unique monster type for Act 5, all detailed in the next section. If the player encounters too much trouble, they can engage the monsters in these waves further back toward the entrance. It would be recommended to defeat them not only for the experience, but should Lister and his pack prove to be too much for the player, they can circumvent that encounter by opening a town portal near Baal and enticing the pack to follow the player back to the entrance of the area and retreat to town, taking the town portal to the chamber and opening the way for the final encounter: Baal himself.
In general terms, persistence and retreating to town when necessary will always prove to be the main key to a player’s success, although there are some tips in the article on Baal as well as in the section below. Once he is defeated, Tyrael will appear over his corpse and open a portal which will provide a proper exit from Act 5. You can take all the time you want to loot the chamber and listen to the long monologue he has for the finish of the expansion as well as the final cutscene. While a game will still be active for some time if you are playing online, in single player, this will close the game, so be sure you are finished looting before taking the red portal if you’re playing in single player.
Encounters
The first level of the Worldstone Keep is home to Defiled Warriors, Vile Witches and Fetid Defilers. The Vile Witches can be dangerous in groups as they can cast an Amplify Damage curse as well as cast high volumes of missile attacks. Groups of Defiled Warriors can be dangerous should they decide to spam their charge skill. The last monster isn’t much of a threat as it has low damage, often avoids combat and even the spawn it activates in other monsters is hardly considered a threat. Staying mobile and withdrawing to a safer area if their onslaught is overwhelming should prove to be an effective method of dealing with them. Champion and unique versions of Blood Lords can be encountered in this area as well.
The second level is home to Greater Hell Spawn and their Suicide Minion counterparts, with the occasional pack of Hell Lords. Level 3 will host Death Lords, Demon Sprites, Rancid Defilers and Stygian Furies. The same tactics will apply here, however. Proceed with caution so large groups won’t be alerted to your presence, stay mobile and withdraw to a safer area if you should feel overwhelmed.
The Throne of Destruction will have very little variety in Normal difficulty, your foes will be Stygian Furies and Death Lords. Quickly assess the easiest side to clear and quickly engage the foes, should there be any to be found. Having several Stygian Furies launching missile attacks can be surprisingly dangerous, especially with their Amplify Damage curse, so again, stay mobile and be prepared to withdraw to a safer area if necessary. Once the corners are clear, proceed northward with caution. Engage foes as necessary and don’t hesitate to open town portals every so often to shorten your journey. The good news is that Baal’s element traps are not active here, so you can take all the time you want to prepare. And while it is quicker to stick to the two middle corridors, it may be desirable to clear the side passages if the player may need to retreat down this way to deal with the final waves of monsters.
Once the player has entered the room where Baal squats in front of the portal to the Worldstone Chamber, the entire room must be cleared of opponents before the final encounter begins. Once cleared, he will laugh mockingly and unleash five waves of minions. Keep in mind, especially for the third, fourth and fifth waves, that if the anteroom is absent a boss monster, he will launch the next wave. In this way, a player can skip an encounter if they so choose.
The first wave will feature a variety of Fallen Ones called Warped Ones and their leader Colenzo the Annihilator. Deal with them the way you always have, focusing on Colenzo so he won’t raise his slain fellows, just take a bit of care should you have low hit points as his Fire Enchanted property may cause a lethal amount of damage. The second wave will have cold-casting skeleton mages and a group of Unravellers with Achmel the Cursed. Drawing the skeletons into the lower half of the room should be sufficient to prevent their resurrection, and keep an eye on your red (or green) globe as the Unholy Bolt coupled with poison damage can cause a swift death. Another thing to note is that it is very difficult to draw Colenzo and also the Unravellers away from Baal’s sight, so you will have to endure a significant amount of time being decrepified.
The third wave will consist of Council Members led by Bartuc the Bloody. It is recommended to retreat to town after the encounter with Achmel and remove the poisoning as well as hanging back outside of Baal’s sight so the Decrepify curse won’t be a hindrance to you or your minions will help. If necessary, trying to draw them off one or two at a time will make them easier to defeat if you should find them overly difficult as a group. The fourth wave will consist of a group of Extra Fast Venom Lords with Ventar the Unholy. The same thing will apply here. Hang back outside Baal’s sight and draw them off in smaller groups can make all the difference. The final wave will consist of Lister the Tormentor and his Minions of Destruction. They can be exceptionally difficult as they have the property to induce a significant stun effect, and in groups, has lead to the death of many characters unfortunate enough to be hit by one (and then by several) of these foes. As mentioned before, retreating down into the lower part of the Throneroom area and managing to lose them is a successful tactic should players not wish to defeat them in combat.
When the Minons of Destruction are defeated or lost in the lower passages, Baal will laugh mockingly and enter the portal to the Worldstone Chamber. With the portal now accessible, the player can engage Baal in the final battle of the game. Be sure to visit the article on him if you need tips and strategies in dealing with him.
I’ve finished the game! What now?
To increase the replay value of the game, two more levels await the intrepid adventurer not done with the treasures available in the normal difficulty level. While these difficulty levels offer a tough challlenge to the unprepared, they also offer a chance at much greater rewards.
Nightmare Difficulty
Encompassing levels 36-66, this level has the opportunity to drop many useful items to round out a character. Monsters are much more durable, but offer better experience points and the chance of more valuable drops. Additionally, players must work with a 40% penalty to their resistances. Dying offers the penalty of losing 5% of the experience earned for that level. Managing to retreive your corpse(s) will recover 75% of the experience lost. There are many other things which are apparent in Nightmare difficulty, but these tend to be of the most concern. The Arreat Summit has a complete listing of things that are different in Nightmare.
Hell Difficulty
Stretching from levels 67 to 85, this difficulty comprises the greatest challenges the game has to offer. Monsters are exceptionally tough and an unprepared player will quickly notice if they have been lucky enough to build their characters properly. The rewards, however, may definitely outshine the dangers as higher experience points, prized items and high runes are most likely to be dropped by monsters in this difficulty. The penalty to resistances is increased an additional 60% and nearly every monster has at least one immunity. As formidable as the difficulty level can be, it is possible for a player to succeed without «godly» gear if they understand what is necessary to work around the challenges offered by this level of play. A complete listing of differences for Hell difficulty can also be found on the Arreat Summit.
General Tips for Survival in Nightmare and Hell Difficulty
There are four distinct playstyles in Diablo II: Melee, ranged, area-of-effect and minions. All others are merely hybrid of one of the abovementioned styles. What is listed below are some general advice to keep in mind, and although «godly» gear can make things much easier, it is by no means necessary to quest to and defeat Baal in Hell Difficulty.
Melee
Commonly paladins, barbarians, shapeshifter druids, javazons and martial arts assassins will find that getting about 50% crushing blow, some amount of open wounds, and bulking up on resistances will level the playing field, especially in Hell. Adopting an extra element or two of attack such as cold, poison or lightning will also help. Barbarian builds, for example, will often suggest taking one point in Berserk as the damage is completely magic damage, and effective against physically immune monsters. Life leech, faster hit recovery and increased attack speed will also help characters who melee as their prime mode of attack.
Ranged
Although many would consider a Lightning Sorceress and the Bonemancer to be totally different from a Bowazon, all three still play the same way: inflicting damage on an opponent while trying to remain distant, often using Hirelings or other minions to maintain distance from their foes. On the other hand, there are significant differences, build-wise. The Sorceress and Bonemancer will benefit most from having gear to boost their skills as well as items with faster cast rate, while the Bowazon should definitely be on the lookout for items that will increase her attack speed as well as her damage. Having some crushing blow/open wounds/significant elemental damage gear on their hirelings will also go a long way to taking significant pain out of Hell difficulty.
Area-of-Effect
The wind druid, poison nova necromancer and hammerdin would be a part of this category. As being close to an opponent is necessary for maximum effectiveness, faster hit recovery, faster cast rate, skill bonuses and high resistances would maximize the effectiveness of this playstyle.
Minion Builds
While many disdain the druid’s summoning tree, it can certainly help to have strong minions to add to distraction, while the Necromancer’s summoning tree can be a powerful tool when coupled up with Corpse Explosion and properly allocated curses. In the case of the Bowazon (as javazons require too many synergies to have her as more than a disposable ally), a well-allocated Valkyrie is a very rugged, if slow minion and can well outlast most monsters. In these cases, what these builds would benefit most from would be items to boost their relevant skills.
All builds
Above all, a player should know the signs when a monster outmatches the character and avoid the particular monsters if they should be beyond one’s ability to overcome them, or to recognize the shortcomings of the build and look for ways to work around it. Buffing out a hireling, adding elemental damage, investing in an extra skill or looking for easier-to-obtain substitutes for the suggestions found in build guides can mean the difference between success and failure.
Weigh damage potential. While crushing blow is excellent for the initial chunks of a monster’s life bar and open wounds is great for continued damage to even physical immune monsters, these alone will make a quest in Hell difficulty a very long one. Examine the character’s skills closely, and many guides for the same build will include one-point skills that can make a significant difference without breaking that particular build. Build on resistances as elemental attacks, especially in Hell, are quite potent and can be unexpectedly fatal.
Руководства: Версия
Тир-лист Season ThreeТир-лист AoE Density FarmingТир-лист Boss / Elite FarmingКалькулятор способностейБилды: АмазонкаБилды: АссасинБилды: ВарварБилды: ДруидБилды: НекромантБилды: ПаладинБилды: Волшебница
Руководства: Runes and Crafting
Руководство: Farming and Upgrading RunesРуководство: Leveling RunewordsРуководство: All RunewordsРуководство: Horadric CubeРуководство: Crafting RecipesРуководство: Socketed Base Items
Развитие персонажа
Развитие АмазонкаРазвитие АссасинРазвитие ВарварРазвитие ДруидРазвитие НекромантРазвитие ПаладинРазвитие Волшебница
Руководства: Farming
Руководство: Best Magic Find GearРуководство: Farming RunОбзор: Вероятность найти маг-й предметFarming AndarielFarming Lower KurastFarming MephistoFarming Secret Cow Level
Руководства: Item and System
Руководство: Auto MapBase Item QualityBreakpointsBoss AttributesРуководство: CharmsЗащитаGamblingGear SetsСамоцветыРедкость предметаДрагоценные камниНаемникиShrinesРуководство: Sundered Charms
Руководства: Walkthrough
ПандемонийРуководство: Act 1Руководство: Act IIРуководство: Act IIIРуководство: Act IVРуководство: Act V
По вашим критериям руководства. не найдено