
- Manuals
- Brands
- Asus Manuals
- Motherboard
- Motherboard P5GV-MX
- User manual
-
Contents
-
Table of Contents
-
Bookmarks
Quick Links
Related Manuals for Asus P5GV-MX
Summary of Contents for Asus P5GV-MX
-
Page 1
P5GV-MX… -
Page 2
Product warranty or service will not be extended if: (1) the product is repaired, modified or altered, unless such repair, modification of alteration is authorized in writing by ASUS; or (2) the serial number of the product is defaced or missing. -
Page 3: Table Of Contents
Welcome! …………….1-2 Package contents …………..1-2 Special features …………..1-3 1.3.1 Product highlights ……….. 1-3 1.3.2 Innovative ASUS features ……..1-5 Before you proceed ………….. 1-6 Motherboard overview …………1-7 1.5.1 Placement direction ……….1-7 1.5.2 Screw holes …………. 1-7 1.5.3…
-
Page 4
Creating a bootable floppy disk ……2-2 2.1.2 ASUS EZ Flash utility ……….2-3 2.1.3 AFUDOS utility …………2-4 2.1.4 ASUS CrashFree BIOS 2 utility …….. 2-6 2.1.5 ASUS Update utility ……….2-8 BIOS setup program …………2-11 2.2.1 BIOS menu screen ……….2-12 2.2.2… -
Page 5
Support CD information …………3-2 3.2.1 Running the support CD ………. 3-2 3.2.2 Drivers menu …………3-3 3.2.3 Utilities menu …………3-4 3.2.4 ASUS Contact information ……..3-5 Appendix: CPU features Intel EM64T …………….. A-2 ® Using the Intel EM64T feature ……….A-2 ®… -
Page 6: Notices
Notices Federal Communications Commission Statement This device complies with Part 15 of the FCC Rules. Operation is subject to the following two conditions: • This device may not cause harmful interference, and • This device must accept any interference received including interference that may cause undesired operation.
-
Page 7: Safety Information
Safety information Electrical safety • To prevent electrical shock hazard, disconnect the power cable from the electrical outlet before relocating the system. • When adding or removing devices to or from the system, ensure that the power cables for the devices are unplugged before the signal cables are connected.
-
Page 8: About This Guide
Refer to the following sources for additional information and for product and software updates. ASUS websites The ASUS website provides updated information on ASUS hardware and software products. Refer to the ASUS contact information. Optional documentation Your product package may include optional documentation, such as warranty flyers, that may have been added by your dealer.
-
Page 9: Typography
Conventions used in this guide To make sure that you perform certain tasks properly, take note of the following symbols used throughout this manual. DANGER/WARNING: Information to prevent injury to yourself when trying to complete a task. CAUTION: Information to prevent damage to the components when trying to complete a task.
-
Page 10: P5Gv-Mx Specifications Summary
S/PDIF out interface Realtek RTL8100C PCI 10/100M LAN controller ® Supports up to 8 USB 2.0 ports Special features ASUS CPU Lock Free ASUS Q-FAN ASUS MyLogo ASUS EZ Flash ASUS CrashFree BIOS 2 BIOS features 4 MB Flash ROM, AMI BIOS, PnP, DMI2.0, WfM2.0, SM BIOS 2.3, PXE, RPL…
-
Page 11
1 x Serial ATA power cable Form Factor Micro-ATX form factor: 9.6 in x 9.6 in (24.5cm x 24.5cm) Support CD Device drivers contents ASUS PC Probe II ASUS Live Update utility Anti-virus utility (OEM version) *Specifications are subject to change without notice. -
Page 13
This chapter describes the motherboard features and the new technologies it supports. Product introduction ASUS P5GV-MX… -
Page 14: Welcome
® The motherboard delivers a host of new features and latest technologies, making it another standout in the long line of ASUS quality motherboards! Before you start installing the motherboard, and hardware devices on it, check the items in your package with the list below.
-
Page 15: Special Features
See Appendix for details. CPU Lock Free This feature allows you to adjust the CPU multiplier to 14x. Making the appropriate BIOS setting automatically reduces the CPU multiplier value for more flexibility when increasing external FSB. See page 2-22 for details. ASUS P5GV-MX…
-
Page 16
Dual-channel DDR memory support Employing the Double Data Rate (DDR) memory technology, the motherboard supports up to 4GB of system memory using DDR400/333 DIMMs. The ultra-fast 400MHz memory bus delivers the required bandwidth for the latest 3D graphics, multimedia, and Internet applications. See page 1-16 for details. -
Page 17: Innovative Asus Features
ROM chip. See details on page 2-6. ASUS Q-Fan technology The ASUS Q-Fan technology smartly adjusts the CPU fan speed according to the system loading to ensure quiet, cool, and efficient operation. See page 2-30 for details.
-
Page 18: Before You Proceed
Before you proceed Take note of the following precautions before you install motherboard components or change any motherboard setting. • Unplug the power cord from the wall socket before touching any component. • Use a grounded wrist strap or touch a safely grounded object or a metal object, such as the power supply case, before handling components to avoid damaging them due to static electricity.
-
Page 19: Motherboard Overview
Place eight (8) screws into the holes indicated by circles to secure the motherboard to the chassis. Do not overtighten the screws! Doing so can damage the motherboard. Place this side towards the rear of the chassis P5GV-MX ASUS P5GV-MX…
-
Page 20: Motherboard Layout
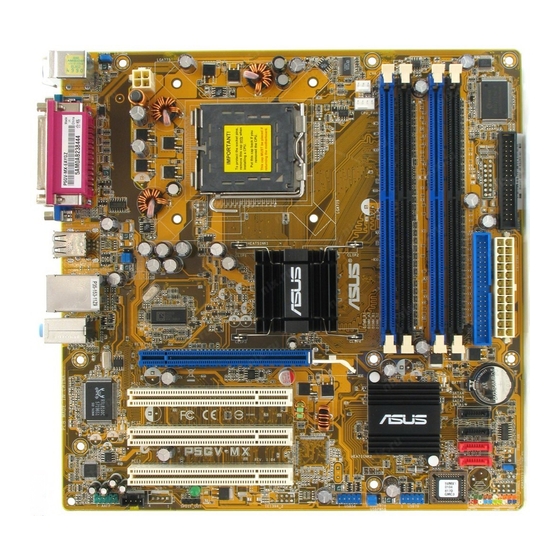
1.5.3 Motherboard layout 24.5cm(9.6in) KBPWR PS/2KBMS CHA_FAN ATX12V T: Mouse B: Keyboard CPU_FAN COM1 LGA775 F_USB12 LAN_USB34 ® Intel 915GV Top:Rear Speaker Out Center: Side Speaker Out Below: Center/Subwoofer PCIEX16(x4 mode) CR2032 3V Lithium Cell CMOS Power PCI1 RTL8100C Intel SATA4 ICH6 PCI2…
-
Page 21: Central Processing Unit (Cpu)
PnP cap/socket pins/motherboard components. ASUS shoulders the repair cost only if the damage is shipment/transit-related. • Keep the cap after installing the motherboard. ASUS will process Return Merchandise Authorization (RMA) requests only if the motherboard comes with the cap on the LGA775 socket.
-
Page 22
Press the load lever with your thumb (A) and move it to the left (B) until it is released from the retention tab. PnP Cap Retention tab Load lever This side of the cam box should face you. To prevent damage to the socket pins, do not remove the PnP cap unless you are installing a CPU. -
Page 23
The motherboard supports Intel Pentium 4 LGA775 processors with ® ® the Intel Enhanced Memory 64 Technology (EM64T), Enhanced Intel ® SpeedStep Technology (EIST), and Hyper-Threading Technology. Refer ® to the Appendix for more information on these CPU features. ASUS P5GV-MX 1-11… -
Page 24: Installing The Cpu Heatsink And Fan
1.6.2 Installing the CPU heatsink and fan The Intel Pentium 4 LGA775 processor requires a specially designed ® ® heatsink and fan assembly to ensure optimum thermal condition and performance. • Install the motherboard to the chassis before you install the CPU fan and heatsink assembly.
-
Page 25
When the fan and heatsink assembly is in place, connect the CPU fan cable to the connector on the motherboard labeled CPU_FAN. Do not forget to connect the CPU fan connector! Hardware monitoring errors can occur if you fail to plug this connector. ASUS P5GV-MX 1-13… -
Page 26: Uninstalling The Cpu Heatsink And Fan
1.6.3 Uninstalling the CPU heatsink and fan To uninstall the CPU heatsink and fan: Disconnect the CPU fan cable from the connector on the motherboard. Rotate each fastener counterclockwise. Pull up two fasteners at a time in a diagonal sequence to disengage the heatsink and fan assembly from the motherboard.
-
Page 27
Remove the heatsink and fan assembly from the motherboard. Rotate each fastener clockwise to reset the orientation. Narrow end of the groove When reset, each fastener should be oriented as shown, with the narrow groove directed outward. ASUS P5GV-MX 1-15… -
Page 28: System Memory
System memory 1.7.1 Overview The motherboard comes with four 184-pin Double Data Rate (DDR) Dual Inline Memory Modules (DIMM) sockets. The following figure illustrates the location of the sockets: P5GV-MX P5GV-MX 184-pin DDR DIMM Sockets 1.7.2 Memory Configurations You may install 256 MB, 512 MB and 1 GB unbuffered non-ECC DDR DIMMs into the DIMM sockets using the memory configurations in this section.
-
Page 29
512MB Winbond DDR333-512 Winbond W942508BH-6 • • • 512MB Winbond U24512ADWBG6H20 Winbond W942508CH-5 • • • 256MB Elpida U24256ADEPG6H20 Elpida DD2508AKTA-5C • • • 512MB Elpida U24512ADEPG6H20 Elpida DD2508AMTA • • • (Continued on the next page) ASUS P5GV-MX 1-17… -
Page 30
DDR400 Qualified Vendors List DIMM support Size Vendor Model Brand Side(s) Component 256MB Transcend DDR400-256 Samsung K4H560838F-TCCC • • • 256MB Transcend DDR400-256 Mosel V58C2256804SAT5B • • • 512MB Transcend 102709-0001 A2S56D3OATP • • • 512MB Transcend DDR400-512 Mosel V58C2256804SAT5B •… -
Page 31: Installing A Dimm
DIMM. DDR DIMM notch Support the DIMM lightly with your fingers when pressing the retaining clips. The DIMM might get damaged when it flips out with extra force. Remove the DIMM from the socket. ASUS P5GV-MX 1-19…
-
Page 32: Expansion Slots
Expansion slots In the future, you may need to install expansion cards. The following sub-sections describe the expansion slots and the cards that they support. Make sure to unplug the power cord before adding or removing expansion cards. Failure to do so may cause you physical injury and damage to the motherboard components.
-
Page 33: Interrupt Assignments
When using PCI cards on shared slots, ensure that the drivers support “Share IRQ” or that the cards do not need IRQ assignments. Otherwise, conflicts will arise between the two PCI groups, making the system unstable and the card inoperable. ASUS P5GV-MX 1-21…
-
Page 34: Pci Slots
PCI Express x16 slot. Qualified PCI Express x16 graphics cards Model Install only qualified PCI Express graphics cards on this ASUS EAX300SE/T motherboard. Other graphics ASUS EAX300SE/TD cards may cause graphics display errors or system boot ASUS EAX600XT failure.
-
Page 35: Jumpers
You do not need to clear the RTC when the system hangs due to overclocking. For system failure due to overclocking, use the C.P.R. (CPU Parameter Recall) feature. Shut down and reboot the system so the BIOS can automatically restore parameter settings to default values. ASUS P5GV-MX 1-23…
-
Page 36
USB device wake-up (3-pin USBPW12, USBPW34, USBPW56, USBPW78) Set these jumpers to +5V to wake up the computer from S1 sleep mode (CPU stopped, DRAM refreshed, system running in low power mode) using the connected USB devices. Set to +5VSB to wake up from S3 or S4 sleep mode (no power to CPU, DRAM in slow refresh, power supply in reduced power mode). -
Page 37
(the default is the Space Bar). This feature requires an ATX power supply that can supply at least 1A on the +5VSB lead, and a corresponding setting in the BIOS. KBPWR +5VSB (Default) P5GV-MX P5GV-MX Keyboard Power Setting ASUS P5GV-MX 1-25… -
Page 38: 1.10 Connectors
1.10 Connectors 1.10.1 Rear panel connectors PS/2 mouse port (green). This port is for a PS/2 mouse. Parallel port. This 25-pin port connects a parallel printer, a scanner, or other devices. LAN (RJ-45) port. This port allows 10/100Mbps connection to a Local Area Network (LAN) through a network hub.
-
Page 39: 1.10.2 Internal Connectors
IDE cable. • Use an 80-conductor IDE cable for Ultra DMA 100/66/33 IDE devices. PRI_IDE NOTE: Orient the red markings (usually zigzag) on the IDE ribbon cable to PIN 1. P5GV-MX P5GV-MX IDE Connector PIN 1 ASUS P5GV-MX 1-27…
-
Page 40
Floppy disk drive connector (34-1 pin FLOPPY) This connector is for the provided Floppy Disk Drive (FDD) signal cable. Insert one end of the cable to this connector, then connect the other end to the signal connector at the back of the floppy disk drive. Pin 5 on the connector is removed to prevent incorrect cable connection when using an FDD cable with a covered Pin 5. -
Page 41: Serial Ata Connectors
Plug your Serial ATA boot disk on the master port (SATA1 and SATA2) to support S3 function. Refer to the table below for details. Serial ATA Master/Slave connectors Connector Setting SATA1, SATA2 Master Boot disk SATA3, SATA4 Slave Data disk ASUS P5GV-MX 1-29…
-
Page 42
USB connectors (10-1 pin USB56, USB78) These connectors are for USB 2.0/1.1 ports. Connect the USB/GAME module cable to any of these connectors, then install the module to a slot opening at the back of the system chassis. P5GV-MX USB56 USB78 P5GV-MX USB 2.0 Connectors Never connect a 1394 cable to the USB connectors. -
Page 43: Atx Power Connectors
+12 Volts +5 Volts +5V Standby +5 Volts Power OK -5 Volts Ground Ground +5 Volts Ground Ground Ground +5 Volts PSON# P5GV-MX Ground Ground +3 Volts -12 Volts P5GV-MX ATX Power Connectors +3 Volts +3 Volts ASUS P5GV-MX 1-31…
-
Page 44
Front panel audio connector (10-1 pin AAFP) This connector is for a chassis-mounted front panel audio I/O module that supports either HD Audio or legacy AC ʻ97 audio standard. Connect one end of the front panel audio I/O module cable to this connector. -
Page 45: System Panel Connector
ON turns the system OFF. • Reset button (Blue 2-pin RESET) This 2-pin connector is for the chassis-mounted reset button for system reboot without turning off the system power. ASUS P5GV-MX 1-33…
-
Page 46
1-34 Chapter 1: Product introduction… -
Page 47
This chapter tells how to change the system settings through the BIOS Setup menus. Detailed descriptions of the BIOS parameters are also provided. BIOS setup ASUS P5GV-MX… -
Page 48: Managing And Updating Your Bios
The following utilities allow you to manage and update the motherboard Basic Input/Output System (BIOS) setup. ASUS AFUDOS (Updates the BIOS in DOS mode using a bootable floppy disk.) ASUS EZ Flash (Updates the BIOS using a floppy disk during POST.) ASUS CrashFree BIOS 2 (Updates the BIOS using a bootable floppy…
-
Page 49: Asus Ez Flash Utility
2.1.2 ASUS EZ Flash utility The ASUS EZ Flash feature allows you to update the BIOS without having to go through the long process of booting from a floppy disk and using a DOS-based utility. The EZ Flash utility is built-in the BIOS chip so it is accessible by pressing <Alt>…
-
Page 50: Afudos Utility
2.1.3 AFUDOS utility The AFUDOS utility allows you to update the BIOS file in DOS environment using a bootable floppy disk with the updated BIOS file. This utility also allows you to copy the current BIOS file that you can use as backup when the BIOS fails or gets corrupted during the updating process.
-
Page 51: Updating The Bios File
Updating the BIOS file To update the BIOS file using the AFUDOS utility: Visit the ASUS website (www.asus.com) and download the latest BIOS file for the motherboard. Save the BIOS file to a bootable floppy disk. Write the BIOS filename on a piece of paper. You need to type the exact BIOS filename at the DOS prompt.
-
Page 52: Asus Crashfree Bios 2 Utility
2.1.4 ASUS CrashFree BIOS 2 utility The ASUS CrashFree BIOS 2 is an auto recovery tool that allows you to restore the BIOS file when it fails or gets corrupted during the updating process. You can update a corrupted BIOS file using the motherboard support CD or the floppy disk that contains the updated BIOS file.
-
Page 53: Recovering The Bios From The Support Cd
Restart the system after the utility completes the updating process. The recovered BIOS may not be the latest BIOS version for this motherboard. Visit the ASUS website (www.asus.com) to download the latest BIOS file. ASUS P5GV-MX…
-
Page 54: Asus Update Utility
2.1.5 ASUS Update utility The ASUS Update is a utility that allows you to manage, save, and update the motherboard BIOS in Windows environment. The ASUS Update utility ® allows you to: • Save the current BIOS file • Download the latest BIOS file from the Internet •…
-
Page 55: Updating The Bios Through The Internet
To update the BIOS through the Internet: Launch the ASUS Update utility from the Windows desktop by ® clicking Start > Programs > ASUS > ASUSUpdate > ASUSUpdate. The ASUS Update main window appears. Select Update BIOS from Select the ASUS FTP site…
-
Page 56: Updating The Bios Through A Bios File
To update the BIOS through a BIOS file: Launch the ASUS Update utility from the Windows desktop by ® clicking Start > Programs > ASUS > ASUSUpdate > ASUSUpdate. The ASUS Update main window appears. Select Update BIOS from a file option from the drop-down menu, then click Next.
-
Page 57: Bios Setup Program
The BIOS setup screens shown in this section are for reference purposes only, and may not exactly match what you see on your screen. • Visit the ASUS website (www.asus.com) to download the latest BIOS file for this motherboard. ASUS P5GV-MX 2-11…
-
Page 58: Bios Menu Screen
2.2.1 BIOS menu screen Menu items Menu bar Configuration fields General help System Time [11:51:19] Use [ENTER], [TAB] System Date [Thu 09/08/2005] or [SHIFT-TAB] to Legacy Diskette A [1.44M, 3.5 in] select a field. Primary IDE Master : [ST320413A] Use [+] or [-] to Primary IDE Slave : [Not Detected] configure system time.
-
Page 59: Menu Items
[English] Use [+] or [-] to For example, selecting Main shows the Primary IDE Master :[ST320413A] configure system time. Primary IDE Slave :[ASUS CD-S340] Secondary IDE Master :[Not Detected] Secondary IDE Slave :[Not Detected] Main menu items. Third IDE Master…
-
Page 60: Main Menu
Main menu When you enter the BIOS Setup program, the Main menu screen appears, giving you an overview of the basic system information. Refer to section “2.2.1 BIOS menu screen” for information on the menu screen items and how to navigate through them. System Time [11:51:19] Use [ENTER], [TAB]…
-
Page 61: Primary, Third And Fourth Ide Master/Slave
When set to [Disabled], the data transfer from and to the device occurs one sector at a time. Configuration options: [Disabled] [Auto] ASUS P5GV-MX 2-15…
-
Page 62
PIO Mode [Auto] Selects the PIO mode. Configuration options: [Auto] [0] [1] [2] [3] [4] DMA Mode [Auto] Selects the DMA mode. Configuration options: [Auto] [SWDMA0] [SWDMA1] [SWDMA2] [MWDMA0] [MWDMA1] [MWDMA2] [UDMA0] [UDMA1] [UDMA2] [UDMA3] [UDMA4] [UDMA5] [UDMA6] SMART Monitoring [Auto] Sets the Smart Monitoring, Analysis, and Reporting Technology. -
Page 63: Ide Configuration
If you set to any of these options and encountered problems, revert to the default setting S-ATA. Configuration options: [S-ATA+P-ATA] [S-ATA] [P-ATA] IDE Detect Time Out [35] Selects the time out value for detecting ATA/ATAPI devices. Configuration options: [0] [5] [10] [15] [20] [25] [30] [35] ASUS P5GV-MX 2-17…
-
Page 64: System Information
2.3.6 System Information This menu gives you an overview of the general system specifications. The BIOS automatically detects the items in this menu. AMIBIOS Version : 0203 Build Date : 09/14/05 Processor Type : Genuine Intel(R) CPU 3.80GHz Speed : 3800MHz Count System Memory Size…
-
Page 65: Advanced Menu
<-> keys to adjust the CPU frequency. You can also type the desired CPU frequency using the numeric keypad. The values range from 100 to 450. Refer to the table below for the correct Front Side Bus and CPU External Frequency settings. ASUS P5GV-MX 2-19…
-
Page 66
FSB/CPU External Frequency Synchronization Front Side Bus CPU External Frequency FSB 800 200 MHz FSB 533 133 MHz DRAM Frequency [Auto] Allows you to set the DDR operating frequency. Configuration options: [Auto] [333MHz] [400MHz] Selecting a very high DRAM frequency may cause the system to become unstable! If this happens, revert to the default setting. -
Page 67: Usb Configuration
Allows you to enable support for operating systems without an EHCI hand-off feature. Configuration options: [Enabled] [Disabled] DO NOT disable the BIOS EHCI Hand-Off option if you are running a Windows operating system with USB device. ® ASUS P5GV-MX 2-21…
-
Page 68: Cpu Configuration
2.4.3 CPU Configuration The items in this menu show the CPU-related information that the BIOS automatically detects. Sets the ratio between Configure Advanced CPU settings CPU Core Clock and the FSB Frequency. Manufacturer: Intel Brand String: Genuine Intel(R) CPU 3.80GHz NOTE: If an invalid Frequency : 3800 MHz…
-
Page 69: Chipset
Select an item then press <Enter> to display the sub-menu. Advanced Chipset Settings Configure DRAM Timing by SPD [Enabled] Booting Graphic Adapter Priority [PCI/Int-VGA] Pre-allocated Graphics Memory [Enabled, 8MB] Graphics memory type [Auto] Select Screen Select Item ASUS P5GV-MX 2-23 Change Option General Help Save and Exit Exit…
-
Page 70: Advanced Chipset Settings
Advanced Chipset Settings Configure DRAM Timing by SPD [Enabled] When this item is enabled, the DRAM timing parameters are set according to the DRAM SPD (Serial Presence Detect). When disabled, you can manually set the DRAM timing parameters through the DRAM sub-items. The following sub-items appear when this item is Disabled.
-
Page 71: Onboard Devices Configuration
Parallel Port ECP DMA. Configuration options: [DMA0] [DMA1] [DMA3] EPP Version [1.9] Allows selection of the Parallel Port EPP version. This item appears only when the Parallel Port Mode is set to EPP. Configuration options: [1.9] [1.7] ASUS P5GV-MX 2-25…
-
Page 72: Pci Pnp
Parallel Port IRQ [IRQ7] Configuration options: [IRQ5] [IRQ7] 2.4.6 PCI PnP The PCI PnP menu items allow you to change the advanced settings for PCI/PnP devices. The menu includes setting IRQ and DMA channel resources for either PCI/PnP or legacy ISA devices, and setting the memory size block for legacy ISA devices.
-
Page 73: Power Menu
Allows you to enable or disable the Advanced Configuration and Power Interface (ACPI) support in the Application-Specific Integrated Circuit (ASIC). When set to Enabled, the ACPI APIC table pointer is included in the RSDT pointer list. Configuration options: [Disabled] [Enabled] ASUS P5GV-MX 2-27…
-
Page 74: Apm Configuration
2.5.5 APM Configuration APM Configuration Enabled or disable APM. Restore on AC Power Loss [Power Off] Resume On RTC Alarm [Disabled] Resume On Ring [Disabled] Resume On PME# [Disabled] Power On By PS/2 Keyboard [Enabled] Keyboard Wakeup Password : Not Installed Power On By PS/2 Mouse [Disabled] Select Screen…
-
Page 75
When set to Enabled, this parameter allows you to use the PS/2 mouse to turn on the system. This feature requires an ATX power supply that provides at least 1A on the +5VSB lead. Configuration options: [Disabled] [Enabled] ASUS P5GV-MX 2-29… -
Page 76: Hardware Monitor
Configuration options: [Ignored] [xxx C/xxx CPU Q-Fan Control [Disabled] Allows you to enable or disable the ASUS Q-Fan feature that smartly adjusts the fan speeds for more efficient system operation. Configuration options: [Disabled] [Enabled] The CPU Fan Ratio and CPU Target Temperature items appear when you enable the CPU Q-Fan Control feature.
-
Page 77: Boot Menu
The Boot menu items allow you to change the system boot options. Select an item then press <Enter> to display the sub-menu. APM Configuration Boot Device Priority Boot Settings Configuration Security Select Screen Select Item Enter Go to Sub-screen General Help Save and Exit Exit ASUS P5GV-MX 2-31…
-
Page 78: Boot Device Priority
1st Boot Device [1st FLOPPY DRIVE] 2nd Boot Device [PM-ST330620A] 3rd Boot Device [PS-ASUS CD-S360] 1st ~ xxth Boot Device [1st Floppy Drive] Select Screen These items specify the boot device priority from the available devices. The Select Item Enter Go to Sub-screen…
-
Page 79
This allows you to enable or disable the full screen logo display feature. Configuration options: [Disabled] [Enabled] Set this item to [Enabled] to use the ASUS MyLogo™ feature. Add On ROM Display Mode [Force BIOS] Sets the display mode for option ROM. -
Page 80: Security
2.6.4 Security The Security menu items allow you to change the system security settings. Select an item then press <Enter> to display the configuration options. Security Settings <Enter> to change password. Supervisor Password : Installed <Enter> again to User Password : Installed disabled password.
-
Page 81: Change User Password
<Enter>. Confirm the password when prompted. The message “Password Installed” appears after you set your password successfully. To change the user password, follow the same steps as in setting a user password. ASUS P5GV-MX 2-35…
-
Page 82: Exit Menu
Clear User Password Select this item to clear the user password. Password Check [Setup] When set to [Setup], BIOS checks user password when accessing the Setup utility. When set to [Always], BIOS checks user password whenever accessing Setup or booting the system. Configuration options: [Setup] [Always] Exit menu The Exit menu items allow you to load the optimal or failsafe default values…
-
Page 83: Discard Changes
Setup menus. When you select this option or if you press <F5>, a confirmation window appears. Select OK to load default values. Select Exit & Save Changes or make other changes before saving the values to the non-volatile RAM. ASUS P5GV-MX 2-37…
-
Page 84
2-38 Chapter 2: BIOS setup… -
Page 85: Chapter 3: Software Support
This chapter describes the contents of the support CD that comes with the motherboard package. Software support ASUS P5GV-MX…
-
Page 86: Installing An Operating System
The contents of the support CD are subject to change at any time without notice. Visit the ASUS website(www.asus.com) for updates. 3.2.1 Running the support CD Place the support CD to the optical drive.
-
Page 87: Drivers Menu
® using Windows Server 2003 Pack 1, Windows XP Professional x64 ® ® Edition, or Windows Server 2003 x64 Edition operating system. ® • Download the latest OS patch for normal audio operation from http://support.microsoft.com/?kbid=901105. ASUS P5GV-MX…
-
Page 88: Utilities Menu
This utility helps you keep your computer in healthy operating condition. ASUS Update The ASUS Update utility allows you to update the motherboard BIOS in a Windows environment. This utility requires an Internet connection either ®…
-
Page 89: Asus Contact Information
® ASUS Screen Saver Installs the ASUS screen saver. 3.2.4 ASUS Contact information Click the Contact tab to display the ASUS contact information. You can also find this information on the inside front cover of this user guide. ASUS P5GV-MX…
-
Page 90
Chapter 3: Software support… -
Page 91: Cpu Features
The Appendix describes the CPU features that the motherboard supports. CPU features ASUS P5GV-MX…
-
Page 92: Appendix: Cpu Features
32-bit operating systems. • The motherboard comes with a BIOS file that supports EM64T. You can download the latest BIOS file from the ASUS website (www.asus. com/support/download/) if you need to update the BIOS file. See Chapter 2 for details.
-
Page 93: Using The Eist
Click Apply, then click OK. 10. Close the Display Properties window. After you adjust the power scheme, the CPU internal frequency slightly decreases when the CPU loading is low. The screen displays and procedures may vary depending on the operating system. ASUS P5GV-MX…
-
Page 94: Intel ® Hyper-Threading Technology
Intel Hyper-Threading Technology ® • The motherboard supports Intel Pentium 4 LGA775 processors ® ® with Hyper-Threading Technology. • Hyper-Threading Technology is supported under only Windows ® XP/2003 Server and Linux 2.4.x (kernel) and later versions. Under Linux, use the Hyper-Threading compiler to compile the code. If you are using any other operating systems, disable the Hyper-Threading Techonology item in the BIOS to ensure system stability and performance.
-
Драйверы
19
-
Инструкции по эксплуатации
12
Языки:

ASUS P5GV-MX инструкция по эксплуатации
(94 страницы)
- Языки:Английский
-
Тип:
PDF -
Размер:
4.87 MB -
Описание:
P5GV-MX User’s Manual for English Edition (E2254)
Просмотр

ASUS P5GV-MX инструкция по эксплуатации
(88 страниц)
- Языки:Английский
-
Тип:
PDF -
Размер:
4.32 MB -
Описание:
P5GV-MX User’s Manual for English Edition (E2580)
Просмотр

ASUS P5GV-MX инструкция по эксплуатации
(40 страниц)
- Языки:Молдавский, Немецкий
-
Тип:
PDF -
Размер:
1.65 MB -
Описание:
Motherboard Installation Guide (German)
Motherboard Installation Guide (German)
Просмотр

ASUS P5GV-MX инструкция по эксплуатации
(94 страницы)
- Языки:Китайский
-
Тип:
PDF -
Размер:
2.77 MB -
Описание:
P5GV-MX User’s Manual for Traditional Chinese Edition (T2254)
Просмотр

ASUS P5GV-MX инструкция по эксплуатации
(94 страницы)
- Языки:Немецкий
-
Тип:
PDF -
Размер:
3.65 MB -
Описание:
P5GV-MX User’s Manual for German Edition (G2254)
Просмотр

ASUS P5GV-MX инструкция по эксплуатации
(94 страницы)
- Языки:Французский
-
Тип:
PDF -
Размер:
3.7 MB -
Описание:
P5GV-MX User’s Manual for French Edition (F2254)
Просмотр

ASUS P5GV-MX инструкция по эксплуатации
(44 страницы)
- Языки:Китайский, Молдавский
-
Тип:
PDF -
Размер:
1.88 MB -
Описание:
Motherboard Installation Guide (Simplified Chinese)
Просмотр

ASUS P5GV-MX инструкция по эксплуатации
(44 страницы)
- Языки:Китайский, Молдавский
-
Тип:
PDF -
Размер:
2.02 MB -
Описание:
Motherboard Installation Guide (Traditional Chinese)
Просмотр

ASUS P5GV-MX инструкция по эксплуатации
(8 страниц)
- Языки:Китайский, Молдавский
-
Тип:
PDF -
Размер:
2.67 MB -
Описание:
Motherboard DIY Troubleshooting Guide (Traditional Chinese version)
Просмотр

ASUS P5GV-MX инструкция по эксплуатации
(40 страниц)
- Языки:Молдавский, Японский
-
Тип:
PDF -
Размер:
1.73 MB -
Описание:
Motherboard Installation Guide (Japanese)
Просмотр

ASUS P5GV-MX инструкция по эксплуатации
(40 страниц)
- Языки:Молдавский, Французский
-
Тип:
PDF -
Размер:
1.64 MB -
Описание:
Motherboard Installation Guide (French)
Просмотр

ASUS P5GV-MX инструкция по эксплуатации
(721 страница)
- Языки:Молдавский
-
Тип:
PDF -
Размер:
43.88 MB -
Описание:
Motherboard Installation Guide (Multiple Languages)
Просмотр
На NoDevice можно скачать инструкцию по эксплуатации для ASUS P5GV-MX. Руководство пользователя необходимо для ознакомления с правилами установки и эксплуатации ASUS P5GV-MX. Инструкции по использованию помогут правильно настроить ASUS P5GV-MX, исправить ошибки и выявить неполадки.
Краткое содержание страницы № 1
P5GV-MX
Motherboard
Краткое содержание страницы № 2
E2580 Revised Edition V2.0 April 2006 Copyright © 2006 ASUSTeK COMPUTER INC. All Rights Reserved. No part of this manual, including the products and software described in it, may be reproduced, transmitted, transcribed, stored in a retrieval system, or translated into any language in any form or by any means, except documentation kept by the purchaser for backup purposes, without the express written permission of ASUSTeK COMPUTER INC. (“ASUS”). Product warranty or service will not be extende
Краткое содержание страницы № 3
Contents Notices …………………………………………………………………………………… vi Safety information ………………………………………………………………….. vii About this guide ………………………………………………………………………viii Typography …………………………………………………………………………….. ix P5GV-MX specifications summary ………………………………………
Краткое содержание страницы № 4
Contents Chapter 2: BIOS setup 2.1 Managing and updating your BIOS …………………………………. 2-2 2.1.1 Creating a bootable floppy disk ………………………… 2-2 2.1.2 ASUS EZ Flash utility ……………………………………….. 2-3 2.1.3 AFUDOS utility ……………………………………………….. 2-4 2.1.4 ASUS CrashFree BIOS 2 utility ………………………….. 2-6 2.1.5 ASUS Update utility ……………………………………….. 2-8 2.
Краткое содержание страницы № 5
Contents 2.5.4 ACPI APIC Support ……………………………………….. 2-27 2.5.5 APM Configuration ………………………………………… 2-28 2.5.6 Hardware Monitor ………………………………………….. 2-30 2.6 Boot menu ……………………………………………………………….. 2-31 2.6.1 Boot Device Priority ………………………………………. 2-32 2.6.2 Hard Disk Drives ……………………………………………. 2-32 2.6
Краткое содержание страницы № 6
Notices Federal Communications Commission Statement This device complies with Part 15 of the FCC Rules. Operation is subject to the following two conditions: • This device may not cause harmful interference, and • This device must accept any interference received including interference that may cause undesired operation. This equipment has been tested and found to comply with the limits for a Class B digital device, pursuant to Part 15 of the FCC Rules. These limits are designed to provide r
Краткое содержание страницы № 7
Safety information Electrical safety • To prevent electrical shock hazard, disconnect the power cable from the electrical outlet before relocating the system. • When adding or removing devices to or from the system, ensure that the power cables for the devices are unplugged before the signal cables are connected. If possible, disconnect all power cables from the existing system before you add a device. • Before connecting or removing signal cables from the motherboard, ensure that all power
Краткое содержание страницы № 8
About this guide This user guide contains the information you need when installing and configuring the motherboard. How this guide is organized This manual contains the following parts: • Chapter 1: Product introduction This chapter describes the features of the motherboard and the new technologies it supports. This chapter also lists the hardware setup procedures that you have to perform when installing system components. It includes description of the jumpers and connectors on the motherbo
Краткое содержание страницы № 9
Conventions used in this guide To make sure that you perform certain tasks properly, take note of the following symbols used throughout this manual. DANGER/WARNING: Information to prevent injury to yourself when trying to complete a task. CAUTION: Information to prevent damage to the components when trying to complete a task. IMPORTANT: Instructions that you MUST follow to complete a task. NOTE: Tips and additional information to help you complete a task. Typography Bold
Краткое содержание страницы № 10
P5GV-MX specifications summary ® ® ® CPU LGA775 socket for Intel Pentium 4/Celeron processor ® Compatible with the Intel PCG 04A and 04B processors ® Supports Intel Enhanced Intel SpeedStep Technology (EIST) ® Supports Intel Enhanced Memory 64 Technology (EM64T) ® Supports Intel Hyper-Threading Technology ® Chipset Intel 915GV ® Intel ICH6 Front Side Bus 800/533 MHz Memory Dual-channel memory architecture 4 x 184-pin DIMM sockets support up to 4GB of unbufferred non-ECC 400/333
Краткое содержание страницы № 11
P5GV-MX specifications summary Internal 1 x CPU fan connector connectors 1 x Chassis fan connector 1 x 24-pin ATX power connector 1 x 4-pin ATX 12 V power connector 2 x USB 2.0 connectors for 4 additional USB 2.0 ports 1 x CD audio-in connector 1 x Front panel high-definition audio connector 1 x S/PDIF out connector System panel connector Manageability WfM 2.0, DMI2.0, WOL by PME, WOR by PME, SM Bus, Accessary Userʼs manual UltraDMA cable FDD
Краткое содержание страницы № 12
xii
Краткое содержание страницы № 13
This chapter describes the motherboard features and the new technologies it supports. Product 1 introduction ASUS P5GV-MX 1-1
Краткое содержание страницы № 14
1.1 Welcome! ® Thank you for buying an ASUS P5GV-MX motherboard! The motherboard delivers a host of new features and latest technologies, making it another standout in the long line of ASUS quality motherboards! Before you start installing the motherboard, and hardware devices on it, check the items in your package with the list below. 1.2 Package contents Check your motherboard package for the following items. Motherboard ASUS P5GV-MX motherboard Cables 1 x Serial ATA signal cable 1 x Seria
Краткое содержание страницы № 15
1.3 Special features 1.3.1 Product highlights Latest processor technology The motherboard comes with a 775-pin surface mount Land Grid Array ® ® ® ® (LGA) socket designed for the Intel Pentium 4 or Intel Celeron ® processor in the 775-land package. The motherboard supports the Intel ® Pentium 4 processor with 800/533 MHz Front Side Bus (FSB). The ® motherboard also supports the Intel Hyper-Threading Technology and ® is fully compatible with Intel 04B and 04A processors. See page 1-9 for
Краткое содержание страницы № 16
Dual-channel DDR memory support Employing the Double Data Rate (DDR) memory technology, the motherboard supports up to 4GB of system memory using DDR400/333 DIMMs. The ultra-fast 400MHz memory bus delivers the required bandwidth for the latest 3D graphics, multimedia, and Internet applications. See page 1-16 for details. PCI Express™ interface (max 2GB/s transfer rate, x4 mode) The motherboard fully supports PCI Express, the latest I/O interconnect technology that speeds up the PCI b
Краткое содержание страницы № 17
USB 2.0 technology The motherboard implements the Universal Serial Bus (USB) 2.0 specification, dramatically increasing the connection speed from the 12Mbps bandwidth on USB 1.1 to a faster 480Mbps on USB 2.0. USB 2.0 is backward compatible with USB 1.1. See pages 1-24, 1-27, 1-30 and 2-21 for details. Temperature, fan, and voltage monitoring The CPU temperature is monitored by the Winbond Super I/O to prevent overheating and damage. The system fan rotation per minute (RPM) is monitored f
Краткое содержание страницы № 18
1.4 Before you proceed Take note of the following precautions before you install motherboard components or change any motherboard setting. • Unplug the power cord from the wall socket before touching any component. • Use a grounded wrist strap or touch a safely grounded object or a metal object, such as the power supply case, before handling components to avoid damaging them due to static electricity. • Hold components by the edges to avoid touching the ICs on them. • Whenever you uninstall
Краткое содержание страницы № 19
1.5 Motherboard overview Before you install the motherboard, study the configuration of your chassis to ensure that the motherboard fits into it. Make sure to unplug the power cord before installing or removing the motherboard. Failure to do so can cause you physical injury and damage to the motherboard components. 1.5.1 Placement direction When installing the motherboard, make sure that you place it into the chassis in the correct orientation. The edge with external ports goes to the rear p
Краткое содержание страницы № 20
1.5.3 Motherboard layout 24.5cm(9.6in) PS/2KBMS KBPWR CHA_FAN T: Mouse ATX12V B: Keyboard CPU_FAN COM1 LGA775 VGA F_USB12 LAN_USB34 ® Intel Top:Rear Speaker Out 915GV Center: Side Speaker Out Below: MCH Center/Subwoofer PCIEX16(x4 mode) CR2032 3V Lithium Cell CMOS Power PCI1 RTL8100C Intel SATA4 ICH6 SATA3 PCI2 SATA2 P5GV-MX CLRTC SATA1 PCI3 AD1986A USBPW78 4Mb USB56 USB78 PANEL SB_PWR USBPW56 BIOS AAFP CD SPDIF_OUT 1-8 Chapter 1: Product introduction PARALLEL PORT USBPW34 USBPW12 ® DDR DIMM_A1
E2254
First Edition
October 2005
Copyright © 2005 ASUSTeK COMPUTER INC. All Rights Reserved.
No part of this manual, including the products and software described in it, may be reproduced,
transmitted, transcribed, stored in a retrieval system, or translated into any language in any form
or by any means, except documentation kept by the purchaser for backup purposes, without the
express written permission of ASUSTeK COMPUTER INC. («ASUS»).
Product warranty or service will not be extended if: (1) the product is repaired, modified or
altered, unless such repair, modification of alteration is authorized in writing by ASUS; or (2)
the serial number of the product is defaced or missing.
ASUS PROVIDES THIS MANUAL «AS IS» WITHOUT WARRANTY OF ANY KIND, EITHER
EXPRESS OR IMPLIED, INCLUDING BUT NOT LIMITED TO THE IMPLIED WARRANTIES
OR CONDITIONS OF MERCHANTABILITY OR FITNESS FOR A PARTICULAR PURPOSE.
IN NO EVENT SHALL ASUS, ITS DIRECTORS, OFFICERS, EMPLOYEES OR AGENTS BE
LIABLE FOR ANY INDIRECT, SPECIAL, INCIDENTAL, OR CONSEQUENTIAL DAMAGES
(INCLUDING DAMAGES FOR LOSS OF PROFITS, LOSS OF BUSINESS, LOSS OF USE
OR DATA, INTERRUPTION OF BUSINESS AND THE LIKE), EVEN IF ASUS HAS BEEN
ADVISED OF THE POSSIBILITY OF SUCH DAMAGES ARISING FROM ANY DEFECT OR
ERROR IN THIS MANUAL OR PRODUCT.
SPECIFICATIONS AND INFORMATION CONTAINED IN THIS MANUAL ARE FURNISHED
FOR INFORMATIONAL USE ONLY, AND ARE SUBJECT TO CHANGE AT ANY TIME
WITHOUT NOTICE, AND SHOULD NOT BE CONSTRUED AS A COMMITMENT BY
ASUS. ASUS ASSUMES NO RESPONSIBILITY OR LIABILITY FOR ANY ERRORS OR
INACCURACIES THAT MAY APPEAR IN THIS MANUAL, INCLUDING THE PRODUCTS
AND SOFTWARE DESCRIBED IN IT.
Products and corporate names appearing in this manual may or may not be registered
trademarks or copyrights of their respective companies, and are used only for identification or
explanation and to the ownersʼ benefit, without intent to infringe.
ii
Посмотреть инструкция для Asus P5GV-MX бесплатно. Руководство относится к категории Материнские платы, 1 человек(а) дали ему среднюю оценку 7.2. Руководство доступно на следующих языках: английский. У вас есть вопрос о Asus P5GV-MX или вам нужна помощь? Задайте свой вопрос здесь
Не можете найти ответ на свой вопрос в руководстве? Вы можете найти ответ на свой вопрос ниже, в разделе часто задаваемых вопросов о Asus P5GV-MX.
Какая ширина Asus P5GV-MX?
Какая толщина Asus P5GV-MX?
Инструкция Asus P5GV-MX доступно в русский?
Не нашли свой вопрос? Задайте свой вопрос здесь