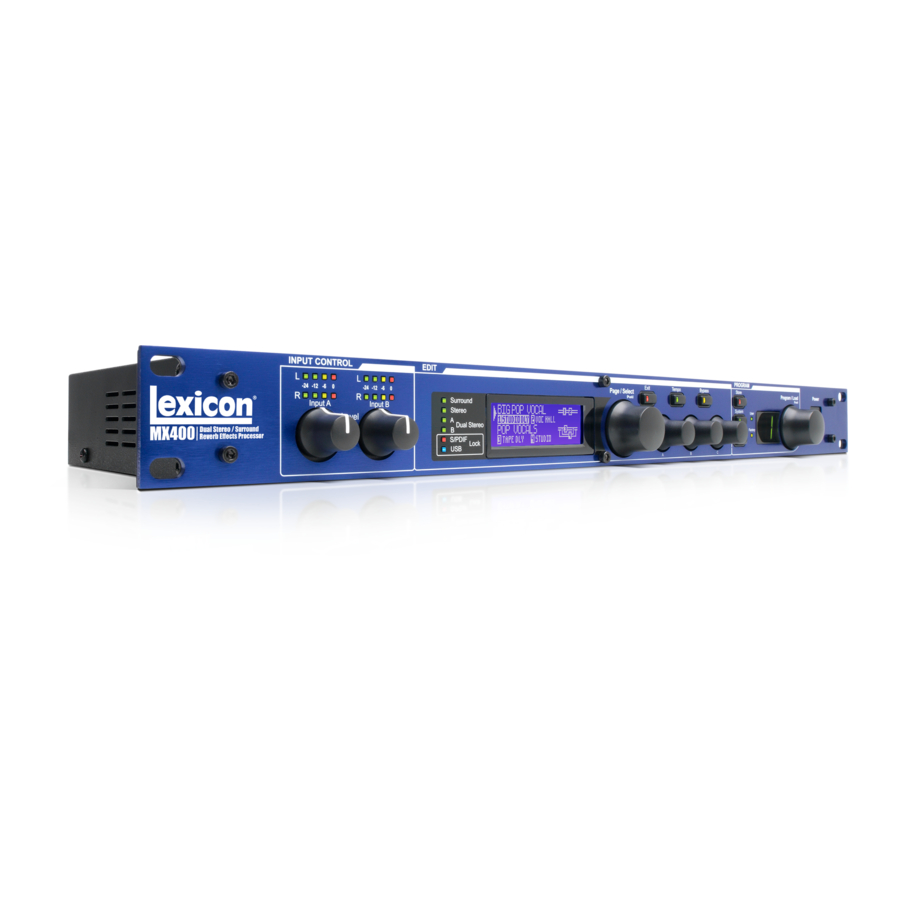
MX400 ×åòûðåõ-êàíàëüíûé ðåâåðáåðàòîð / ïðîöåññîð ýôôåêòîâ LEXICON.
Ñåðòèôèêàöèîííîå óäîñòîâåðåíèå Ïðîèçâîäèòåëü: Lexicon Àäðåñ ïðîèçâîäèòåëÿ:8760 S. Sandy Parkway Sandy, Utah 84070, USA çàÿâëåò, ÷òî äàííûé ïðîäóêò: Íàèìåíîâàíèå ïðîäóêòà:MX400 and MX400XL Ïðèìå÷àíèå: Ê íàèìåíîâàíèþ ïðîäóêòà ìîãóò áûòü äîáàâëåíû áóêâû — EU. Âàðèàíò ïðîäóêòà: íåò ñîîòâåòñòâóåò
3
Âàæíûå èíñòðóêöèè ïî áåçîïàñíîñòè · Ñëåäóéòå âñåì èíñòðóêöèÿì è ñîáëþäàéòå ïðåäóïðåæäåíèÿ, íàíåñåííûå íà óñòðîéñòâî è ïåðå÷èñëåííûå â äàííîì ðóêîâîäñòâå. · Âñåãäà èñïîëüçóéòå óñòðîéñòâî ñ óêàçàííûì èñòî÷íèêîì ïèòàíèÿ. Ó÷òèòå, ÷òî ïîäêëþ÷åíèå ê èñòî÷íèêàì ïèòàíèÿ ñ äðóãèì íàïðÿæåíèåì ìîæåò
Ñîäåðæàíèå Ââåäåíèå …………………………………………………………………………………7 Êîìïëåêòàöèÿ …………………………………………………………………………………………….. 7 Êðàòêîå ðóêîâîäñòâî
Âèáðàòî Ñòåðåî (òîëüêî îáðàáîòàííûé ñèãíàë) ……………………………………….. 34 Pitch Shift (Òðàíñïîíèðîâàíèå) …………………………………………………………… Ñòåðåî Detune (Ðàññòðîéêà)
Ââåäåíèå Ïîçäðàâëÿåì âàñ ñ ïðèîáðåòåíèåì ÷åòûðåõ êàíàëüíîãî ñòåðåî / surround ðåâåðáåðàòîðà è ïðîöåññîðà ýôôåêòîâ ÌÕ400! ×åòûðå ïðîöåññîðà ÌÕ400 ïðåäîñòàâëÿåò â âàøå ðàñïîðÿæåíèå ëåãåíäàðíóþ ðåâåðáåðàöèþ è ýôôåêòû Lexicon è øèðîêèé äèàïàçîí êîíôèãóðàöèé è ïåðåõîäîâ. Èñïîëüçóéòå ÌÕ400 íà êîíöåðòå
Êðàòêîå ðóêîâîäñòâî Ïåðåäå íà÷àëîì ðàáîòû ñ ÌÕ400 æåëàòåëüíî ïîëíîñòüþ ïðî÷èòàòü äàííîå ðóêîâîäñòâî. Íî åñëè âàì íå òåðïèòñÿ íà÷àòü ðàáîòàòü ñ óñòðîéñòâîì, òî â ýòîì ðàçäåëå äàåòñÿ îïèñàíèå óñòàíîâêè ïðîñòîãî ïàðàëëåëüíîãî ïîäêëþ÷åíèÿ (èñïîëüçîâàíèå ÌÕ400 ñ ìèêøåðîì) è âûáîð ïðîãðàììû. Ñòàíäàðòíîå
Âûáîð è çàãðóçêà ïðîãðàììû Ïîâåðíèòå ðó÷êó Program / Load ( Ïðîãðàììà / Çàãðóçêà) äëÿ âûáîðà ïðîãðàììû. Íà äèñïëåå çàìèãàåò íîìåð çàãðóæàåìîé ïðîãðàììû (Program Number Display). Äëÿ çàãðóçêè ïðîãðàììû, íàæìèòå íà ðó÷êó. ðó÷êà Program/Load Èíäèêàöèÿ íîìåðà ïðîãðàììû Îáðàòèòå âíèìàíèå, ÷òî ÌÕ400
Ïåðåäíÿÿ ïàíåëü 1. Ñâåòîäèîäíûå èíäèêàòîðû óñèëåíèÿ (Gain). Êàæäàÿ ïàðà ñâåòîäèîäíûõ èíäèêàòîðîâ óñèëåíèÿ ïîêàçûâàåò óðîâåíü ñèãíàëà íà êàæäîé èç âõîäíûõ ïàð ÌÕ400. Äèàïàçîí ñîñòàâëÿåò îò -24dB, -12dB, -6dB, è 0dB. 2. Ðó÷êè óðîâíÿ âõîäíîãî ñèãíàëà À è  Êàæäàÿ ðó÷êà âõîäíîãî ñèãíàëà ðåãóëèðóåò
10. System (Ñèñòåìà) Äîñòóï ê ìåíþ ãëîáàëüíûõ íàñòðîåê ñèñòåìû. 11. Bypass (îáõîä) Èñïîëüçóåòñÿ äëÿ îáõîäà èëè ìüþòèðîâàíèÿ òåêóùåé ïðîãðàììû. 12. Ñâåòîäèîäíûå èíäèêàòîðû ïîëüçîâàòåëüñêîé è çàâîäñêîé ïðîãðàìì Ïîêàçûâàþò, êàêàÿ âûáðàíà ïðîãðàììà: ïîëüçîâàòåëüñêàÿ èëè çàâîäñêàÿ. 13. Äèñïëåé íîìåðà
Òûëüíàÿ ïàíåëü 1. Ðàçúåì ïèòàíèÿ Ïîäêëþ÷èòå øíóð ïèòàíèÿ. 2. Ïîðò USB Ïîäêëþ÷åíèå ñòàíäàðòíîãî êàáåëÿ USB äëÿ îáåñïå÷åíèÿ ñâÿçè ñ êîìïüþòåðîì è èñïîëüçîâàíèÿ ïðîãðàììíîãî îáåñïå÷åíèÿ MX-Edit™ è îêíà ïëàãèíû ÌÕ400. Ïðè ïîäêëþ÷åíèè ÌÕ400 ê êîìïüþòåðó ÷åðåç êàáåëü USB, â îêíå Äèñïëåÿ Ïðîãðàììû íà
6. Ñèììåòðè÷íûå Àíàëîãîâûå Ëèíåéíûå ñòåðåî âûõîäû (ïàðû) Äâîéíûå ëèíåéíûå âûõîäû ñ Â× ôèëüòðàöèåé íà 1/4 äþéìîâîì áàëàíñíîì/ íåáàëàíñíîì ðàçúåìå TRS èëè ñèììåòðè÷íîì ðàçúåìå XLR, ÿâëÿþòñÿ ñåðâî-ñáàëàíñèðîâàííûìè, ÷òî ïîçâîëÿåò èçáåæàòü ïîòåðè ñèãíàëà ïðè èñïîëüçîâàíèè íåññèìåòðè÷íûõ ïîäêëþ÷åíèé
Îáçîð ÌÕ400 ÌÕ400 — ýòî ÷ðåçâû÷àéíî ãèáêèé ïðîöåññîð ýôôåêòîâ, ôàêòè÷åñêè îí ìîæåò ðàáîòàòü êàê òðè ðàçëè÷íûõ ïðîöåññîðà. Ïðè ýêñïëóàòàöèè ÌÕ400 ðåêîìåíäóåòñÿ âûáðàòü íóæíûé òèï ïðîöåññîðà äëÿ ðàáîòû (Surround, Stereo èëè Dual Stereo), ñäåëàòü ñîîòâåòñòâóþùèå ïîäêëþ÷åíèÿ è âûáðàòü Êîíôèãóðàöèþ,
Äèàãðàììà ïîäêëþ÷åíèÿ: Surround In/Out Ïîäêëþ÷åíèÿ ñòåðåî êîíôèãóðàöèè Ñòåðåî ðåæèì êîíôèãóðèðóåò ÌÕ400 â êà÷åñòâå îäèíî÷íîãî ñòåðåî ïðîöåññîðà âõîäà / âûõîäà, èñïîëüçóþùèì òîëüêî âõîäíóþ / âûõîäíóþ ïàðó À (Àíàëîãîâóþ è S/PDIF). Ïðè âûáîðå ñòåðåî êîíôèãóðàöèè, âõîäíàÿ / âûõîäíàÿ ïàðà  —
Äëÿ èñòî÷íèêîâ ñèãíàëà, êîòîðûå áóäóò çàïóñêàòü Ïðîãðàììó À (ýòî ïðîãðàììà, ïîêàçàííàÿ â âåðõíåé ïîëîâèíå ïðîãðàììíîãî äèñïëåÿ, êîòîðàÿ èñïîëüçóåò Ýôôåêò 1 è Ýôôåêò 2), ïîäêëþ÷èòåñü ê âõîäíîé (Front) è âûõîäíîå ïàðå À Ëåâûé / Ïðàâûé. Èñòî÷íèêè ñèãíàëà, çàïóñêàþùèå ïðîãðàììó  (ýòî ïðîãðàììà,
ëèáî  íà çíà÷åíèå Digital (öèôðîâîé), ÌÕ400 áîëåå íå èñïîëüçóåò âñòðîåííûé ñèíõðîíèçàòîð äëÿ àóäèî ïîòîêà, è ïîýòîìó íåîáõîäèìî èçìåíèòü èñòî÷íèê ñèíõðîñèãíàëà ñî âñòðîåííîãî íà öèôðîâîé. Êðîìå òîãî, ÌÕ400 ïðèíèìàåò âíåøíèé ñèíõðîñèãíàë òîëüêî íà âõîä S/PDIF A. Ýòî îçíà÷àåò, ÷òî ïðè èñïîëüçîâàíèè
Ðàáîòà ñ ÌÕ400 Âûáîð è çàãðóçêà ïðîãðàìì (êîíôèãóðàöèè Surround, STEREO) 1. Ïîâåðíèòå ðó÷êó Program / Load äëÿ âûáîðà ïðîãðàììû. Äî òåõ ïîð, ïîêà ïðîãðàììà íå çàãðóæåíà, íîìåð âûáðàííîé ïðîãðàììû ìèãàåò íà Äèñïëåå Ïðîãðàììû (Program Display). Íàçâàíèå ïðîãðàììû òàêæå ïîÿâëÿåòñÿ íà Ãëàâíîì äèñïëåå
3. Ïîñëå çàâåðøåíèÿ ïðîöåäóðû íàèìåíîâàíèÿ, íàæìèòå âíîâü íà êíîïêó Store. Ïîâåðíèòå ðó÷êó Page / Select èëè Program / Load äëÿ âûáîðà ÿ÷åéêè ïàìÿòè, â êîòîðîé áóäåò ñîõðàíåíà ïðîãðàììà. 4. Íàæìèòå âíîâü íà êíîïêó Store äëÿ çàâåðøåíèÿ ïðîöåäóðû ñîõðàíåíèÿ. Ðåäàêòèðîâàíèå ïðîãðàììû Ïîñëå çàãðóçêè
2. Ïîâåðíèòå ðó÷êó Edit Knob A, B, C Edit äëÿ èçìåíåíèÿ íàñòðîéêè ïàðàìåòðà. Ïîñëå çàâåðøåíèÿ, ñîõðàíèòå èçìåíåíèÿ â íóæíîé ïðîãðàììå . Ðåäàêòèðîâàíèå èç ìåíþ Program Edit 1. Íàõîäÿñü íà ýêðàíå ïðîãðàììû (Program Screen), ïîâåðíèòå ðó÷êó Page / Select äëÿ âûäåëåíèÿ ðåäàêòèðóåìîãî ýôôåêòà. 2.
Ïîñëå çàâåðøåíèÿ, ñîõðàíèòå èçìåíåíèÿ â ïðîãðàììå äëÿ ïîñëåäóþùåãî âûçîâà. Èçìåíåíèå íàçíà÷åíèé ðó÷êè Òðè ðåäàêòèðóåìûõ ïàðàìåòðà íà ýêðàíå ïðîãðàììû â êîíôèãóðàöèÿõ ïðîãðàììû Surround è Stereo ìîãóò áûòü èçìåíåíû ïîëüçîâàòåëåì. Ïðè ïîñòàâêå ñ ôàáðèêè, ýòè ïàðàìåòðû âûáðàíû â êàæäîé ïðîãðàììå ïî èõ
Êîíôèãóðàöèè STEREO è DUAL STEREO Ïîñëåäîâàòåëüíàÿ äâîéíàÿ ìîíîôîíè÷åñêàÿ ðàçäåëüíàÿ ìîíîôîíè÷åñêàÿ ïàðàëëåëüíàÿ 1. Dual Mono (Äâîéíàÿ ìîíîôîíè÷åñêàÿ) Ëåâûé è Ïðàâûé âõîäíûå ñèãíàëû ïîñûëàþòñÿ ÷åðåç Ýôôåêò 1/3 è Ýôôåêò 2/4 ñîîòâåòñòâåííî. Çàòåì êàæäûé ñèãíàë ìàðøðóòèçèðóåòñÿ íà ñîîòâåòñòâóþùèé
Êîíôèãóðàöèÿ SURROUND 1. Stereo In / Surround Out Ýòà îïöèÿ ìàðøðóòèçàöèè áåðåò ñèãíàë ñî ñòåðåî èñòî÷íèêà, ïîäêëþ÷åííîãî ê ïåðåäíèì (Front) âõîäàì Ëåâûé 1 è Ïðàâûé , ïðîïóñêàåò ÷åðåç ðåâåðáåðàöèþ Surround è çàòåì ïîñûëàåò íà âñå ÷åòûðå âûõîäà. Ïðèìå÷àíèå: Íà ýòîé ìàðøðóòèçàöèè äîñòóïåí òîëüêî
Êíîïêà TEMPO Êíîïêà Tempo èñïîëüçóåòñÿ äëÿ óñòàíîâêè ïàðàìåòðà òåìïà â ýôôåêòàõ çàäåðæêè.  íåêîòîðûõ ñëó÷àÿõ â ïðîãðàììå ñ äâóìÿ ýôôåêòàìè ìîæåò áûòü óñòàíîâëåíî äâå çàäåðæêè. Êíîïêà Tempo áóäåò ìèãàòü ñî ñêîðîñòüþ çàäåðæêè, âûäåëåííîé íà Ãëàâíîì äèñïëåå. Äëÿ óñòàíîâêè òåìïà âòîðîé çàäåðæêè,
Ìîíî Ñòåðåî Âõîä âûõîä Âõîä âûõîä Ðåâåðáåðàöèÿ Ðåâåðáåðàöèÿ — ýòî ñëîæíûé ýôôåêò, âîññîçäàþùèé îñîáåííîñòü âîñïðèÿòèÿ çâóêà â çàêðûòîì ïðîñòðàíñòâå. Ïðè ñòîëêíîâåíèè çâóêîâûõ âîëí ñ îáúåêòîì èëè äðóãèìè îãðàíè÷åíèÿìè, íå ïðîèñõîäèò èõ îñòàíîâêè. ×àñòü çâóêà ïîãëîùàåòñÿ îáúåêòîì, íî áîëüøàÿ åãî
Plate Reverbs — Stereo small.Plate,.large.Plate,.vocal.Plate,.drum.Plate Ïåðâîíà÷àëüíî, ïëàñòèí÷àòàÿ ðåâåðáåðàöèÿ (Plate) äîñòèãàëàñü çà ñ÷åò áîëüøèõ, òîíêèõ ìåòàëëè÷åñêèõ ëèñòîâ, ïîäâåøåííûõ âåðòèêàëüíî ñ ïîìîùüþ ïðóæèíû. Ýôôåêò áîëüøîãî îòêðûòîãî ïðîñòðàíñòâà ìîäåëèðîâàëñÿ ñ ïîìîùüþ ñèãíàëîâ
Studio Reverb — Stereo Ýòîò ýôôåêò (Studio — Ñòóäèÿ) â áîëüøîé ñòåïåíè ïîõîæ íà ðåâåðáàðàöèþ Room. Îí äàåò îòëè÷íóþ èìèòàöèþ áîëåå ìåíüøèõ ïî ðàçìåðó, õîðîøî óïðàâëÿåìûõ àêóñòè÷åñêèõ ïðîñòðàíñòâ, õàðàêòåðèçóåòñÿ íàëè÷èåì îñíîâíûõ çîí èñïîëíåíèÿ â ñòóäèÿõ çàïèñè. Ðåâåðáåðàöèÿ Studio òàêæå óäîáíà ïðè
Size (Ðàçìåð) Ïàðàìåòð Size (ðàçìåð) óñòàíàâëèâàåò ñêîðîñòü ïîñòåïåííîãî íàðàñòàíèÿ äèôôóçèè ïîñëå íà÷àëüíîãî ïåðèîäà (êîòîðûé ðåãóëèðóåòñÿ ïàðàìåòðîì Diffusion). Ðåãóëÿòîð Size èçìåíÿåò çâóê ðåâåðáåðàöèè îò î÷åíü áîëüøîãî äî î÷åíü ìàëîãî. Êàê ïðàâèëî, ýòîò ðåãóëÿòîð óñòàíàâëèâàåòñÿ â ñîîòâåòñòâèè
Boing (Ñêðåæåò) Ýòî óíèêàëüíûé ïàðàìåòð, èñïîëüçóåìûé äëÿ ïðóæèííîé ðåâåðáåðàöèè (Spring) è ïðåäíàçíà÷åííûé äëÿ óâåëè÷åíèÿ èëè óìåíüøåíèÿ øóìîâûõ ïîìåõ, âîçíèêàþùèå â ðåçóëüòàòå ñæàòèÿ-ðàñòÿæåíèÿ ïðóæèíû. Ýòè ïîìåõè ÿâëÿþòñÿ ôèçè÷åñêîé õàðàêòåðèñòèêîé ðåâåðáåðàöèé ðåçîíàíñíîãî êîíòóðà ïðóæèíû.
2-Tap Delay — Stereo Çàäåðæêà 2-Tap Delay — ýòî ðåãóëèðóåìàÿ çàäåðæêà ïèíã-ïîíã, â êîòîðîé êàæäûé óäàð ìîæåò áûòü óñòàíîâëåí èíäèâèäóàëüíî â ñîîòâåòñòâèè ñî âðåìåíåì çàäåðæêè. Çàäåðæêà 2Tap ðàññ÷èòûâàåòñÿ êàê ïðîöåíò äåéñòâèòåëüíîãî âðåìåíè çàäåðæêè â äèàïàçîíå 1 — 100% (íàïðèìåð, åñëè âðåìÿ
Smear Ýòîò ïàðàìåòð ðåãóëèðóåò âåëè÷èíó «ðàçìàçûâàíèÿ» èëè óõóäøåíèå ñèãíàëà è ïîòåðþ ÷àñòîò. Âåñüìà íàãëÿäíî ýòîò ýôôåêò ïðîñìàòðèâàåòñÿ â Tape Delay, ÷åì âûøå óñòàíîâêè, òåì áîëüøå íà êàæäîì ïîâòîðå çàäåðæêè òåðÿåòñÿ ðàçáîð÷èâîñòü ïî ñðàâíåíèþ ñ îðèãèíàëüíûì ñèãíàëîì. Òàð 1 è 2 Ïàðàìåòðû Òàð
Òàê êàê îêîí÷àòåëüíûé âûõîäíîé ñèãíàë ìåíüøå ÷åì îðèãèíàëüíûé, òðåòèé ðåãóëÿòîð Makeup Gain êîìïåíñèðóåò ýòó ïîòåðþ â óðîâíå, íî ñ ìåíüøèì äèíàìè÷åñêèì äèàïàçîíîì (ðàçíèöåé ìåæäó ñàìûìè òèõèìè è ñàìûìè ãðîìêèìè ÷àñòÿìè ñèãíàëà). Ïðèìå÷àíèå: Ýôôåêòû Äå-åññåðà è Êîìïðåññîðà — ýòî ïðîãðàììû
Release — âðåìÿ ñïàäà ïàðàìåòð Release ðåãóëèðóåò ïîñòîÿííîå âðåìÿ ñïàäà, îïðåäåëÿþùåãî ñêîðîñòü îòêëèêà êîìïðåññîðà íà óìåíüøåíèå âõîäíîãî óðîâíÿ. Îáû÷íî ýòîò ïàðàìåòð óñòàíàâëèâàåòñÿ íà äëèííûå çíà÷åíèÿ. Êîðîòêèå âðåìåíà ñïàäà ìîãóò ïðèâåñòè ê ïîÿâëåíèþ ýôôåêòà, ïîäîáíîìó «ïóëüñàöèè» â àíàëîãîâîì
Òðåìîëî / Ïàíîðàìèðîâàíèå Ñòåðåî (òîëüêî îáðàáîòàííûé ñèãíàë) Ýôôåêòû Tremolo è Panner (Òðåìîëî è ïàíîðàìèðîâàíèå) ñîçäàþò ðèòìè÷åñêèå èçìåíåíèÿ àìïëèòóäû ñèãíàëà. Ýôôåêò Tremolo îêàçûâàåò âîçäåéñòâèå íà àìïëèòóäó îáîèõ êàíàëîâ îäíîâðåìåííî, à ýôôåêò Panner îêàçûâàåò âîçäåéñòâèå íà àìïëèòóäó
Ãëóáèíà (Depth) Ðåãóëèðîâêà èíòåíñèâíîñòè ýôôåêòà. Ýòîò ðåãóëÿòîð îêàçûâàåò âîçäåéñòâèå òîëüêî íà âûõîä LFO. Íå îêàçûâàåò âîçäåéñòâèÿ íà âûõîäû èíäèâèäóàëüíûõ âîëíîâûõ ôîðì. Ãîëîñà Ðåãóëèðóåò êîëè÷åñòâî äîïîëíèòåëüíûõ ãîëîñîâ Õîðóñà. Ì Regen — ðåãåíåðàöèÿ Ýòà ðó÷êà ðåãóëèðóåò êîëè÷åñòâî
Shift 1 & 2 — ñìåùåíèå 1 è 2 Îïðåäåëÿåò âåëè÷èíó ñìåùåíèÿ âûñîòû òîíà èëè ðàññòðîéêó âûñîòû òîíà îò îðèãèíàëüíîãî ñèãíàëà. Ëó÷øå ðàáîòàåò ñ îòäåëüíûìè íîòàìè. Delay 1 è 2 — Çàäåðæêà 1 è 2 Ðåãóëèðîâêà êîëè÷åñòâà âîçâðàùàåìîãî ÷åðåç ëèíèþ çàäåðæêè ñèãíàëà, ñìåùåííîãî â Pitch Shift è Detune . Ýòî
Input Source A — Âõîä Èñòî÷íèêà À  ÌÕ400 èìåþòñÿ êàê àíàëîãîâûå, òàê è öèôðîâûå âõîäû äëÿ ïîäêëþ÷åíèÿ èñòî÷íèêà ñèãíàëà.  çàâèñèìîñòè îò èñïîëüçóåìîãî âõîäà, íåîáõîäèìî ñäåëàòü âûáîð ìåæäó àíàëîãîâûì è öèôðîâûì èñòî÷íèêàìè. ÌÕ400 ïðåäëàãàåò íà âûáîð îäèí èç òðåõ ðàçëè÷íûõ èñòî÷íèêîâ âõîäà: Analog
Analog Output  — Àíàëîãîâûé âûõîä  Analog Out B èäåíòè÷åí Analog Out A, íî èìååò îòíîøåíèå òîëüêî ê OutPair B. Äëÿ âûáîðà ìåæäó îïöèÿìè Mono Left è Stereo  — Rear èñïîëüçóéòå ðó÷êó Knob Â. Output Level — Óðîâåíü âûõîäà Âûõîäû ÌÕ400 ìîãóò áûòü îïòèìèçèðîâàíû äëÿ ðàáîòû ñ îáîðóäîâàíèåì, òðåáóþùèì
MIDI Channel A ÌÕ400 èìååò äâà êàíàëà ïðèåìà MIDI, Êàíàë À è Êàíàë Â. MIDI Êàíàë À èñïîëüçóåòñÿ âñåìè êîíôèãóðàöèÿìè ÌÕ400: Surround, Stereo, Dual Stereo. Ëþáîå èçìåíåíèå ïðîãðàììû èëè ñîîáùåíèÿ ÑÑ, ïîñûëàåìûå íà ÌÕ400 íà MIDI êàíàë À îáðàáàòûâàþòñÿ àêòèâíîé ïðîãðàììîé. Êàíàëû ìîãóò áûòü
MIDI CC Receive — ïðèåì MIDI CC Îïöèÿ ïðèåìà MIDI CC ïîçâîëÿåò âêëþ÷èòü èëè îòêëþ÷èòü ïðèåì ñîîáùåíèé MIDI CC. Ïðè âûêëþ÷åííîé îïöèè MIDI Program Receive, óñòðîéñòâî ôèëüòðóåò âñå ñîîáùåíèÿ MIDI CC òàêèì îáðàçîì, ÷òîáû ÌÕ400 íå îòêëèêàëñÿ íà íèõ íè â îäíîé èç êîíôèãóðàöèé (Surround, Stereo, Dual
2. Íàæìèòå è óäåðæèâàéòå êíîïêó Store äî òåõ ïîð ïîêà áåëàÿ ïîëîñà âûïîëíåíèÿ ïðîöåññà íå èñ÷åçíåò ïîëíîñòüþ. Ïðîöåäóðà âîññòàíîâëåíèÿ çàâîäñêèõ íàñòðîåê áóäåò çàâåðøåíà. Ïðîãðàììíîå îáåñïå÷åíèå MX-EditTM Editor/Librarian Windows è ÌÀÑ Ïðèëàãàåìîå ïðîãðàììíîå îáåñïå÷åíèå MX-EditTM Editor/Librarian
Èíñòàëëÿöèÿ ïðîãðàììíîãî îáåñïå÷åíèÿ MX-EditTM Editor/Librarian -Ìàñ Ìèíèìàëüíûå ñèñòåìíûå òðåáîâàíèÿ — Mac Ïåðåä èíñòàëëÿöèåé ïðîãðàììíîãî îáåñïå÷åíèÿ MX-Edit Editor / Librarian, óáåäèòåñü â òîì, ÷òî âàø êîìïüþòåð ñîîòâåòñòâóåò ìèíèìàëüíûì òðåáîâàíèÿì. • OSX 10.4 èëè âûøå Äëÿ èíñòàëëÿöèè
Ùåëêíèòå äâà ðàçà íà èìåíè ïðîãðàììû, ÷òîáû îòêðûòü åå â ðåäàêòîðå. Íàñòðîéêè ïðîãðàììû îòðàæåíû â ðó÷êàõ Paremeter è êíîïêàõ â îêíå Program Editor. Òåïåðü âûáðàííàÿ ïðîãðàììà çàãðóæåíà òàêæå è â ÌÕ400 . Ëþáûå èçìåíåíèÿ, âûïîëíåííûå â îêíå Ðåäàêòîðà Ïðîãðàìì ÌÕ-Edit, îäíîâðåìåííî áóäóò îòðàæàòüñÿ
• ×òîáû îòêðûòü ïðîãðàììó, êîòîðàÿ áûëà ñîõðàíåíà íà âàøåì êîìïüþòåðå (íî íå ïîÿâëÿåòñÿ â Áèáëèîòåêå ÌÕEdit), ùåëêíèòå File è âûáåðèòå Open Program (Îòêðîéòå ïðîãðàììó). Ïî óìîë÷àíèþ, äèàëîãîâîå Open âåäåò ïîèñê â ïàïêå Ìîè äîêóìåíòû (èëè â ïîñëåäíåé ïàïêå, èç êîòîðîé áûëà îòêðûòà ïðîãðàììà).
Êíîïêè âûáîðà ðåâåðáåðàöèè / ýôôåêòà Äëÿ èçìåíåíèÿ ðåâåðáåðàöèè èëè ýôôåêòà íà ïðîöåññîðå 1 èëè ïðîöåññîðå 2, ùåëêíèòå ëåâîé êëàâèøåé ìûøè íà êíîïêå Reverb / Effect Select (Âûáîð ðåâåðáåðàöèè / ýôôåêòà) â çîíå óïðàâëåíèÿ Ð1 èëè Ð2. Ïîÿâèòñÿ ïåðå÷åíü ýôôåêòîâ è ðåâåðáåðöèé ÌÕ400, ñ ôëàæêîì,
Tempo Ïðè âûáîðå îäíîé èç çàäåðæåê ÌÕ400, àêòèâèçèðóåòñÿ êíîïêà Tempo â ýòîì ïðîöåññîðå è íà÷èíàåò ìèãàòü ñî ñêîðîñòüþ òåìïà. Çíà÷åíèå òåìïà ïîêàçûâàåòñÿ â ìèëëèñåêóíäàõ (ìñ), è ðÿäîì ñ îòîáðàæàåìûì òåìïîì ïîÿâëÿåòñÿ ÷åòâåðòíàÿ íîòà. Ïðè ðåãóëèðîâêå ïàðàìåòðà Time Range, äåëåíèå áåç îñòàòêà âðåìåíè
Ñîõðàíåíèå Ïðîãðàììû Äëÿ ñîõðàíåíèÿ ïðîãðàììû â îäíîé èç ïîëüçîâàòåëüñêèõ ÿ÷ååê ïàìÿòè â áèáëèîòåêå ÌÕ-Edit (è ñîîòâåòñòâóþùåé ÿ÷åéêå â ôèçè÷åñêîé ïàìÿòè ÌÕ400), îòêðîéòå ïðîãðàììó, êîòîðóþ âû õîòèòå ñîõðàíèòü. Ïðè àêòèâíîì îêíå Ðåäàêòîðà Ïðîãðàììû, ùåëêíèòå ìåíþ Device (Óñòðîéñòâî) è çàòåì
Èñïîëüçîâàíèå ÌÕ400 â êà÷åñòâå àïïàðàòíîãî ïëàãèíà ÌÕ 200 ïîñòàâëÿåòñÿ ñ ïðîãðàììíûì îáåñïå÷åíèåì VST™ è AUDIO Units, êîòîðîå ïîçâîëÿåò èñïîëüçîâàòü ÌÕ400 â êà÷åñòâå àïïàðàòíîãî ïëàãèíà. Òåïåðü âû èìååòå äîñòóï ê êëàññè÷åñêèì ðåâåðáåðàöèÿì è ýôôåêòàì Lexicon® â ðàìêàõ ïðîåêòîâ çàïèñè ïðîãðàììíîãî
Êîíôèãóðàöèÿ ïðîãðàììíîãî îáåñïå÷åíèÿ Òàê êàê àóäèî ñèãíàë, îáðàáàòûâàåòñÿ â îáîðóäîâàíèè ÌÕ400, à íå âíóòðè êîìïüþòåðà, íåîáõîäèìî óñòàíîâèòü âàøó DAW (öèôðîâàÿ àóäèî ðàáî÷àÿ ñòàíöèÿ) íà ïîñûë è ïðèìå àóäèî ñèãíàëà íà è ñ ÌÕ400. Ìíîãèå DAW èìåþò äëÿ ýòîãî âñòðîåííûå êîíôèãóðàöèè ìàðøðóòèçàöèè;
Èñïîëüçîâàíèå Îêíà Ïëóãèí ÌÕ400  DAW, îòêðîéòå ïëóãèí Lexicon ÌÕ400. Âû óâèäèòå êîïèþ îêíà Ðåäàêòîðà Ïðîãðàìì, Âû ìîæåòå èñïîëüçîâàòü ïðîãðàììíîå îáåñïå÷åíèå ïëóãèí ÌÕ400 êàê è ëþáîé äðóãîé ïëóãèí: Session Recall, àâòîìàòèçàöèÿ — âñå ðàáîòàåò òàêæå êàê è ëþáîé äðóãîé ïëóãèí VSt™ èëè Audio Unit.
Òàáëèöà MIDI 51
MIDI CC MAP — Dual Stereo ýôôåêòû 52
MIDI CC MAP — Ìàðøðóòèçàöèÿ 5 Dual Stereo ýôôåêòîâ, ñòåðåî ýôôåêòû 53
MIDI CC MAP — Ìàðøðóòèçàöèÿ 5 Dual Stereo ýôôåêòîâ, ñòåðåî ýôôåêòû 54
MIDI CC MAP — ýôôåêòû SURROUND HALL 55
Ïðîãðàììû — Dual Stereo 56
Ïðîãðàììû — Stereo 57
Ïðîãðàììû — SURROUND 58
Ñïåöèôèêàöèè Àíàëãîâûå àóäèî âõîäû Ðàçúåìû Èìïåäàíñ Óðîâåíü âõîäà À/Ö ïðåîáðàçîâàíèå ÷åòûðå 1/4« TRS ñèììåòðè÷íûõ èëè íåññèìåòðè÷íûõ 50k Ohms ñèì., 25k Ohms íåñèì. +4 dBu nominal, +24 dBu maximum 24-bit, 48kHz or 44.1kHz, 128 x ñóïåðäèñêðåòèçàöèÿ Àíàëîãîâûå àóäèî âûõîäû Ðàçúåìû ÷åòûðå 1/4« TRS
Перед вами файл pdf, где представлена инструкция (руководство) на русском для LEXICON MX400. Вы можете скачать ее либо изучить в онлайн режиме.
Подробные сведения об инструкции:
Устройство из раздела: процессор эффектов
Бренд-производитель: LEXICON
Наименование модели: LEXICON MX400
Язык: Руководство на русском языке
Файл: pdf
Размер файла: 2,11 MB
Скачать инструкцию к HARPER HDT2-1110
ЗАГРУЗИТЬ
Просмотр инструкции онлайн
-
Contents
-
Table of Contents
-
Bookmarks
Quick Links
Related Manuals for Lexicon MX400
Summary of Contents for Lexicon MX400
-
Page 1
MX400 User Guide… -
Page 1
MX400 User Guide… -
Page 2
IMPORTANT SAFETY INSTRUCTIONS… -
Page 2
IMPORTANT SAFETY INSTRUCTIONS… -
Page 3
Directive 93/68/EEC. Vice-President of Engineering-MI 8760 S. Sandy Parkway Sandy, Utah 84070, USA Date: May 15, 2006 European Contact: Your local Lexicon Sales and Service Office or Harman Music Group 8760 South Sandy Parkway Sandy, Utah 84070 USA Ph: (801) 566-8800… -
Page 3
Directive 93/68/EEC. Vice-President of Engineering-MI 8760 S. Sandy Parkway Sandy, Utah 84070, USA Date: May 15, 2006 European Contact: Your local Lexicon Sales and Service Office or Harman Music Group 8760 South Sandy Parkway Sandy, Utah 84070 USA Ph: (801) 566-8800… -
Page 4
The company shall not be liable for any consequential damage as a result of the product’s use in any circuit or assembly. 4. Lexicon Professional reserves the right to make changes in design or make addi- tions to or improvements upon this product without incurring any obligation to install the same additions or improvements on products previously manufactured. -
Page 5: Table Of Contents
Balanced Analog Line Output Pairs …………..7 Balanced Analog Line Input Pairs ……………. 7 aBout.the.mX400…………..8 connectIng.the.mX400…………8 Surround Configuration Connections …………..8 Stereo Configuration Connections ……………. 9 Dual Stereo Configuration Connections …………… 9 the.mX400.and.dIgItal.I/o…………10 usIng.the.mX400…………..12 Selecting and Loading Programs (Surround, Stereo Configurations) ….12…
-
Page 6
Storing a Program ………………..41 Archiving …………………… 41 usIng.the.mX400.as.a.hardWare.Plug-In……42 Installing the MX-Edit VST Hardware Plug-In ………… 42 Connecting the MX400 ………………42 Software Configuration ………………43 Using the MX400 Plug-In Window …………… 44 Controls ……………………44 mIdI.ImPlementatIon.chart………..45 mIdI.cc.maPs…………….46 Program.lIsts……………..50 sPecIFIcatIons……………..53… -
Page 7: Introduction
Use the MX400 live or in the studio, connect and control it via your PC or Mac, or use it as a hardware plug-in. The possibilities are virtually endless! InCluded ITems •…
-
Page 7: Introduction
Use the MX400 live or in the studio, connect and control it via your PC or Mac, or use it as a hardware plug-in. The possibilities are virtually endless! InCluded ITems •…
-
Page 8: Quick.start
5. Turn up the Aux Send levels on the channel corresponding to the Post-fader send (Aux 1 and Aux 2 in this example) that the MX400 is connected to until the red input LEDs light only occasionally. If the red Input LEDs stay lit, too much signal is being sent to the MX400;…
-
Page 8: Quick.start
5. Turn up the Aux Send levels on the channel corresponding to the Post-fader send (Aux 1 and Aux 2 in this example) that the MX400 is connected to until the red input LEDs light only occasionally. If the red Input LEDs stay lit, too much signal is being sent to the MX400;…
-
Page 9: Select And Load A Program
Program/Load knob Program Number Display Note that the MX400 comes with 99 Factory programs and 99 User programs. Factory and User LED’s to the left of the Program Number Display window indicate whether the displayed program is a Factory or User program. For more information…
-
Page 10: The.front.panel
14 15 11 12 13 1. Gain LEDs Each pair of Gain LEDs indicate input signal strength of each of the MX400’s input pairs. Range is from -24dB, -12dB, -6dB, and 0dB. 2. Input Knobs A & B Each Input Knob controls input gain of one stereo input pair.
-
Page 10: The.front.panel
14 15 11 12 13 1. Gain LEDs Each pair of Gain LEDs indicate input signal strength of each of the MX400’s input pairs. Range is from -24dB, -12dB, -6dB, and 0dB. 2. Input Knobs A & B Each Input Knob controls input gain of one stereo input pair.
-
Page 11: System
13. Program Number Display Displays the number of the selected program. 14. Program / Load Selects factory and user programs. Pressing this knob loads the program manually if program Auto Load is disabled. 15. Power Switch Turns the MX400 on and off.
-
Page 11: System
13. Program Number Display Displays the number of the selected program. 14. Program / Load Selects factory and user programs. Pressing this knob loads the program manually if program Auto Load is disabled. 15. Power Switch Turns the MX400 on and off.
-
Page 12: The.rear.panel
(such as 96kHz). Doing so can cause unpredictable performance. Make sure the device you are connecting to the MX400’s S/PDIF In is set as the Clock Master (if that option is available) and transmitting at a sample rate of 44.1kHz or 48kHz only. As with any…
-
Page 12: The.rear.panel
(such as 96kHz). Doing so can cause unpredictable performance. Make sure the device you are connecting to the MX400’s S/PDIF In is set as the Clock Master (if that option is available) and transmitting at a sample rate of 44.1kHz or 48kHz only. As with any…
-
Page 13: Balanced Analog Line Output Pairs
The Rear Panel MX400 6. Balanced Analog Line Output Pairs Dual RF-filtered 1/4″ balanced/unbalanced TRS or balanced XLR line outputs are servo-balanced, so no signal loss is incurred when using unbalanced connections (1/4″ inputs only). If only a single plug is connected to the Left output, both Left and Right signals can be summed to mono by selecting Mono Left for analog output A or B in the System Menu.
-
Page 14: About.the.mx400
ConneCTIng The mX400 The MX400 has four inputs and four outputs grouped in pairs A — Front (Stereo) and B — Rear. There are also two S/PDIF input/output connectors (A and B) that are the digital equivalent of these analog input and output pairs.
-
Page 14: About.the.mx400
ConneCTIng The mX400 The MX400 has four inputs and four outputs grouped in pairs A — Front (Stereo) and B — Rear. There are also two S/PDIF input/output connectors (A and B) that are the digital equivalent of these analog input and output pairs.
-
Page 15: Stereo Configuration Connections
A only (analog and S/PDIF). Input/output pair B is disabled when the Stereo configuration is selected. S/PDIF output A mirrors analog output pair A but input pair A can only be analog or digital (selectable in the MX400’s System menu). Connection Diagram: Dual Mono In/Dual Mono Out, Dual Mono In/Ste-…
-
Page 16: The.mx400.And.digital.i/O
While in the System Menu, use Knobs A, B, and C to change values. As with all equipment that receives digital audio streams, when setting either Input Source A or B to Digital, the MX400 can no longer use its own internal clock source for the audio…
-
Page 16: The.mx400.And.digital.i/O
While in the System Menu, use Knobs A, B, and C to change values. As with all equipment that receives digital audio streams, when setting either Input Source A or B to Digital, the MX400 can no longer use its own internal clock source for the audio…
-
Page 17
T 200mA L, 250V 100V — 120V ~ 50/60Hz 16W MAX If only S/PDIF B input is to be used, the MX400 still needs the external clock source to be connected to S/PDIF A. Master Clock Source External Processor or… -
Page 17
T 200mA L, 250V 100V — 120V ~ 50/60Hz 16W MAX If only S/PDIF B input is to be used, the MX400 still needs the external clock source to be connected to S/PDIF A. Master Clock Source External Processor or… -
Page 18: Using.the.mx400
Program Display until loaded. The name of the pro- gram also appears in the MX400’s Main Display. The Factory or User LED next to the Program Display lights to indicate whether a Factory or User pro- gram is selected.
-
Page 18: Using.the.mx400
Program Display until loaded. The name of the pro- gram also appears in the MX400’s Main Display. The Factory or User LED next to the Program Display lights to indicate whether a Factory or User pro- gram is selected.
-
Page 19: Editing A Program
Using the MX400 MX400 3. When naming is complete, press the Store button again. Turn the Page/Select or Program/Load knob to select the new user program memory location to store 4. Press the Store button again to complete the store procedure.
-
Page 19: Editing A Program
Using the MX400 MX400 3. When naming is complete, press the Store button again. Turn the Page/Select or Program/Load knob to select the new user program memory location to store 4. Press the Store button again to complete the store procedure.
-
Page 20: Changing An Effect
Using the MX400 2. Turn Edit Knob A, B, or C Edit to modify a parameter setting. When finished, store the changes to the program if you would like them to be recalled. From the Program Edit Menus 1. While on the Program Screen, turn the Page/Select knob to highlight the effect you want to edit.
-
Page 21: Changing Knob Assignments
When finished, store the changes to the program if you would like them to be recalled. eFFect.mIX/routIng Each of the MX400 programs offers programmable effect routing and a wet/dry mix parameter for each effect. These different routings and mix controls give you many options for your effect signal path and precise control over balance between the two effects.
-
Page 22: Stereo And Dual Stereo Configurations
Using the MX400 stereo.and.dual.stereo.conFIguratIons 1. Dual Mono 2. Cascade Effect 1/3 Effect 2/4 Effect 1/3 Effect 2/4 3. Parallel 4. Mono Split Effect 1/3 Effect 1/3 Effect 2/4 Effect 2/4 5. Stereo Effect 1/3 1. Dual Mono This routing option sends the Left and Right input signals through Effect 1/3 and Effect 2/4 respectively.
-
Page 23: Surround Configurations
The Left/Right rear outputs are always 100% wet processed. 2. Surround In/Out This routing option takes a surround input source connected to all of the MX400 inputs, processes through the Surround reverb, and sends it to all four outputs.
-
Page 23: Surround Configurations
The Left/Right rear outputs are always 100% wet processed. 2. Surround In/Out This routing option takes a surround input source connected to all of the MX400 inputs, processes through the Surround reverb, and sends it to all four outputs.
-
Page 24: Tempo Button
A Parallel Processor is connected by sending a copy of a signal (such as from an Aux Send of a mixer channel) to an effects device (such as the MX400), and the effected (or wet) signal is returned to the mixer or amp. It is then blended together with the original unaffected (dry) signal.
-
Page 25: Reverbs
The MX400 proudly offers a true Surround Hall reverb, the first in its class. The Sur- round Hall uses all of the MX400’s DSP horsepower to provide an immensely lush, en- veloping reverb that offers two routing options: stereo in/surround out and surround in/ surround out.
-
Page 25: Reverbs
The MX400 proudly offers a true Surround Hall reverb, the first in its class. The Sur- round Hall uses all of the MX400’s DSP horsepower to provide an immensely lush, en- veloping reverb that offers two routing options: stereo in/surround out and surround in/ surround out.
-
Page 26
The Plates in the MX400 model the sound of metal plates with high initial diffusion and a relatively bright, colored sound. Plate reverbs are designed to be heard as part of the music, mellowing and thickening the initial sound. -
Page 26
The Plates in the MX400 model the sound of metal plates with high initial diffusion and a relatively bright, colored sound. Plate reverbs are designed to be heard as part of the music, mellowing and thickening the initial sound. -
Page 27
Effects Descriptions MX400 Studio Reverb — Stereo Much like Room reverb, Studio produces an excellent simulation of smaller, well-controlled acoustic spaces, characteristic of the main performance areas in recording studios. Studio is also useful with dialog and voiceover applications as well as individual instrument and electric guitar tracks. -
Page 28
Effects Descriptions up more slowly and sustains for the time set by Spread. With Shape in the middle, the build-up and sustain of the reverberation envelope emulates a large concert hall (assuming that Spread is at least halfway up, and that Size is 30 meters or larger). Low Spread settings result in a rapid onset of reverberation at the beginning of the envelope, with little or no sustain. -
Page 29: Delays
Effects Descriptions MX400 Boing This is a unique parameter to the Spring reverb, designed to increase or decrease the amount of spring rattle that is a physical characteristic of spring tank reverbs. delays Delays repeat a sound a short time after it first occurs. Delay becomes echo when the output is fed back into the input (feedback).
-
Page 30
Ducker Threshold MX400’s Studio and Digital delays offer a “ducking” feature, which causes the delay repeats to attenuate (or get softer) by –6dB when live (or input) signal is present. This allows the delay to remain as an effect, and not clash with the original signal. The higher this value is set, the louder an input signal must be for the ducking to take place. -
Page 31: Dbx ® Dynamics
To better use the Compressor in the MX400, a bit of understanding about compression is helpful. Note that the Compressor does not pass dry audio.
-
Page 31: Dbx ® Dynamics
To better use the Compressor in the MX400, a bit of understanding about compression is helpful. Note that the Compressor does not pass dry audio.
-
Page 32
Effects Descriptions Because the resulting output is less than the original signal, a third control, Makeup Gain compensates for this loss of level, but with less dynamic range, or the difference between the softest and loudest parts of the signal. Note: The De-Esser and Compressor effects are Mono In Dual Stereo configuration programs. -
Page 33: Modulated Effects
Effects Descriptions MX400 Release Release allows adjustment of the release time constant, determining how quickly the compressor responds to decreasing input level. This should normally be set long. Short release times may cause an effect similar to “pumping” in an analog compressor.
-
Page 34
— from subtle detunes to full interval shifts up or down a two octave range. The MX400’s Pitch Shift effect is a chromatic shifter, meaning all notes of the scale are shifted by the same interval. Pitch Shift is very useful with guitar tracks, monophonic synth lines, or where special vocal effects are needed. -
Page 35
Effects Descriptions MX400 Depth Scales the intensity of the effect. This control affects the output of the LFO only. It has no effect on the outputs of the individual waveforms. Voices Controls the number of additional Chorus voices. Regen Controls the amount of modulated signal being fed back into the input, creating feed- back. -
Page 36: Mx400.System.menus
System Menus. Configuration This menu is where you select what kind of processor you want the MX400 to run as (Surround, Stereo, or as a Dual Stereo processor). Use Knob A to change the MX400’s configuration. See page 8 («About the MX400») for more information on configurations.
-
Page 37
MX400. When set to 44.1kHz, the MX400 utilizes an inter- nal clock with a 44.1kHz sample rate. When set to 48kHz, the MX400 uti- lizes an internal clock with a 48kHz sample rate. When set to Digital, the unit utilizes the S/PDIF input clock source, even if an analog audio source is used. -
Page 37
MX400. When set to 44.1kHz, the MX400 utilizes an inter- nal clock with a 44.1kHz sample rate. When set to 48kHz, the MX400 uti- lizes an internal clock with a 48kHz sample rate. When set to Digital, the unit utilizes the S/PDIF input clock source, even if an analog audio source is used. -
Page 38
This is useful when you want to record a dry performance digitally, but also hear effects processing while you are recording. To send unpro- cessed audio out the MX400 digital outputs, set the Digital Out A and Digital Out B options to Dry. Turn Knob A to change Digital Out A, and Knob B to change Digital Out B. -
Page 39
Channel B. MIDI channel A is the channel used by all MX400 Configurations: Surround, Stereo, and Dual Stereo. Any program change or CC messages sent to the MX400 on MIDI Channel A will be processed by the active program. Channels can be set from 1-16, All channels, or Off. Use Knob A to change MIDI Channel A settings. -
Page 40
The MIDI CC receive option lets you enable or disable the MX400 from receiving MIDI CC messages. When MIDI Program Receive is set to off, it filters all MIDI CC messages so that the MX400 will not respond them in any configuration (Surround, Stereo, or Dual Stereo). MIDI program change messages are still received even when this option is disabled. -
Page 41: The.mx-Edit Tm .Editor/Librarian.-.Windows ®. .And.mac Tm
MX400 powered on and connected via a standard USB cable. Important: If you plug your MX400 into a USB port other than the one used during the installation of MX-Edit software and drivers, you may need to run the USB driver installer again.
-
Page 42: Installing The Mx-Edit Editor/Librarian Software — Mac
QuICk sTarT When you first open MX-Edit, you will see the MX-Edit Library on the left side of the MX-Edit window, with the MX400 icon at the top of the Library. An editor panel for the current program is also open.
-
Page 42: Installing The Mx-Edit Editor/Librarian Software — Mac
QuICk sTarT When you first open MX-Edit, you will see the MX-Edit Library on the left side of the MX-Edit window, with the MX400 icon at the top of the Library. An editor panel for the current program is also open.
-
Page 43: The Mx-Edit Library
Factory and User programs stored in MX400’s physical memory. To view programs in the Library window, click the MX400 tab in the upper left corner, then double-click the Factory or User icon to expand the Library and see the Factory or User program lists.
-
Page 43: The Mx-Edit Library
Factory and User programs stored in MX400’s physical memory. To view programs in the Library window, click the MX400 tab in the upper left corner, then double-click the Factory or User icon to expand the Library and see the Factory or User program lists.
-
Page 44: The Mx-Edit Program Editor
All changes that you make in the active Program Editor window are reflected in real- time on the MX400. MX-Edit and the MX400 are fully interactive, so any changes made on the MX400’s front panel are reflected in real-time in the MX-Edit Program Editor window as well.
-
Page 45
To change a reverb or effect in Processor 1 or Processor 2, left click on the Reverb/ Effect Select button in Effect 1 or Effect 2 control area. A list of the MX400’s reverbs and effects appears, with a check mark next to the currently selected reverb or effect. -
Page 45
To change a reverb or effect in Processor 1 or Processor 2, left click on the Reverb/ Effect Select button in Effect 1 or Effect 2 control area. A list of the MX400’s reverbs and effects appears, with a check mark next to the currently selected reverb or effect. -
Page 46: Saving A Program
To change the tempo value, simply place the mouse cursor over the Tempo button, and left-click twice to tap the tempo, just as you would on the MX400 front panel. The Tempo buttons on the MX400 and in the Program Editor window now flash at the new tempo.
-
Page 46: Saving A Program
To change the tempo value, simply place the mouse cursor over the Tempo button, and left-click twice to tap the tempo, just as you would on the MX400 front panel. The Tempo buttons on the MX400 and in the Program Editor window now flash at the new tempo.
-
Page 47: Storing A Program
MX-Edit Library and the MX400 itself. Click Save to store to the selected User pro- gram location. To cancel the operation, click Cancel, or close the Store to Device dialog box.
-
Page 47: Storing A Program
MX-Edit Library and the MX400 itself. Click Save to store to the selected User pro- gram location. To cancel the operation, click Cancel, or close the Store to Device dialog box.
-
Page 48: Using.the.mx400.As.a.hardware.plug-In
Make sure the MX400 is powered up and connected to your computer with a standard USB cable. (For Windows XP users, make sure the MX400 is plugged into the same USB port as when the software was loaded.) audIo.connectIons…
-
Page 48: Using.the.mx400.As.a.hardware.plug-In
Make sure the MX400 is powered up and connected to your computer with a standard USB cable. (For Windows XP users, make sure the MX400 is plugged into the same USB port as when the software was loaded.) audIo.connectIons…
-
Page 49: Software Configuration
For lower latencies and the best audio performance, it is recommended that you con- nect the MX400 to your computer’s audio I/O device using the S/PDIF Inputs and out- puts. If your I/O device does not have a S/PDIF connection, or if it already connected to another device, you may use the analog connections from your computer’s I/O device…
-
Page 50: Using The Mx400 Plug-In Window
(per physical device) of the plug-in window. If you attempt to open more than one plug-in window, the message shown below will appear. This message will also appear if the MX400’s MIDI ports are being used by the DAW or another application.
-
Page 50: Using The Mx400 Plug-In Window
(per physical device) of the plug-in window. If you attempt to open more than one plug-in window, the message shown below will appear. This message will also appear if the MX400’s MIDI ports are being used by the DAW or another application.
-
Page 51: Midi.implementation.chart
MX400 mIdI ImPlemenTaTIon CharT…
-
Page 51: Midi.implementation.chart
MX400 mIdI ImPlemenTaTIon CharT…
-
Page 52: Midi.cc.maps
mIdI CC maP — Dual StereO effectS…
-
Page 52: Midi.cc.maps
mIdI CC maP — Dual StereO effectS…
-
Page 53
MX400 mIdI CC maP — rOutIng 5 Dual StereO effectS, StereO effectS… -
Page 53
MX400 mIdI CC maP — rOutIng 5 Dual StereO effectS, StereO effectS… -
Page 54
mIdI CC maP- rOutIng 5 Dual StereO effectS, StereO effectS… -
Page 54
mIdI CC maP- rOutIng 5 Dual StereO effectS, StereO effectS… -
Page 55
MX400 mIdI CC maP — SurrOunD hall effectS… -
Page 55
MX400 mIdI CC maP — SurrOunD hall effectS… -
Page 56: Program.lists
Programs — Dual StereO…
-
Page 56: Program.lists
Programs — Dual StereO…
-
Page 57
MX400 Programs — StereO… -
Page 57
MX400 Programs — StereO… -
Page 58
Programs — SurrOunD… -
Page 58
Programs — SurrOunD… -
Page 59: Specifications
MX400 sPeCIfICaTIons Analog Audio Inputs Connectors four ¼» TRS balanced or unbalanced Impedance 50k Ohms bal., 25k Ohms unbal. Input Level +4 dBu nominal, +24 dBu maximum A/D Conversion 24-bit, 48kHz or 44.1kHz, 128 x oversampling Analog Audio Outputs Connectors four ¼»…
-
Page 59: Specifications
MX400 sPeCIfICaTIons Analog Audio Inputs Connectors four ¼» TRS balanced or unbalanced Impedance 50k Ohms bal., 25k Ohms unbal. Input Level +4 dBu nominal, +24 dBu maximum A/D Conversion 24-bit, 48kHz or 44.1kHz, 128 x oversampling Analog Audio Outputs Connectors four ¼»…
-
Page 60
Phone: (801)-568-7660 | Fax: (801)-568-7662 Harman Music Group MX400 8760 South Sandy Parkway | Sandy, Utah 84070 Questions or comments? U.S.A. Email us at: customer@lexiconpro.com Copyright 2006 Lexicon Part Number: 18-0446-A… -
Page 60
Phone: (801)-568-7660 | Fax: (801)-568-7662 Harman Music Group MX400 8760 South Sandy Parkway | Sandy, Utah 84070 Questions or comments? U.S.A. Email us at: customer@lexiconpro.com Copyright 2006 Lexicon Part Number: 18-0446-A…
This manual is also suitable for:
Mx400xl

2
Ñåðòèôèêàöèîííîå óäîñòîâåðåíèå
Ïðîèçâîäèòåëü: Lexicon
Àäðåñ ïðîèçâîäèòåëÿ:8760 S. Sandy Parkway
Sandy, Utah 84070, USA
çàÿâëåò, ÷òî äàííûé ïðîäóêò:
Íàèìåíîâàíèå ïðîäóêòà:MX400 and MX400XL
Ïðèìå÷àíèå: Ê íàèìåíîâàíèþ ïðîäóêòà ìîãóò áûòü äîáàâëåíû áóêâû — EU.
Âàðèàíò ïðîäóêòà: íåò
ñîîòâåòñòâóåò ñëåäóþùèì ñïåöèôèêàöèÿì ïðîäóêòà
Áåçîïàñíîñòü:IEC 60065 (7
th
ed. 2001)
EMC: EN 55013 (2001+A1)
EN 55020 (2002+A1)
Äîïîëíèòåëüíàÿ èíôîðìàöèÿ:
Íàñòîÿùèì óäîñòîâåðÿåòñÿ, ÷òî ïðîäóêò ñîîòâåñòâóåò òðåáîâàíèÿì Äèðåêòèâû 73/23/EEC ïî íèçêèì íàïðÿæåíè-
ÿì è EMC Äèðåêòèâû 89/336/EEC â ñîîòâåòñòâèè ñ èçìåíåíèÿìè, âíåñåííûìè Äèðåêòèâîé 93/68/EEC..
Âèöå-ïðåçèäåíò Engineering-MI
8760 S. Sandy Parkway
Sandy, Utah 84070, USA
Date: May 15, 2006
Êîíòàêòû: ñ ìåñòíûì îòäåëîì ïðîäàæ Lexicon è ñåðâèñíûì îòäåëîì èëè
Harman Music Group
8760 South Sandy Parkway
Sandy, Utah
84070 USA
Ph: (801) 566-8800

249 ₽
Инструкция (руководство пользователя) на Ревербератор/процессор эффектов Lexicon MX-400
Артикул: lexicon-mx-400
Категория: Lexicon
-
Описание
-
Детали
Описание
Инструкцию по эксплуатации Lexicon MX-400 на русском языке можно будет скачать в личном кабинете после оформления и оплаты заказа.
Детали
| Формат файла |
|
|---|---|
| Размер инструкции в кб |
2213 |