- Manuals
- Brands
- Geeetech Manuals
- 3D Printers
- Acrylic I3 Pro
- Manual
-
Bookmarks
Quick Links
Acrylic Geeetech I3 Pro B
3D Printer
Related Manuals for Geeetech Acrylic I3 Pro B
Summary of Contents for Geeetech Acrylic I3 Pro B
-
Page 1
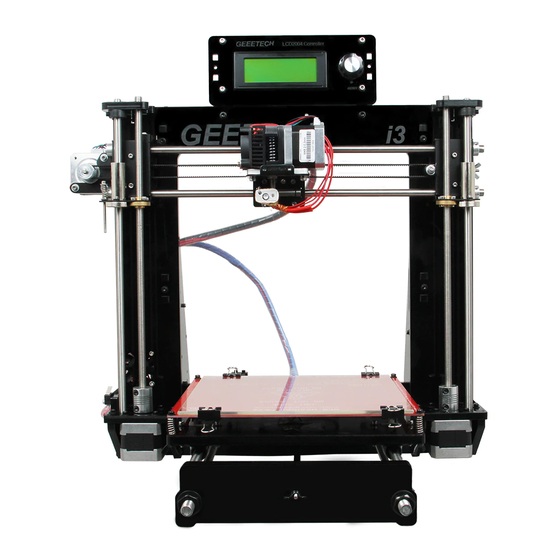
Acrylic Geeetech I3 Pro B 3D Printer… -
Page 2: Copyright Declaration
Copyright Declaration The copyright of this manual belongs to the Shenzhen GETECH CO., LTD. (hereinafter referred to as the «Geeetech»), and all rights reserved. No part of this specification should be reproduced or extracted in any forms or means without the prior written consent of Geeetech by any company and individuals.
-
Page 3: Safety Instructions
We have provided detailed instructions to help you assemble it easily, please download at geeetech.com. However ultimately we cannot be responsible for your health and safety whilst building or operating the printer, with that in mind be sure you are confident with what you are doing prior to commencing with building or buying.
-
Page 4
GEEETECH and the molten plastic extruded will initially be at around 200° C, so special care and attention should be made when handling these parts of the printer during operation. We wouldn’t recommend leaving your printer running unattended, or at least until you are confident to do so. We cannot be held responsible for any loss, damage, threat, hurt or other negligent result from either building or using the printer. -
Page 5: Package List
GEEETECH INTRODUCTION: This Acrylic I3 Pro B 3D printer is designed and manufactured by Shenzhen Getech Co., Ltd based on the Reprap Prusa I3, Geeetech I3 features simple assembly, easy debugging and more stable performance. The acrylic structure makes the printer much easier to operate.
-
Page 6
GEEETECH Name Specifications D8*L322mm Smooth Z axis D8*L390mm Smooth X axis D8*L410mm Smooth Y axis Threaded M8*L300mm Z-axis screw M10*L450mm Threaded Y-axis M2.5 M2.5 Washers Washers Washers Washers — 5 -… -
Page 7
GEEETECH M2.5 Lock nut Lock nut Wing nut Square nut Φ8(tin-bronze) Z-axis nut — 6 -… -
Page 8
GEEETECH Spring washer Screw locking Φ8 ring M2.5×8 mm Screw Screw M2.5×16 mm M3x6mm Screw M3x8mm Screw M3x10mm Screw M3x12mm Screw M3x16mm Screw M3x20mm Screw M3x30mm Screw M3x35mm Screw Screw M3x40mm M4x6mm Screw M4x25mm Screw — 7 -… -
Page 9
GEEETECH countersunk Bolts head bolt M3x16mm Spring LM8UU LM8UU Linear Bearings LM8LUU LM8LUU Linear Bearings Linear Bearing — 8 -… -
Page 10
GEEETECH L1=775(Y axis) Timing Belts L1=860mm(X Timing axis) Belts Bearing metal plate holder Belt Aluminum plate mount 5-8mm Couplings Pulleys 20 tooth d5mm — 9 -… -
Page 11
GEEETECH Driving wheel MR84zz Ball (Placed in bearing No.45) With Aircraft type Spacer Dovetail clamp 9*10*5mm Heat sink Sticker — 10 -… -
Page 12
GEEETECH Belt bracket Knob For LCD 40x40x10mm DuPont 3-Pin cable Male-Female USB Cord — 11 -… -
Page 13
GEEETECH End stop blue / red / black 3D Power 3*0.75 Square Cable mm Switch Line Power Control board Cable power input With heating Heat bed wire and Thermo- wire — 12 -… -
Page 14
GEEETECH Borosilicat e glass Input: 115V/1.5A 230V/0.75A Power Output : supply DC12V/0-15A Stepper motor Extruder MK8 extruder 1set Control GT2560+4 board A4988 — 13 -… -
Page 15
GEEETECH LCD 2004 LCD2004 Nylon ties Coil Acrylic kits XZ frame I3-01 Left side I3-02 frame — 14 -… -
Page 16
GEEETECH Right side I3-03 frame Z motor I3-04 fixed plate Z motor I3-05 fixed plate Z motor I3-06 support plate Z motor I3-07 support plate — 15 -… -
Page 17
GEEETECH Z top mount I3-08 Front support plate A of screw I3-09 and smooth Front support plate B of screw I3-10 and smooth Rear Support plate A of I3-11 screw and smooth rod — 16 -… -
Page 18
GEEETECH Rear support plate B of I3-12 screw and smooth rod Y motor I3-13 fixed plate Y plate for connecting I3-14 plate Y platform I3-15 support plate Y bearing I3-16 limit block Fix the LCD Acrylic panel washer — 17 -… -
Page 19
GEEETECH LCD2004 frame LCD2004 frame holder Plastic Parts X-axis left left end X-axis Right right end Print PI3-S07 bracket — 18 -… -
Page 20
GEEETECH Bearing PI3-08 Bracket Extruder PI3B-S01 bracket Free add-on Ejector File Screw driver kit — 19 -… -
Page 21
GEEETECH Filament holder Starter About 3 meters filament *The acrylic plate for the spool holder and the LCD frame are 5mm. — 20 -… -
Page 22: General Care And Maintenance
Don’t leave your printer in shady and moist places, which may exacerbate the problems associated with erosion. The three axes of the GEEETECH I3 Pro B are lubricated with grease for smooth operation and can last for a long time.
-
Page 23
GEEETECH SUPPROT Thanks for choosing Geeetech, we strive to provide a satisfied and pleasant shopping experience for you, but we do understand there may be some questions you may encounter in using our product. If so, you can contact us directly or post on our forum, our technique staff will help you resolve it. -
Page 24
GEEETECH GEEETECH www.geeetech.com — 23 -…
This manual is also suitable for:
I3 pro b

Комплект для сборки 3D-принтера Geeetech Prusa I3 Pro W
ГЕЕТЕХ
Заявление об авторских правах
Авторские права на это руководство принадлежат компании Shenzhen GETECH CO., LTD. (далее «Geeetech»), и все права защищены. Никакая часть данной спецификации не должна воспроизводиться или извлекаться в любых формах или средствами без предварительного письменного согласия Geeetech со стороны какой-либо компании или отдельных лиц.
Техподдержка
Если вас интересуют технологии 3D-печати, управления полетом и U-home, добро пожаловать в Geeetech, у нас есть для вас серия готовых продуктов, основных плат, модулей и различных периферийных устройств. Или, если вам нужна соответствующая информация или техническая поддержка, войдите на наш форум, где вы сможете найти все, что вам нужно, об открытом исходном коде. Чтобы узнать больше о наших новых продуктах, посетите www.geeetech.com, мы будем служить вам от всего сердца.
— 1 —
ПРАВИЛА ТЕХНИКИ БЕЗОПАСНОСТИ
Для сборки принтера потребуется определенная физическая ловкость, здравый смысл и глубокое понимание того, что вы делаете. Мы предоставили подробные инструкции, которые помогут вам легко его собрать, пожалуйста, загрузите на geeetech.com.
Однако в конечном итоге мы не можем нести ответственность за ваше здоровье и безопасность во время сборки или эксплуатации принтера. Помня об этом, убедитесь, что вы уверены в своих действиях, прежде чем приступить к сборке или покупке. Прочтите все руководство, чтобы вы могли принять обоснованное решение.
Строительство и эксплуатация связаны с электричеством, поэтому следует принять и соблюдать все необходимые меры предосторожности, принтер работает от 12 В, питаемого от сертифицированного источника питания, поэтому вам никогда не придется связываться с чем-либо более 12 В, но имейте в виду, что это все еще может должны быть задействованы высокие токи, и даже при 12 В к ним нельзя относиться легкомысленно.
Высокие температуры связаны с 3D-печатью, экструзионное сопло горячего конца может работать при температуре около 230 ° C, нагретый слой работает при температуре 110 ° C, а температура экструдированного расплавленного пластика первоначально будет составлять около 200 ° C, поэтому
— 2 —
При обращении с этими частями принтера во время работы следует соблюдать особую осторожность и внимание.
Мы не рекомендуем оставлять ваш принтер работающим без присмотра, или, по крайней мере, до тех пор, пока вы не будете уверены в этом. Мы не несем ответственности за какие-либо потери, повреждения, угрозы, травмы или другие последствия небрежности в результате строительства или использования принтера.
— 3 —
ВВЕДЕНИЕ:
3D-принтер Geeetech Prusa I3 pro W разработан и изготовлен компанией Shenzhen Getech Technology Co., Ltd. По сравнению с другими принтерами Geeetech I3 pro, весь корпус I3 pro W, сделанный из высококачественной древесины, значительно упрощен и портативен. Его DIY-дизайн принесет большое чувство выполненного долга, когда вы увидите, как целая машина выходит из фрагментов. Кроме того, I3 pro W сохраняет отличные характеристики 3D-принтеров серии I3: высокая точность и скорость печати, открытая система волокон, гладкая и изысканная поверхность и прочная структура 3D-объектов, безопасная и удовлетворительная печать. Geeetech I3 pro W в сочетании с программным обеспечением для 3D-печати EasyPrint позволяет легко управлять всем заданием печати как для новичков, так и для профессионалов.
Если вы добавите к нему модуль Wi-Fi, вы сможете удаленно управлять своим Pro W через наше приложение EasyPrint 3D, пользоваться множеством бесплатных 3D-моделей в нашей облачной галерее, что позволяет печатать где угодно и когда угодно.
Дайте волю своим смелым идеям с Geeetech Prusa I3 pro W!
(Примечание: модуль Wi-Fi в этот комплект не входит, его нужно покупать отдельно)
— 4 —
СПИСОК ПАКЕТОВ
В этот список входят все детали, необходимые для сборки вашего 3D-принтера Pro W. После получения посылки проверьте, включены ли все перечисленные детали. Также убедитесь, что все компоненты находятся в хорошем состоянии и не повреждены во время транспортировки. Если чего-то не хватает, немедленно свяжитесь с нашей службой поддержки клиентов и сообщите нам НЕТ. , Имя и кол-во.
| Нет | Имя и фамилия | Характеристики | Кол-во | фильм |
| 1 | Гладкий стержень | ψ 8 * L322 мм
ось Z |
2 | 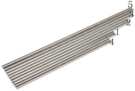 |
| 2 | Гладкий стержень | ψ 8 * L390 мм
Ось X |
2 | |
| 3 | Гладкий стержень | ψ 8 * L410 мм
Ось Y |
2 | |
| 4 | Стержень с резьбой | M8 * L300 мм
Винт оси Z |
2 | |
| 5 | Стержень с резьбой | M10 * L450 мм
Ось Y |
2 | |
| 6 | Стиральная машина | M2.5 | 6 |  |
| 7 | Стиральная машина | M3 | 100 | |
| 8 | Стиральная машина | M10 | 12 | |
| 9 | Паз | M2.5 | 6 | 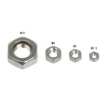 |
| 10 | Паз | M3 | 26 | |
| 11 | Паз | M4 | 2 | |
| 12 | Паз | M10 | 12 | |
| 13 | Контргайка | M4 | 2 | |
| 14 | Барашковая гайка | M3 | 5 | |
| 15 | Квадратный орех | M3 | 25 | |
| 16 | Гайка оси Z | Φ8 (олово-бронза) | 2 | |
| 17 | Проволочная губка | M10 | 6 | |
| 18 | Стопорное кольцо | Φ8 с винтами Джимми | 8 | |
| 19 | Винт | MXNXX × 2.5 мм | 2 | 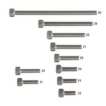 |
| 20 | Винт | MXNXX × 2.5 мм | 4 | |
| 21 | Винт | M3x6mm | 25 | |
| 22 | Винт | M3x10mm | 17 | |
| 23 | Винт | M3x12mm | 7 | |
| 24 | Винт | M3x16mm | 46 | |
| 25 | Винт | M3x20mm | 4 | |
| 26 | Винт | M3x35mm | 5 | |
| 27 | Винт | M3x40mm | 1 | |
| 28 | Винт | M4x6mm | 4 |  |
| 29 | Винт | M4x25mm | 2 | |
| 30 | Винт | потайная головка M3x16мм | 2 | |
| 31 | Весна | 20мм | 5 |  |
| 32 | Линейные подшипники | ЛМ8УУ | 3 | |
| 33 | Линейные подшипники | ЛМ8ЛУУ | 2 | |
| 34 | Линейные подшипники | LMH8UU | 2 |  |
| 35 | Ремни ГРМ | Ось Y | 1 | |
| 36 | Ремни ГРМ | Ось X | 1 | |
| 37 | Держатель ведомого колеса | Металлическая пластина | 2 |  |
| 38 | Муфты | 5-8mm | 2 |  |
| 39 | Барабаны | 20 т D5 | 2 |  |
| 40 | Ведущее колесо | 2 | |
|
| 41 | шариковый подшипник | MR84zz (размещен под номером 40) | 4 | |
| 42 | Прокладка | Для платы управления | 4 |  |
| 43 | Прокладка | Для LCD | 4 | |
| 44 | Моллюск ласточкин хвост | 19мм | 4 | |
| 45 | Радиатор | 4 | ||
| 46 | наклейка | 1 |  |
|
| 47 | Кронштейн ремня | 2 | 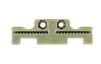 |
|
| 48 | Ручка | Для LCD | 1 | |
| 49 | Вентилятор | 40x40x10 мм 12 В | 1 |  |
| 50 | Удлинительный кабель вентилятора | 3-контактный MF | 1 |  |
| 51 | USB-кабель | AB | 1 |  |
| 52 | Конечная остановка | синий / красный / черный | 3 |  |
| 53 | Кабель питания | 1 | 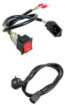 |
|
| 54 | Выходной кабель питания | 1 |  |
|
| 55 | Комплект теплового постельного белья | С нагревательной проволокой и термо-проволокой | 1 комплект |  |
| 56 | Боросиликатное стекло | 1 | ||
| 57 | Блок питания | 110V- 240V DC12V/0-15A | 1 |  |
| 58 | Шаговый двигатель | 4 |  |
|
| 59 | экструдер | Экструдер MK8 | 1 | 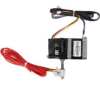 |
| 60 | Пульт управления | GT2560 + 4 A4988 | 1 набор | 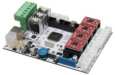 |
| 61 | LCD 2004 | LCD2004 | 1 | 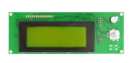 |
| 62 | Галстуки | 3 * 150mm | 30 |  |
| 63 | змеевик | 3M | 1 |  |
| Деревянные наборы | ||||
| П1- А | Рама XZ (вверх) | I3-01 | 1 | |
| W1-Б | Рама XZ (внизу) | I3-01 | 1 |  |
| W2 | Левая боковая рама | I3-02 | 1 |  |
| W3 | Правая боковая рама | I3-03 | 1 |  |
| W4 | Крепежная пластина двигателя Z (слева) | I3-04 | 1 |  |
| W5 | Крепежная пластина двигателя Z (правая) | I3-05 | 1 |  |
| W6 | Опорная плита двигателя Z | I3-06 | 3 | |
| W7 | Опорная плита двигателя Z | I3-07 | 1 |  |
| W8 | Z верхнее крепление | I3-08 | 2 | |
| W9 | Передняя опорная плита A | I3-09 | 1 |  |
| W10 | Передняя опорная плита B | I3-10 | 1 |  |
| W11 | Задняя опорная плита C | I3-11 | 1 |  |
| W12 | Задняя опорная плита D | I3-12 | 1 |  |
| W13 | Крепежная пластина двигателя Y | I3-13 | 1 |  |
| W14 | Соединительная пластина оси Y | I3-14 | 2 | |
| W15 | Строительная площадка | I3-15 | 1 |  |
| W16 | Подшипниковый блок Y | I3-16 | 3 | |
| W17 | крепление кронштейна ремня | I3-17 | 1 | |
| Металлические части | ||||
| M1 | Левый конец оси X | оставил | 1 |  |
| M2 | Правый конец оси X | Правильно | 1 |  |
| M3 | Опора подшипника | PI3F-S07 | 1 |  |
| M4 | Подшипниковый кронштейн | ПИ3Ф-08 | 4 | |
| M5 | Кронштейн экструдера | PI3B-S01 | 1 |  |
| Бесплатное дополнение | ||||
| F1 | Выталкивающий штифт | 1 |  |
|
| F2 | File | 1 | ||
| F3 | Набор катушек с нитью | Деревянные наборы | 1 комплект |  |
| F4 | Стартовая нить | Около 3 метров | 1 |  |
| F5 | Набор отверток |  |
||
| F6 | Шариковая ручка | 1 |
-20-
ОБЩИЙ УХОД И ТЕХНИЧЕСКОЕ ОБСЛУЖИВАНИЕ
Как и все электронное оборудование, важно содержать принтер в чистоте, чтобы продлить срок его службы. Регулярно удаляйте пыль и мусор салфеткой из микрофибры или сжатым воздухом. Каждый раз после использования очищайте трубку и насадку, чтобы обеспечить бесперебойную работу.
- Не оставляйте нагреватели на принтере включенными на длительное время, когда они не используются.
- Не оставляйте принтер в тенистых и влажных местах, так как это может усугубить проблемы, связанные с эрозией.
- Три оси GEEETECH I3 Pro W смазаны консистентной смазкой для бесперебойной работы и могут прослужить долгое время. Возможно, потребуется повторно нанести смазку на ваш принтер для поддержания бесперебойной работы.
- Избегайте размещения блока питания таким образом, чтобы кирпич свисал, тянул или подвергал ненужные нагрузки электрическим проводам и компонентам.
— 21 —
ПОДДЕРЖКА
Благодарим вас за выбор Geeetech, мы стремимся предоставить вам удовлетворенные и приятные впечатления от покупок, но мы понимаем, что могут возникнуть некоторые вопросы, с которыми вы можете столкнуться при использовании нашего продукта. Если да, вы можете связаться с нами напрямую или написать на нашем форуме, наши технические специалисты помогут вам решить эту проблему. Для получения более подробной информации вы также можете посетить вики Geeetech с нашей домашней страницы.
(https://www.geeetech.com)
Подробные инструкции по сборке можно найти по адресу: https://www.geeetech.com/geeetech-prusa-i3-pro-w-3d-printer-diy-kit-p-1014.html
Подробные видеоролики о строительстве можно найти на YouTube: https://www.youtube.com/playlist?list=PLODCkot3GrigDNAiILi4PDbKfZE41VtgG
Подпишитесь на наш канал YouTube, чтобы увидеть больше видео. https://www.youtube.com/user/geeetech
— 22 —

ГЕЕТЕХ
www.geeetech.com
Документы / Ресурсы
Рекомендации

Интернет-магазин 3d принтеров geeetech, универсальный магазин для 3d принтеров, аксессуары для 3d принтеров, запчасти для 3d принтеров
Интернет-магазин 3d принтеров geeetech, универсальный магазин для 3d принтеров, аксессуары для 3d принтеров, запчасти для 3d принтеров
Интернет-магазин 3d принтеров geeetech, универсальный магазин для 3d принтеров, аксессуары для 3d принтеров, запчасти для 3d принтеров
Интернет-магазин 3d принтеров geeetech, универсальный магазин для 3d принтеров, аксессуары для 3d принтеров, запчасти для 3d принтеров
youtube.com/playlist?list=PLODCkot3GrigDNAiILi4PDb
Инструкция по сборке 3D-принтера Geeetech Prusa I3 Pro W — YouTube
Geeetech – YouTube
 Loading…
![]()
Assemble Instruction of Geeetech Acrylic Prusa I3
pro B
Version 04-11-2016

Shenzhen GETECH CO.,LTD
GEEETECH
Safety Instructions
Building the printer will require a certain amount of physical dexterity, common sense and a thorough understanding of what you are doing. We have provided this detailed instruction to help you assemble it easily.
However ultimately we cannot be responsible for your health and safety whilst building or operating the printer, with that in mind be sure you are confident with what you are doing prior to commencing with building or buying. Read the entire manual to enable you to make an informed decision.
Building and operating involves electricity, so all necessary precautions should be taken and adhered to, the printer runs on 12V supplied by a certified power supply, so you shouldn’t ever have to get involved with anything over 12V but bear in mind there can still be high currents involved and even at 12V they shouldn’t be taken lightly.
High temperatures are involved with 3D Printing, the Extrusion nozzle of the hot end can run about 230°C, the heated bed runs 110°C and the molten plastic extruded will initially be at around 200°C, so special care and attention should be made when handling these parts of the printer during operation.
We wouldn’t recommend leaving your printer running unattended, or at least until you are confident to do so. We cannot be held responsible for any loss, damage, threat, hurt or other negligent result from either building or using the printer.
1

Shenzhen GETECH CO.,LTD
GEEETECH
Preparation
1.Unpack the kit and check if all parts are in the box and check the condition of each part, there might be some damage during shipping. To help you with this, there is BOM in the box and each bag was labeled with part number.
2.Contact our customer service immediately by email or through the website if you find any missing or damaged parts. And on the bottom of the BOM, there is a signature of reviewer, please take a picture of it and attach the picture in your mail.
3.Read through each chapter of these instructions to gain an over-all idea of what is involved and how long it might take, before starting on the work described.
4.Before you start, you can put all the part in order to save your time especially those screws and nuts. Do not mix them up.
5.Ensure you have the necessary skills to carry out the work, or enlist the help of someone who does.
6.Work on a big firm table or bench in a clean dry well-lit area.
7.This kit contains tiny parts; please keep them away from kids under 3.
8.Ask for help if you run into any problems — our contact details are on the website and we will always do our best to resolve any problems encountered.
2

Shenzhen GETECH CO.,LTD
GEEETECH
1 Unfold the box and check the package
Unfold the package and take all the parts out to check the condition of the items. As
you can see, all the parts are packed very carefully.
3

Shenzhen GETECH CO.,LTD
GEEETECH
All the acrylic plate has been etched with part ID and the plate is covered with a sheet of Kraft paper, you need to tear them off.
4

Shenzhen GETECH CO.,LTD
GEEETECH
Tips:
1.Before assembly, you are advised to put all the parts, especially the screws and nuts in order, which will save you a lot of time looking for the required parts.
2.The part ID is corresponding to the number labeled on the bag of every part. Some parts may not have label, you can refer to the pictures on the package list.
2 Assemble the rods of a Y axis
Watch the video
Step1. Assemble the 2 threaded rods.
|
Required parts |
Required number |
Part ID |
Pic |
|
M10 threaded rod |
2 |
NO.5 |
|
|
Y plate connecting |
|||
|
2 |
NO.A14 |
||
|
plate |
|||
|
M10 spring washer |
6 |
NO.19 |
|
|
M10 washer |
8 |
NO.9 |
|
|
M10 nut |
8 |
NO.13 |
|
Thread the nuts and washers into the two M10 threaded rods separately. The order
should be:
1)Thread the Y plate connecting plate A14 in the middle.
2)Thread the M10 washer > M8 spring washer >M10 nut > M10 nut > M10 washer
5

Shenzhen GETECH CO.,LTD
GEEETECH
on the left
3)Thread theM10 washer < M8 spring washer < M10 nut < M10 nut< M8 spring washer < M10 washer on the right
4)repeat the above steps for another threaded rod.
6

Shenzhen GETECH CO.,LTD
GEEETECH
Step2. Assemble the 2 smooth rods
|
Required parts |
Required number |
Part ID |
Pic |
|
M8 smooth rod |
3 |
NO.3 |
|
|
LM8UU Linear |
4 |
NO.36 |
|
|
bearings |
|||
Take out the 410mm smooth rod
Slide 2 Linear bearings on each smooth rod. Before you slide the bearings please make sure they are clean.
7

Shenzhen GETECH CO.,LTD
GEEETECH
3 Attach the front and rear support plates
Watch the video
For some of the kit, the locking rings are the silver color, which will not affect the assembly here, but in some steps, for the X axis, there is difference, please pay attention to the note.
8

Shenzhen GETECH CO.,LTD
GEEETECH
|
Required parts |
Required number |
Part ID |
Pic |
|
|
Acrylic |
NO. A9, |
|||
|
2 |
||||
|
plate( front) |
A 10 |
|||
|
Acrylic |
NO. A 11, A |
|||
|
2 |
||||
|
plate( rear) |
12 |
|||
|
M10 washer |
4 |
NO.9 |
||
|
M10 nut |
4 |
NO.13 |
||
|
locking ring |
2 |
NO.20 |
||
Step1.Slide the locking ring on the smooth rods, thread the rods into the acrylic plate; adjust the length so that the smooth rods fit snugly between the front and rear piece.
Step2. Screw up the rods and plate with M10 nut and M10 washer.
9
![]()
Shenzhen GETECH CO.,LTD
GEEETECH
* Tips: Try to keep the rods parallel and the four acrylic pieces parallel. The Y-axis must be a rectangle, that is the rods on both side should be parallel, so is the front and back plate. Otherwise it will cause obstruction for the belt later. You can use a Digital Caliper to measure.
*Note: As we re-designed the rear plate, there are two more holes on A12, in this case, you need to use the screw locking ring to fix the smooth rod.
4 Assemble the Y idler
Watch the video
|
Required parts |
Required number |
Part ID |
Pic |
|
Ball bearing |
2 |
NO.46 |
|
10

Shenzhen GETECH CO.,LTD
|
GEEETECH |
||||
|
bearing holder |
1 |
NO.41 |
||
|
Driven wheel |
1 |
No.45 |
||
|
M3 x 20 screw |
1 |
NO.28 |
||
|
M3 wing nut |
1 |
NO.16 |
||
|
M4 x25 screw |
1 |
NO.33 |
||
|
M4 lock nut |
1 |
NO.15 |
||
Step1. Thread the M3 x 20mm screw through the bearing holder.
11

Shenzhen GETECH CO.,LTD
GEEETECH
Step2. Insert the two MR84zz ball bearings into both ends of the driving wheel.
For your convenience, this step is already finished by us.
12

Shenzhen GETECH CO.,LTD
GEEETECH
13

Shenzhen GETECH CO.,LTD
GEEETECH
Step3. Put the M4 x25 screw and M4 washer through the driving wheel. Lock the other end with a M4 lock nut. You may need a wrench to tighten locking nut.
14

Shenzhen GETECH CO.,LTD
GEEETECH
15

Shenzhen GETECH CO.,LTD
GEEETECH
*Do not screw it too tight, you should leave enough room for the wheel to turn freely.
Step4. Mount the assembled bearing holder onto the front support plates from inside to outside. And screw it with a wing nut.
16

Shenzhen GETECH CO.,LTD
GEEETECH
5 Mount the Y motor
Watch the video
|
Required parts |
Required number |
Part ID |
Pic |
|
Y motor fix plate |
1 |
NO. A13 |
|
17

Shenzhen GETECH CO.,LTD
|
GEEETECH |
||||
|
Stepper motor |
1 |
NO.62 |
||
|
Pulley |
1 |
NO.44 |
||
|
M3 x 12 screw |
3 |
NO.26 |
||
|
M3 x 20 screw |
2 |
NO.28 |
||
|
M3 square nut |
2 |
NO.17 |
||
Note: In some picture, the pulley is a bit different but it won’t affect your assembly.
Step1. Mount the pulley on the motor shaft, one of the screws should be screwed on the flat side of the shaft. Screw it as tight as possible.
18

Shenzhen GETECH CO.,LTD
GEEETECH
Step2. Then screw the motor on the Y motor holder with 3 M3 x 12 screws and M3
washers.
19
![]()
Shenzhen GETECH CO.,LTD
GEEETECH
Step3. Push the Y Motor holder tab into the square hole in Rear -Outside Plate and Rear — Inside Plate. You may need to use a little force, but be careful not to break or crack any of the Acrylic pieces.
Secure the Y Motor holder with 2 M3x20mm screws, M3 Washers and M3 Square Nuts.
20

Shenzhen GETECH CO.,LTD
GEEETECH
6 Build the printing platform
Watch the video
|
Required parts |
Required number |
Part ID |
Pic |
|
Y platform support |
1 |
NO.A15 |
|
|
Y bearing block |
4 |
NO.A16 |
|
21

Shenzhen GETECH CO.,LTD
GEEETECH
|
Nylon tie |
4 |
NO.66 |
|
M3 x 10 screw |
2 |
NO.25 |
|
M3 x 20 screw |
8 |
NO.28 |
|
M3 nut |
8 |
NO.11 |
Step1. Mount the belt mount on the bottom side of the platform with 2 M3 x 10 screws.
22

Shenzhen GETECH CO.,LTD
GEEETECH
Step2. Mount the 4 bearing blocks on the platform with M3 x 20 screws on the same side with the belt-mount. Screw with M3 nuts.
Step3. Get the build platform plate zip-tied to the 4 linear bearings of Y- Axis. *The belt-mount and the fenders are under the platform.
23

Shenzhen GETECH CO.,LTD
GEEETECH
24

Shenzhen GETECH CO.,LTD
GEEETECH
7 Mount the Y –axis belt
Watch the video
|
Required parts |
Required number |
Part ID |
Pic |
|
Timing belt |
1 |
NO.39 |
|
|
M3 x 10 screw |
2 |
NO.25 |
|
|
M3 washer |
2 |
NO.7 |
|
Step1. Drill a hole on one end of the belt the hole can be as the diameter of the M3
screw, leave enough margin
25

Shenzhen GETECH CO.,LTD
GEEETECH
Step2. Fix the belt on one side of the belt -mount with a M3 x 10 screw and washer. Step3. Thread the belt around the driven wheel on the motor and the Y idler.
Step4. Drill a hole on the other end of the belt and fix it on the belt -mount with a M3 x 10 screw and M3 washer.
*Tips:
1. before you drill your second hole, make sure to pull belt tightly to make sure to find proper placement of hole for a tight belt, if it is too loose, it will hinder the move of t he print platform.
26

Shenzhen GETECH CO.,LTD
GEEETECH
8 mount the End stop of Y-axis
Watch the video
27

Shenzhen GETECH CO.,LTD
GEEETECH
|
Required parts |
Required number |
Part ID |
Pic |
||
|
End stop |
NO.56 |
||||
|
1 |
|||||
|
M2.5 x 16 screw |
2 |
NO.22 |
|||
|
M2.5 Hex nut |
2 |
NO.10 |
|||
Mount the end stop on the rear support plate of Y axis with M2.5 X 16 screw and
M2.5 Hex nut.
28

Shenzhen GETECH CO.,LTD
GEEETECH
9 Assemble the right and left side panel
Watch the video
|
Required parts |
Required number |
Part ID |
Pic |
|
XZ frame |
1 |
NO.A1 |
|
|
Acrylic left frame |
1 |
NO.A2 |
|
|
Acrylic right |
|||
|
1 |
NO.A3 |
||
|
frame |
|||
|
M3 x 16 screw |
6 |
NO.27 |
|
29
![]()
Shenzhen GETECH CO.,LTD
GEEETECH
|
M3 square nut |
6 |
NO.17 |
|||
Step1. Screw up the X-Z frame and the side panel with M3 x 16 screws and M3 square nuts.
If the holes not fit, please use the file to trim it.
30

Shenzhen GETECH CO.,LTD
GEEETECH
10 Mount the fan
Watch the video
|
Required |
|||
|
Required parts |
Part ID |
Pic |
|
|
number |
|||
31

Shenzhen GETECH CO.,LTD
GEEETECH
Fix the fan on the left side of the frame with 4 M3 x 30 screw and lock nut. Mind the direction of the wires. (Please pay attention to the direction of the fan)
If you don’t want to use the lock nut you can use hex nut.
32
- Manuals
- Brands
- Geeetech Manuals
- 3D Printers
- Acrylic I3 Pro
- Assemble instruction
Hide thumbs
Also See for Acrylic Prusa I3 Pro B:
- Building instruction (114 pages)
- Assemble instruction (100 pages)
- User manual (35 pages)
,
,
1
2
3
4
5
6
7
8
9
10
11
12
13
14
15
16
17
18
19
20
21
22
23
24
25
26
27
28
29
30
31
32
33
34
35
36
37
38
39
40
41
42
43
44
45
46
47
48
49
50
51
52
53
54
55
56
57
58
59
60
61
62
63
64
65
66
67
68
69
70
71
72
73
74
75
76
77
78
79
80
81
82
-
page
of
82/
82 -
Bookmarks
Advertisement
Shenzhen GETECH CO.,LTD
GEEETECH
All the acrylic plate has been etched with part ID and the plate is covered with
a sheet of kraft paper, you need to tear them off.
www.geeetech.com Tel: +86 755 2658 4110 Fax: +86 755 2658 4074 ‐ 858
Previous Page
Next Page
- 1
- 2
- 3
- 4
- 5
- 6
- 7
Advertisement
Related Manuals for Geeetech Acrylic Prusa I3 Pro B
-

3D Printers Geeetech Prusa I3 pro W Building Instruction
(114 pages)
-
3D Printers Geeetech Prusa I3 Pro C Assemble Instruction
(100 pages)
-
3D Printers Geeetech Acrylic Prusa I3 Pro C Assemble Instruction
(98 pages)
-
3D Printers Geeetech Acrylic Prusa I3 Pro Assemble Instruction
(94 pages)
-
3D Printers Geeetech Acrylic Prusa I3 Pro Assemble Instruction
(90 pages)
-
3D Printers Geeetech Prusa I3 pro W User Manual
(35 pages)
-
3D Printers Geeetech Acrylic I3 Pro B Manual
(24 pages)
-
3D Printers Geeetech I3 Pro C Manual
(24 pages)


-
3D Printers Geeetech Prusa I3 Pro W Assembly Manual
(24 pages)
-
3D Printers Geeetech Acrylic I3 Pro User Manual
(19 pages)
-
3D Printers Geeetech I3 Pro C Quick Start Manual
(24 pages)
-
3D Printers Geeetech Prusa I3 A pro User Manual
(60 pages)
-
3D Printers Geeetech Prusa I3 A pro Assembly Instructions Manual
(55 pages)
-
3D Printers Geeetech Prusa I3 A pro Manual
(16 pages)
-
3D Printers Geeetech acrylic Prusa I3 Assemble Manual
(59 pages)
-
3D Printers Geeetech Acrylic Prusa I3 Assembly Instructions Manual
Pro b (109 pages)


Related Products for Geeetech Acrylic Prusa I3 Pro B
- Geeetech Prusa I3 A pro
- Geeetech acrylic Prusa I3
- Geeetech Prusa I3 X
- Geeetech Prusa I3 M201
- Geeetech I3 Pro X
- Geeetech I3 Pro C
- Geeetech Acrylic Prusa I3 Pro C
- Geeetech A10
- Geeetech A10M
- Geeetech A10T
- Geeetech A20
- Geeetech A20M
- Geeetech A20T
- Geeetech A30
- Geeetech A30 Pro
- Geeetech A30M
Specifications:
|
Accompanying Data:
Geeetech Acrylic Prusa I3 Pro B 3D Printers PDF Assemble Instruction (Updated: Wednesday 8th of March 2023 09:10:44 PM)
Rating: 4.5 (rated by 66 users)
Compatible devices: Delta Rostock mini G2S Pro, Aluminum Prusa I3, A10, Delta Rostock mini G2, acrylic Prusa I3, DP200, Rostock mini, Duplicator 5.
Recommended Documentation:
Geeetech Acrylic Prusa I3 Pro B: Text of Manual, Assemble Instruction
(Ocr-Read Version Summary of Contents, UPD: 08 March 2023)
Geeetech Acrylic Prusa I3 Pro B: Recommended Instructions
SAMSUNG ST66, SE335, Cassette Stove, WinTV-HVR-900 MCE-Kit, 5010000320, AS-I-138-2ET


-
FREE FORM 3D PRINTING PEN FOR ABS/PLA FILAMENT, OLED DISPLAY3D DRUCKSTIFT FÜR ABS/PLA FILAMENT, OLED BILDSCHIRM3D PEN VOOR ABS/PLA FILAMENT, OLED DISPLAYIMPRIMANTE 3D TYPE STYLO POUR FILAMENTS ABS/PLA, AVEC AFFICHAGE OLED3D-РУЧКА ДЛЯ ОБЪЕМНОГО РИСОВАНИЯ, ПЛАСТИК ABSPLA 1.75 ММ3D-РУЧКА ДЛЯ ОБ’ЄМНОГО МАЛЮ …
3DP-PEND-01 10
-
WWW.RAISE3D.COM AMERICA · ASIA · EUROPE Pro2 Air Filter Installation Instruction Pro2 Air Filter Installation instruction STEP 1: Loose the Back Cover Remove the screws marked in red in the following images. Keep the screws in green. STEP 2: Remove the Fixing Screws of the Filter System Hold the filter system with one hand and remove the 4 fix …
PRO2 Series 3
-
This guide only applies to Dreamer 3D printer of FlashforgeQuick Start GuideCaution1. Do not peel the yellow film from the build plate. It is heat-resistant tape, which makes objects stick to the build plate easily.2. Do not remove the wrapping around the nozzle. It consists of ceramic fiber and heat-resistant tape that help to keep the nozzle at a constant temperature so as to ext …
DREAMER 8
-
Daily Maintenance Sheet for VJ-426UFDaily maintenancebcefag hdijCS3007-03 -1-Preparation:Wear the rubber gloves (white) over the plastic gloves (pink).Wear protective goggles.Important!Before performing maintenance, make sure to read “How to handle UV inkjet printer / its supplies” (supplied with the printer).Skin or eye contact with UV curable ink may cause sk …
VJ-426UF 5
-
Skip to contentManuals+User Manuals Simplified.Easy Threed User’s ManualHome » EasyThreed » Easy Threed User’s ManualContents [ hide1 Nano specification:2 Un-Boxing NANO 3d printer3 Installing NANO Slicing Software4 Connect and Power The NANO5 Maintenance6 Safety6.1 Safety and Warnings:6.2 Precaution:6.3 Maintenance :7 FAQ7.1 why the printing head can not move …
NANO 5
-
!»#$»!%&&'()*&!&+,&-.&&&Steps&for&assembly&of&a&Bukito.&Beta&version&1.0,&January&29,&2014&Table&of&contents&&Table&of&contents&………………………………………………………………………………………………………&1&Definitio …
Bukito 30
-
Hold ,then press or to scroll through options. represents Heating Mode, represents Cooling Mode.Power IndicatorLCD LayoutOperation1.Set Target Temperature:2.Second Menu:Press gently to blink display the to change the target target temperature.Now press or temperature.Hold for 6 seconds to enter second menu.Menu setting will be di …
Duplicator 5S 2
-
VJ1638xE-I-031VJ-2638/1638/1638W INSTALLATION MANUAL Please read this manual before usingThank you for purchasing a MUTOH product.This manual explains the steps for unpacking, mount i n g an d basic installation befo re using the MUTOH Full-color inkjet printer VJ-2638/1638/1638W.This manual is intended for owners, installers, and users of this product.U …
VJ-2638 16
-
Guide for CNC CarvingAnleitung für die CNC-Maschine | Guide d’utilisation CNC | Guía para tallado CNC …
CNC Carving 20
-
— 1 -A Precautions…..………………………………………………………………………………2B Check List.………………………………………..……………………..………………………..3C Component Diagram.…………………..………………………..…………….………..4D LCD Monitor Menu and Function…………………………….. …
M200 41
-
1. Table of Contents . . . . . . . . . . . . . . . . . . . . . . . . . . . . . . . . . . . . . . . . . . . . . . . . . . . . . . . . . . . . . . . . . . . . . . . . . . . . . . . . . . . . . . . . . . . . 31.1 01.0 Introduction . . . . . . . . . . . . . . . . . . . . . . . . . . . . . . . . . . . . . . . . . . . . . . . . . . . . . . . . . . . . . . . …
ProJet 5000 94
-
Figure 4 Standalone® SetupPlease see the Figure 4 Standalone User Guide, found on the support.3dsystems.com/gure4standalone, for safe-ty information and comprehensive operating instructions.Save all foam and packing material for future use. Shipping without the original packing material may cause damage to the printer.1. Unbox and Stage Printer1. Remove 4 packing clips around th …
Figure 4 Standalone 4