
Installation
This is a Node.js module available through the
npm registry. Installation is done using the
npm install command:
$ npm install express-session
API
var session = require('express-session')
session(options)
Create a session middleware with the given options.
Note Session data is not saved in the cookie itself, just the session ID.
Session data is stored server-side.
Note Since version 1.5.0, the cookie-parser middleware
no longer needs to be used for this module to work. This module now directly reads
and writes cookies on req/res. Using cookie-parser may result in issues
if the secret is not the same between this module and cookie-parser.
Warning The default server-side session storage, MemoryStore, is purposely
not designed for a production environment. It will leak memory under most
conditions, does not scale past a single process, and is meant for debugging and
developing.
For a list of stores, see compatible session stores.
Options
express-session accepts these properties in the options object.
cookie
Settings object for the session ID cookie. The default value is
{ path: '/', httpOnly: true, secure: false, maxAge: null }.
The following are options that can be set in this object.
cookie.domain
Specifies the value for the Domain Set-Cookie attribute. By default, no domain
is set, and most clients will consider the cookie to apply to only the current
domain.
cookie.expires
Specifies the Date object to be the value for the Expires Set-Cookie attribute.
By default, no expiration is set, and most clients will consider this a
“non-persistent cookie” and will delete it on a condition like exiting a web browser
application.
Note If both expires and maxAge are set in the options, then the last one
defined in the object is what is used.
Note The expires option should not be set directly; instead only use the maxAge
option.
cookie.httpOnly
Specifies the boolean value for the HttpOnly Set-Cookie attribute. When truthy,
the HttpOnly attribute is set, otherwise it is not. By default, the HttpOnly
attribute is set.
Note be careful when setting this to true, as compliant clients will not allow
client-side JavaScript to see the cookie in document.cookie.
cookie.maxAge
Specifies the number (in milliseconds) to use when calculating the Expires
Set-Cookie attribute. This is done by taking the current server time and adding
maxAge milliseconds to the value to calculate an Expires datetime. By default,
no maximum age is set.
Note If both expires and maxAge are set in the options, then the last one
defined in the object is what is used.
cookie.path
Specifies the value for the Path Set-Cookie. By default, this is set to '/', which
is the root path of the domain.
cookie.sameSite
Specifies the boolean or string to be the value for the SameSite Set-Cookie attribute.
By default, this is false.
truewill set theSameSiteattribute toStrictfor strict same site enforcement.falsewill not set theSameSiteattribute.'lax'will set theSameSiteattribute toLaxfor lax same site enforcement.'none'will set theSameSiteattribute toNonefor an explicit cross-site cookie.'strict'will set theSameSiteattribute toStrictfor strict same site enforcement.
More information about the different enforcement levels can be found in
the specification.
Note This is an attribute that has not yet been fully standardized, and may change in
the future. This also means many clients may ignore this attribute until they understand it.
Note There is a draft spec
that requires that the Secure attribute be set to true when the SameSite attribute has been
set to 'none'. Some web browsers or other clients may be adopting this specification.
cookie.secure
Specifies the boolean value for the Secure Set-Cookie attribute. When truthy,
the Secure attribute is set, otherwise it is not. By default, the Secure
attribute is not set.
Note be careful when setting this to true, as compliant clients will not send
the cookie back to the server in the future if the browser does not have an HTTPS
connection.
Please note that secure: true is a recommended option. However, it requires
an https-enabled website, i.e., HTTPS is necessary for secure cookies. If secure
is set, and you access your site over HTTP, the cookie will not be set. If you
have your node.js behind a proxy and are using secure: true, you need to set
“trust proxy” in express:
var app = express()
app.set('trust proxy', 1) // trust first proxy
app.use(session({
  secret: 'keyboard cat',
  resave: false,
  saveUninitialized: true,
  cookie: { secure: true }
}))
For using secure cookies in production, but allowing for testing in development,
the following is an example of enabling this setup based on NODE_ENV in express:
var app = express()
var sess = {
  secret: 'keyboard cat',
  cookie: {}
}

if (app.get('env') === 'production') {
  app.set('trust proxy', 1) // trust first proxy
  sess.cookie.secure = true // serve secure cookies
}

app.use(session(sess))
The cookie.secure option can also be set to the special value 'auto' to have
this setting automatically match the determined security of the connection. Be
careful when using this setting if the site is available both as HTTP and HTTPS,
as once the cookie is set on HTTPS, it will no longer be visible over HTTP. This
is useful when the Express "trust proxy" setting is properly setup to simplify
development vs production configuration.
genid
Function to call to generate a new session ID. Provide a function that returns
a string that will be used as a session ID. The function is given req as the
first argument if you want to use some value attached to req when generating
the ID.
The default value is a function which uses the uid-safe library to generate IDs.
NOTE be careful to generate unique IDs so your sessions do not conflict.
app.use(session({
  genid: function(req) {
    return genuuid() // use UUIDs for session IDs
  },
  secret: 'keyboard cat'
}))
name
The name of the session ID cookie to set in the response (and read from in the
request).
The default value is 'connect.sid'.
Note if you have multiple apps running on the same hostname (this is just
the name, i.e. localhost or 127.0.0.1; different schemes and ports do not
name a different hostname), then you need to separate the session cookies from
each other. The simplest method is to simply set different names per app.
proxy
Trust the reverse proxy when setting secure cookies (via the “X-Forwarded-Proto”
header).
The default value is undefined.
trueThe “X-Forwarded-Proto” header will be used.falseAll headers are ignored and the connection is considered secure only
if there is a direct TLS/SSL connection.undefinedUses the “trust proxy” setting from express
resave
Forces the session to be saved back to the session store, even if the session
was never modified during the request. Depending on your store this may be
necessary, but it can also create race conditions where a client makes two
parallel requests to your server and changes made to the session in one
request may get overwritten when the other request ends, even if it made no
changes (this behavior also depends on what store you’re using).
The default value is true, but using the default has been deprecated,
as the default will change in the future. Please research into this setting
and choose what is appropriate to your use-case. Typically, you’ll want
false.
How do I know if this is necessary for my store? The best way to know is to
check with your store if it implements the touch method. If it does, then
you can safely set resave: false. If it does not implement the touch
method and your store sets an expiration date on stored sessions, then you
likely need resave: true.
rolling
Force the session identifier cookie to be set on every response. The expiration
is reset to the original maxAge, resetting the expiration
countdown.
The default value is false.
With this enabled, the session identifier cookie will expire in
maxAge since the last response was sent instead of in
maxAge since the session was last modified by the server.
This is typically used in conjuction with short, non-session-length
maxAge values to provide a quick timeout of the session data
with reduced potential of it occurring during on going server interactions.
Note When this option is set to true but the saveUninitialized option is
set to false, the cookie will not be set on a response with an uninitialized
session. This option only modifies the behavior when an existing session was
loaded for the request.
saveUninitialized
Forces a session that is “uninitialized” to be saved to the store. A session is
uninitialized when it is new but not modified. Choosing false is useful for
implementing login sessions, reducing server storage usage, or complying with
laws that require permission before setting a cookie. Choosing false will also
help with race conditions where a client makes multiple parallel requests
without a session.
The default value is true, but using the default has been deprecated, as the
default will change in the future. Please research into this setting and
choose what is appropriate to your use-case.
Note if you are using Session in conjunction with PassportJS, Passport
will add an empty Passport object to the session for use after a user is
authenticated, which will be treated as a modification to the session, causing
it to be saved. This has been fixed in PassportJS 0.3.0
secret
Required option
This is the secret used to sign the session ID cookie. This can be either a string
for a single secret, or an array of multiple secrets. If an array of secrets is
provided, only the first element will be used to sign the session ID cookie, while
all the elements will be considered when verifying the signature in requests. The
secret itself should be not easily parsed by a human and would best be a random set
of characters. A best practice may include:
- The use of environment variables to store the secret, ensuring the secret itself
does not exist in your repository. - Periodic updates of the secret, while ensuring the previous secret is in the
array.
Using a secret that cannot be guessed will reduce the ability to hijack a session to
only guessing the session ID (as determined by the genid option).
Changing the secret value will invalidate all existing sessions. In order to rotate
the secret without invalidating sessions, provide an array of secrets, with the new
secret as first element of the array, and including previous secrets as the later
elements.
store
The session store instance, defaults to a new MemoryStore instance.
unset
Control the result of unsetting req.session (through delete, setting to null,
etc.).
The default value is 'keep'.
'destroy'The session will be destroyed (deleted) when the response ends.'keep'The session in the store will be kept, but modifications made during
the request are ignored and not saved.
req.session
To store or access session data, simply use the request property req.session,
which is (generally) serialized as JSON by the store, so nested objects
are typically fine. For example below is a user-specific view counter:
// Use the session middleware
app.use(session({ secret: 'keyboard cat', cookie: { maxAge: 60000 }}))

// Access the session as req.session
app.get('/', function(req, res, next) {
  if (req.session.views) {
    req.session.views++
    res.setHeader('Content-Type', 'text/html')
    res.write('<p>views: ' + req.session.views + '</p>')
    res.write('<p>expires in: ' + (req.session.cookie.maxAge / 1000) + 's</p>')
    res.end()
  } else {
    req.session.views = 1
    res.end('welcome to the session demo. refresh!')
  }
})
Session.regenerate(callback)
To regenerate the session simply invoke the method. Once complete,
a new SID and Session instance will be initialized at req.session
and the callback will be invoked.
req.session.regenerate(function(err) {
  // will have a new session here
})
Session.destroy(callback)
Destroys the session and will unset the req.session property.
Once complete, the callback will be invoked.
req.session.destroy(function(err) {
  // cannot access session here
})
Session.reload(callback)
Reloads the session data from the store and re-populates the
req.session object. Once complete, the callback will be invoked.
req.session.reload(function(err) {
  // session updated
})
Session.save(callback)
Save the session back to the store, replacing the contents on the store with the
contents in memory (though a store may do something else–consult the store’s
documentation for exact behavior).
This method is automatically called at the end of the HTTP response if the
session data has been altered (though this behavior can be altered with various
options in the middleware constructor). Because of this, typically this method
does not need to be called.
There are some cases where it is useful to call this method, for example,
redirects, long-lived requests or in WebSockets.
req.session.save(function(err) {
  // session saved
})
Session.touch()
Updates the .maxAge property. Typically this is
not necessary to call, as the session middleware does this for you.
req.session.id
Each session has a unique ID associated with it. This property is an
alias of req.sessionID and cannot be modified.
It has been added to make the session ID accessible from the session
object.
req.session.cookie
Each session has a unique cookie object accompany it. This allows
you to alter the session cookie per visitor. For example we can
set req.session.cookie.expires to false to enable the cookie
to remain for only the duration of the user-agent.
Cookie.maxAge
Alternatively req.session.cookie.maxAge will return the time
remaining in milliseconds, which we may also re-assign a new value
to adjust the .expires property appropriately. The following
are essentially equivalent
var hour = 3600000
req.session.cookie.expires = new Date(Date.now() + hour)
req.session.cookie.maxAge = hour
For example when maxAge is set to 60000 (one minute), and 30 seconds
has elapsed it will return 30000 until the current request has completed,
at which time req.session.touch() is called to reset
req.session.cookie.maxAge to its original value.
req.session.cookie.maxAge // => 30000
Cookie.originalMaxAge
The req.session.cookie.originalMaxAge property returns the original
maxAge (time-to-live), in milliseconds, of the session cookie.
req.sessionID
To get the ID of the loaded session, access the request property
req.sessionID. This is simply a read-only value set when a session
is loaded/created.
Session Store Implementation
Every session store must be an EventEmitter and implement specific
methods. The following methods are the list of required, recommended,
and optional.
- Required methods are ones that this module will always call on the store.
- Recommended methods are ones that this module will call on the store if
available. - Optional methods are ones this module does not call at all, but helps
present uniform stores to users.
For an example implementation view the connect-redis repo.
store.all(callback)
Optional
This optional method is used to get all sessions in the store as an array. The
callback should be called as callback(error, sessions).
store.destroy(sid, callback)
Required
This required method is used to destroy/delete a session from the store given
a session ID (sid). The callback should be called as callback(error) once
the session is destroyed.
store.clear(callback)
Optional
This optional method is used to delete all sessions from the store. The
callback should be called as callback(error) once the store is cleared.
store.length(callback)
Optional
This optional method is used to get the count of all sessions in the store.
The callback should be called as callback(error, len).
store.get(sid, callback)
Required
This required method is used to get a session from the store given a session
ID (sid). The callback should be called as callback(error, session).
The session argument should be a session if found, otherwise null or
undefined if the session was not found (and there was no error). A special
case is made when error.code === 'ENOENT' to act like callback(null, null).
store.set(sid, session, callback)
Required
This required method is used to upsert a session into the store given a
session ID (sid) and session (session) object. The callback should be
called as callback(error) once the session has been set in the store.
store.touch(sid, session, callback)
Recommended
This recommended method is used to “touch” a given session given a
session ID (sid) and session (session) object. The callback should be
called as callback(error) once the session has been touched.
This is primarily used when the store will automatically delete idle sessions
and this method is used to signal to the store the given session is active,
potentially resetting the idle timer.
Compatible Session Stores
The following modules implement a session store that is compatible with this
module. Please make a PR to add additional modules 
aerospike-session-store A session store using Aerospike.
better-sqlite3-session-store A session store based on better-sqlite3.
cassandra-store An Apache Cassandra-based session store.
cluster-store A wrapper for using in-process / embedded
stores — such as SQLite (via knex), leveldb, files, or memory — with node cluster (desirable for Raspberry Pi 2
and other multi-core embedded devices).
connect-arango An ArangoDB-based session store.
connect-azuretables An Azure Table Storage-based session store.
connect-cloudant-store An IBM Cloudant-based session store.
connect-couchbase A couchbase-based session store.
connect-datacache An IBM Bluemix Data Cache-based session store.
@google-cloud/connect-datastore A Google Cloud Datastore-based session store.
connect-db2 An IBM DB2-based session store built using ibm_db module.
connect-dynamodb A DynamoDB-based session store.
@google-cloud/connect-firestore A Google Cloud Firestore-based session store.
connect-hazelcast Hazelcast session store for Connect and Express.
connect-loki A Loki.js-based session store.
connect-lowdb A lowdb-based session store.
connect-memcached A memcached-based session store.
connect-memjs A memcached-based session store using
memjs as the memcached client.
connect-ml A MarkLogic Server-based session store.
connect-monetdb A MonetDB-based session store.
connect-mongo A MongoDB-based session store.
connect-mongodb-session Lightweight MongoDB-based session store built and maintained by MongoDB.
connect-mssql-v2 A Microsoft SQL Server-based session store based on connect-mssql.
connect-neo4j A Neo4j-based session store.
connect-pg-simple A PostgreSQL-based session store.
connect-redis A Redis-based session store.
connect-session-firebase A session store based on the Firebase Realtime Database
connect-session-knex A session store using
Knex.js, which is a SQL query builder for PostgreSQL, MySQL, MariaDB, SQLite3, and Oracle.
connect-session-sequelize A session store using
Sequelize.js, which is a Node.js / io.js ORM for PostgreSQL, MySQL, SQLite and MSSQL.
connect-sqlite3 A SQLite3 session store modeled after the TJ’s connect-redis store.
connect-typeorm A TypeORM-based session store.
couchdb-expression A CouchDB-based session store.
dynamodb-store A DynamoDB-based session store.
express-etcd An etcd based session store.
express-mysql-session A session store using native
MySQL via the node-mysql module.
express-nedb-session A NeDB-based session store.
express-oracle-session A session store using native
oracle via the node-oracledb module.
express-session-cache-manager
A store that implements cache-manager, which supports
a variety of storage types.
express-session-etcd3 An etcd3 based session store.
express-session-level A LevelDB based session store.
express-session-rsdb Session store based on Rocket-Store: A very simple, super fast and yet powerfull, flat file database.
express-sessions A session store supporting both MongoDB and Redis.
firestore-store A Firestore-based session store.
fortune-session A Fortune.js
based session store. Supports all backends supported by Fortune (MongoDB, Redis, Postgres, NeDB).
hazelcast-store A Hazelcast-based session store built on the Hazelcast Node Client.
level-session-store A LevelDB-based session store.
lowdb-session-store A lowdb-based session store.
medea-session-store A Medea-based session store.
memorystore A memory session store made for production.
mssql-session-store A SQL Server-based session store.
nedb-session-store An alternate NeDB-based (either in-memory or file-persisted) session store.
@quixo3/prisma-session-store A session store for the Prisma Framework.
restsession Store sessions utilizing a RESTful API
sequelstore-connect A session store using Sequelize.js.
session-file-store A file system-based session store.
session-pouchdb-store Session store for PouchDB / CouchDB. Accepts embedded, custom, or remote PouchDB instance and realtime synchronization.
session-rethinkdb A RethinkDB-based session store.
@databunker/session-store A Databunker-based encrypted session store.
sessionstore A session store that works with various databases.
tch-nedb-session A file system session store based on NeDB.
Examples
View counter
A simple example using express-session to store page views for a user.
var express = require('express')
var parseurl = require('parseurl')
var session = require('express-session')

var app = express()

app.use(session({
  secret: 'keyboard cat',
  resave: false,
  saveUninitialized: true
}))

app.use(function (req, res, next) {
  if (!req.session.views) {
    req.session.views = {}
  }

  // get the url pathname
  var pathname = parseurl(req).pathname

  // count the views
  req.session.views[pathname] = (req.session.views[pathname] || 0) + 1

  next()
})

app.get('/foo', function (req, res, next) {
  res.send('you viewed this page ' + req.session.views['/foo'] + ' times')
})

app.get('/bar', function (req, res, next) {
  res.send('you viewed this page ' + req.session.views['/bar'] + ' times')
})

app.listen(3000)
User login
A simple example using express-session to keep a user log in session.
var escapeHtml = require('escape-html')
var express = require('express')
var session = require('express-session')

var app = express()

app.use(session({
  secret: 'keyboard cat',
  resave: false,
  saveUninitialized: true
}))

// middleware to test if authenticated
function isAuthenticated (req, res, next) {
  if (req.session.user) next()
  else next('route')
}

app.get('/', isAuthenticated, function (req, res) {
  // this is only called when there is an authentication user due to isAuthenticated
  res.send('hello, ' + escapeHtml(req.session.user) + '!' +
    ' <a href="/logout">Logout</a>')
})

app.get('/', function (req, res) {
  res.send('<form action="/login" method="post">' +
    'Username: <input name="user"><br>' +
    'Password: <input name="pass" type="password"><br>' +
    '<input type="submit" text="Login"></form>')
})

app.post('/login', express.urlencoded({ extended: false }), function (req, res) {
  // login logic to validate req.body.user and req.body.pass
  // would be implemented here. for this example any combo works

  // regenerate the session, which is good practice to help
  // guard against forms of session fixation
  req.session.regenerate(function (err) {
    if (err) next(err)

    // store user information in session, typically a user id
    req.session.user = req.body.user

    // save the session before redirection to ensure page
    // load does not happen before session is saved
    req.session.save(function (err) {
      if (err) return next(err)
      res.redirect('/')
    })
  })
})

app.get('/logout', function (req, res, next) {
  // logout logic

  // clear the user from the session object and save.
  // this will ensure that re-using the old session id
  // does not have a logged in user
  req.session.user = null
  req.session.save(function (err) {
    if (err) next(err)

    // regenerate the session, which is good practice to help
    // guard against forms of session fixation
    req.session.regenerate(function (err) {
      if (err) next(err)
      res.redirect('/')
    })
  })
})

app.listen(3000)
Debugging
This module uses the debug module
internally to log information about session operations.
To see all the internal logs, set the DEBUG environment variable to
express-session when launching your app (npm start, in this example):
$ DEBUG=express-session npm start
On Windows, use the corresponding command;
> set DEBUG=express-session & npm start
License
MIT
As of late I have been writing some content on express.js, and as such it was only a matter of time until I came to a point where it is time to look into how to handle session data, and user authentication. If I want to implement user authentication in a way that I perceive as the right way, I will want to use passport. However so far I often find myself making simple hobby apps, as such I can take a more informal route to handling authentication involving some system that is just assignment of a unique id to each client by way of a cookie file for example. In any case this post is about express-session, a great project for working with session data in an express.js project
1 — What to know
This is a post on using the express-session middeware for express to quickly get up and running with session data. This is not a getting started post on express.js, node.js, or javaScript in general. Also It is worth mentioning that in this post I am using express 4.x, and version 1.15.6 of express-session.
2 — Basic example of express-session
For a basic example of express session I made a demo that is just a single app.js file that makes use of just express, and express-session modules. The options that I give to express-session are the minimal set of options that I would want to give to any use case of express-session regardless of how simple it might be.
So for this demo I just need express-and express-session:
|
|
Once I have my demo folder set up with the package.json, and the dependences installed in the node_modules folder I just need a single app.js file at root.
|
|
I can then start the app, and go to localhost:8080 in the browser by calling app.js with node.
|
|
When I do so I should see what is in the session data object including my simple count value that will go up each time I refresh the page.
For a basic example the simple count should work at helping to show the value of express-session. It can be used to create, and update session data server side. Although The count is set back to the client via res.json, it does not have to be sent. When it comes to something that should stay server side it can, the cookie session id is the only thing that really needs to be shared.
3 — Options used in the basic example
There are at least some basic options that should always be used in most projects regardless of how simple they might be. In addition there are many other options of interest that should be set in different ways depending on the nature of the project.
3.1 — name
This property is used to set the name of the cookie that will be sent in the response, and also read from in requests. This property can be omitted, and result in a default value of “connect.sid” Even Though it is not required, it is good practice to always give a short, concise name that is relevant to the project. Also I set a name per demo to help resolve an issue where the same cookie ends up being used for many different demos. So it is a good idea to always set unique names to eliminate cookie name collisions.
3.2 — secret
This is a required option that is used to sign cookies that are used for the sessions. The value can be a string, or an array of strings. When an array of strings is given, the string of index 0 will be used when signing session cookies, and the other strings will be considered when verifying the signature in requests.
You might be wondering if this is something that should be kept…well…secret, and the answer is of course yes. In my basic example I am just using a string literal, which is fine for a simple hello world style example, but not so great for production code.
3.3 — resave
This is another must have option that has to do with weather the session is saved to the store on every request even if it was not changed. The way I think about this I would assume that this value should be set to false with most use case examples, but it can depend on the store used. The biggest concern that comes to mind is older sates writing over newer ones because of a time race between parallel requests. Still with some stores it may be necessary to set this to true.
3.4 — saveUninitialized
This is another required option that has to do with saving uninitialized sessions. When a session is new, but has not yet been modified that is an uninitialized session. My reasoning is that this should be set to false by default.
4 — Using the FileStore for storage of session data
Out of the box express-session uses a mem store to store session data. This might work okay for quick demo apps, but if I do want to start going in the direction of making a production app I will want to use another storage option such as session-file-store
|
|
I can then use the file store by calling an instance of it, and setting that to the store property of the instance of express-session
|
|
To confirm that this is working I can start the app, go to localhost:8080, hit refresh a few times and then restart the app. When I go back I should continue where I left off. Also I can check out the contents of the session folder, and look at the json file that should be there, this will store the state of the session.
There are many more options for this session store, and of course there are many more options for modules that do this in a different way. For the scope of this post at least I thought that I should cover at least one of theme.
5 — Authentication with express-session only?
With authentication in express.js it may be best to go with passport, this is defiantly a professional and versatile way of making quick work of setting up some kind of system that involves user registration and authentication (aka logging in). However if you are just making some simple little hobby app there might be a desire to have some kind of primitive yet effective way of doing this.
Express session involves the use of cookies, and it is possible to have the cookies not expire (at least in a short time) resulting in a persistent way of setting a unique id to each visitor to the app. The id set in the cookie could be used as a replacement for a user login, and password in a way I guess. Yes there are many draw backs to this, but I see simple games, and projects using this kind of system, and it works for what it is worth when it comes to basic little examples that are just going to be used on a local network.
6 — Using cookie-parser to parse req.cookies
If for some reason I want to parse the cookies so I can see the id values in re.cookies I can use cookie-parser module to make quick work of that.
add in cookie parser
|
|
When I use cookie parser with app.use cookie parser will populate a req.cookies array.
|
|
When doing so it might be best to make use that the secret value will match up with what is being use in express session when it comes to using signed cookies.
7 — Conclusion
This module is great for getting session management out of the way quickly, I can not say that this is the kind of thing that I want to implement on my own. I did not cover all options that can be used with this module, but maybe that is a job for future posts on express. There is much more to write about with this module, as well as all the other projects that are used with it. So much to write about, and so little time.
When it comes to some kind of actaul little project example that makes use of the express session middelware one of my express examples that is worth mentioning thus far would be my simple little network pointers express example.
Improve Article
Save Article
Like Article
Improve Article
Save Article
Like Article
Session management can be done in node.js by using the express-session module. It helps in saving the data in the key-value form. In this module, the session data is not saved in the cookie itself, just the session ID.
Installation of express-session module:
- You can visit the link Install express-session module. You can install this package by using this command.
npm install express-session
- After installing express-session you can check your express-session version in command prompt using the command.
npm version express-session
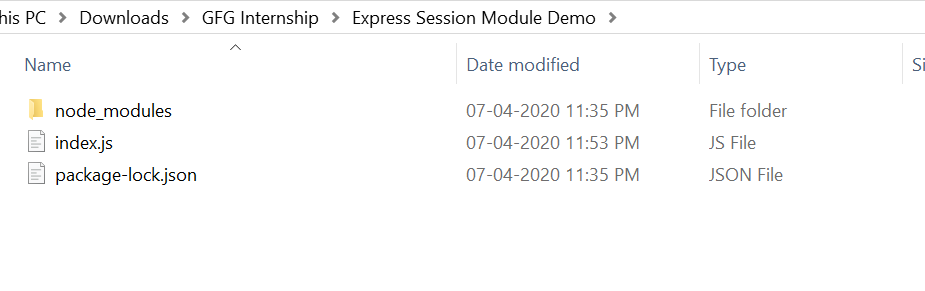
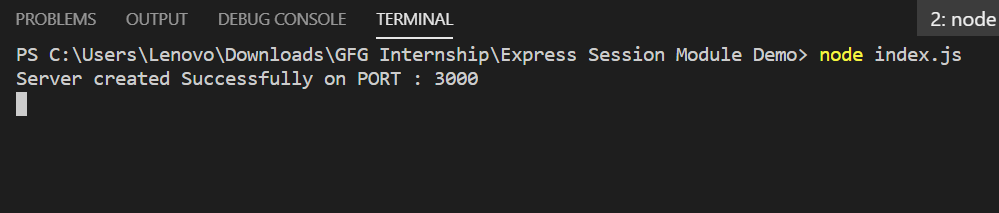
- After that, you can create a folder and add a file for example index.js, To run this file you need to run the following command.
node index.js
Filename: index.js
const express = require("express")
const session = require('express-session')
const app = express()
var PORT = process.env.port || 3000
app.use(session({
secret: 'Your_Secret_Key',
resave: true,
saveUninitialized: true
}))
app.get("/", function(req, res){
req.session.name = 'GeeksforGeeks'
return res.send("Session Set")
})
app.get("/session", function(req, res){
var name = req.session.name
return res.send(name)
})
app.listen(PORT, function(error){
if(error) throw error
console.log("Server created Successfully on PORT :", PORT)
})
Steps to run the program:
- The project structure will look like this:
- Make sure you have install express and express-session module using following commands:
npm install express
npm install express-session
- Run index.js file using below command:
node index.js
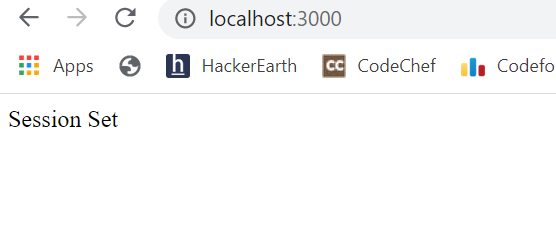
- Now to set your session, just open browser and type this URL:
http://localhost:3000/
- Till now, you have set session and to see session value, type this URL:
http://localhost:3000/session
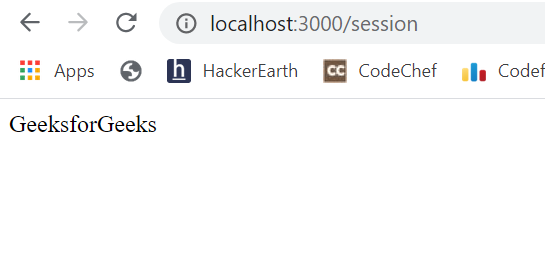
So this is how you can do session management in node.js using the express-session module.
Last Updated :
28 Apr, 2020
Like Article
Save Article

Доброго времени суток, друзья!
Представляю вашему вниманию перевод второй части Руководства по Express — веб-феймворку для Node.js автора Flavio Copes.
Предполагается, что вы знакомы с Node.js. Если нет, то прошу сюда.
Без дальнейших предисловий.
15. Шаблонизация
Express умеет работать с серверными шаблонизаторами (server-side template engines).
Шаблонизатор позволяет динамически генерировать HTML-разметку посредством передачи данных в представление (view).
По умолчанию Express использует шаблонизатор Pug, который раньше назывался Jade.
Несмотря на то, что с момента выхода последней версии Jade прошло почти 3 года, он все еще поддерживается в целях обеспечения обратной совместимости.
В новых проектах следует использовать Pug или другой шаблонизатор. Вот официальный сайт Pug: pugjs.org.
Среди других шаблонизаторов, можно назвать Handlebars, Mustache, EJS и др.
Использование Pug
Для использования Pug, его сначала нужно установить:
npm i pug
Затем его следует добавить в Express:
const express = require('express')
const app = express()
app.set('view engine', 'pug')
После этого мы можем создавать шаблоны в файлах с расширением .pug.
Создадим представление about:
app.get('/about', (req, res) => {
    res.render('about')
})
И шаблон в views/about.pug:
p Привет от Pug
Данный шаблон создаст тег «p» с текстом «Привет от Pug».
Интерполировать переменные можно так:
app.get('/about', (req, res) => {
    res.render('about', { name: 'Иван' })
})
p #{name} говорит привет
Подробнее о Pug мы поговорим в следующем разделе.
При использовании шаблонизатора для динамической генерации страниц можно столкнуться с некоторыми проблемами, особенно, когда возникает необходимость преобразовать HTML, например, в Pug. Для этого в сети существуют готовые решения. Вот одно из них: html-to-pug.com.
Использование Handlebars
Попробуем использовать Handlebars вместо Pug.
Устанавливаем его с помощью npm i handlebars.
В директории views создаем файл about.hbs следующего содержания:
{{name}} говорит привет
Перепишем код Express:
const express = require('express')
const app = express()
const hbs = require('hbs')

app.set('view engine', 'hbs')
app.set('views', path.join(__dirname, 'views'))
app.get('/about', (req, res) => {
    res.render('about', { name: 'Иван' })
})

app.listen(3000, () => console.log('Сервер готов'))
Вы также можете рендерить React на стороне сервера с помощью пакета express-react-views.
Устанавливаем данный пакет:
npm i express-react-views
Теперь вместо Handlebars укажем Express использовать express-react-views в качестве движка для обработки jsx-файлов:
const express = require('express')
const app = express()

app.set('view engine', 'jsx')
app.engine('jsx', require('express-react-views').createEngine())

app.get('/about', (req, res) => {
    res.render('about', { name: 'Иван' })
})

app.listen(3000, () => console.log('Сервер запущен'))
В директории views создаем файл about.jsx:
const React = require('react')

class HelloMessage extends React.Component {
    render() {
        return <div>{this.props.name} говорит привет</div>
    }
}

module.exports = HelloMessage
16. Справочник по Pug
Что такое Pug? Это шаблонизатор или движок для динамического рендеринга HTML-разметки, используемый Express по умолчанию.
Установка:
npm i pug
Настройка Express:
const path = require('path')
cpnst express = require('express')
const app = express()

app.set('view engine', 'pug')
app.set('views', path.join(__dirname, 'views'))

app.get('/about', (req, res) => {
    res.render('about', { name: 'Иван' })
})
Шаблон (about.pug):
p #{name} говорит привет
Передача функции, возвращающей значение:
app.get('about', (req, res) => {
    res.render('about', { getName: () => 'Иван' })
})
p #{getName()} говорит привет
Добавление элементу идентификатора или класса:
p#title
p.title
Установка doctype:
doctype html
Мета-теги:
html
    head
        meta(charset='utf-8')
        meta(http-equiv='X-UA-Compatible', content='IE=edge')
        meta(name='description', content='Описание')
        meta(name='viewport', content='width=device-width, initial-scale=1')
Добавление скриптов или стилей:
html
    head
        link(rel="stylesheet", href="style.css")
        script(src="script.js", defer)
Встроенные скрипты:
    script alert('тест')

    script
        (function(b,o,i,l,e,r){b.GoogleAnalyticsObject=l;b[l]||(b[l]= function(){(b[l].q=b[l].q||[]).push(arguments)});b[l].l=+new Date; e=o.createElement(i);r=o.getElementsByTagName(i)[0]; e.src='//www.google-analytics.com/analytics.js'; r.parentNode.insertBefore(e,r)}(window,document,'script','ga')); ga('create','UA-XXXXX-X');ga('send','pageview');
Циклы:
ul
    each color in ['Red', 'Green', 'Blue']
        li= color

ul
    each color, index in ['Red', 'Green', 'Blue']
        li= 'Номер цвета ' + index + ':' + color
Условия:
if name
    h2 #{name} говорит привет
else
    h2 Привет

if name
    h2 #{name} говорит привет
else if anotherName
    h2 #{anotherName} говорит привет
else
    h2 Привет
Переменные:
- var name = 'Иван'
- age = 30
- var petr = { name: 'Петр' }
- var friends = ['Иван', 'Петр']
Инкремент:
age++
Приваивание переменной элементу:
p= name

span= age
Перебор переменных:
for friend in friends
    li= friend

ul
    each friend in friends
        li= friend
Получение количества элементов:
p #{values.length}
While:
- var n = 0

ul
    while n <= 5
        li= n++
Включение одного файла в другой:
include otherfile.pug
Определение блоков.
Хорошо организованная система шаблонов предполагает создание базового шаблона и его расширение другими шаблонами по мере необходимости.
Базовый шаблон расширяется с помощью блоков:
html
    head
        link(rel="stylesheet", href="style.css")
        script(src="script.js", defer)
        body
            block header

            block main
                h1 Домашняя страница
                p Добро пожаловать

            block footer
Расширение базового шаблона.
Шаблон расширяется с помощью ключевого слова extends:
extends home.pug
После этого нужно пеопределить блоки. Весь контент шаблона должен содержаться в блоках, иначе движок не будет знать, куда его поместить:
extends home.pug

block main
    h1 Другая страница
    p Привет
    ul
        li Раз элемент списка
        li Два элемент списка
Можно переопределять как один, так и несколько блоков. Те блоки, которые не переопределяются, сохраняют оригинальное содержимое.
Комментарии.
Видимые (сохраняются в разметке):
// однострочный комментарий

//
    многострочный
    комментарий
Невидимые (удаляются при рендеринге):
//- однострочный комментарий

//-
    многострочный
    комментарий
17. Middleware (промежуточный слой, промежуточное программное обеспечение)
Middleware — это промежуточный слой между получением запроса от клиента и отправкой ему ответа. Другими словами, это функция, которая выполняет дополнительные операции в процессе маршрутизации после получения запроса и перед выполнением основных операций сервером.
Обычно, middleware применяется для обработки запроса/ответа либо для перехвата запроса перед его обработкой роутером. Middleware в общем виде выглядит так:
app.use((req, res, next) => {/* */})
Метод next() служит для передачи запроса следующему middleware, если в этом есть необходимость.
Если опустить next() в middleware, то обработка ответа завершится и он будет отправлен клиенту.
Middleware редко пишется вручную, как правило, в качестве таковых используются npm-пакеты.
Примером подобного пакета является cookie-parser, применяемый для преобразования куки в объект req.cookies. Данный пакет устанавливается с помощью npm i cookie-parser и используется следующим образом:
const express = require('express')
const app = express()
const cookieParser = require('cookie-parser')

app.get('/', (req, res) => res.send('Привет!'))

app.use(cookieParser())

app.listen(3000, () => console.log('Сервер готов'))
Middleware может использоваться в определенном маршрутизаторе. Для этого он передается роутеру в качестве второго аргумента:
const myMiddleware = (req, res, next) => {
    // ...
    next()
}

app.get('/', myMiddleware, (req, res) => res.send('Привет!'))
Для того, чтобы сохранить данные, сформированные middleware, для их передачи другим middleware или обработчику запроса, используется объект Request.locals. Он позволяет записывать данные в текущий запрос:
req.locals.name = 'Иван'
18. Обработка статических файлов
Обычной практикой является хранение изображений, стилей и других файлов в директории public и использование их на верхнем уровне:
const express = require('express')
const app = express()

app.use(express.static('public'))

// ...

app.listen(3000, () => console.log('Сервер готов'))
Если в директории public имеется файл index.html, он будет отправлен в ответ на запрос к localhost:3000.
19. Отправка файлов
Express предоставляет удобный метод для отправки файлов в ответ на запрос — Reaponse.download().
После обращения клиента к маршруту, отправляющему в ответ файл, клиенту будет направлен запрос на скачивание файла.
Метод Response.download() позволяет отправлять файлы в ответ на запрос вместо отображения страницы:
app.get('/', (req, res) => res.download('./file.pdf'))
В контексте приложения это выглядит так:
const express = require('express')
const app = express()

app.get('/', (req, res) => res.download('./file.pdf'))
app.listen(3000, () => console.log('Сервер готов'))
При отправке файла можно определить его название:
res.download('./file.pdf', 'some-custom-name.pdf')
Третим параметром рассматриваемого метода является колбэк, вызываемый после отправки файла:
res.download('./file.pdf', 'some-custom-name.pdf', error => {
    if (error) {
        // обрабатываем ошибку
    } else {
        console.log('Файл успешно отправлен')
    }
})
20. Сессии
По умолчанию запросы в Express являются одноразовыми, т.е. запросы не могут связываться между собой. Не существует способа определить, что повторный запрос отправлен тем же клиентом.
Пользователи не могут быть идентифицированы нативными средствами.
Вот где в игру вступают сессии.
После реализации названного механизма, каждому пользователю и сайту присваивается сессия, хранящая пользовательское состояние.
Мы будем использовать express-session, поддерживаемый командой Express.
Устанавливаем его:
npm i express-session
Инициализируем:
const session = require('express-session')
Добавляем в Express в качестве middleware:
const express = require('express')
const session = require('express-session')
const app = express()
app.use(session(
    'secret': '343ji43j4n3jn4jk3n'
))
После этого все запросы к приложению будут сессионными.
Единственным обязательным параметром является secret, но существуют и другие. secret — произвольная случайная строка, уникальная для приложения.
Сессия включается в состав запроса, доступ к ней можно получить через req.session:
app.get('/', (req, res, next) => {
    // req.session
})
Данный объект может быть использован как для получения данных, так и для их записи:
req.sessions.name = 'Иван'
console.log(req.sessions.name) // Иван
При записи данные сериализуются (преобразуются в формат JSON), так что можно смело использовать вложенные объекты.
Сессии используются для передачи данных другим middleware или для их извлечения при последующих запросах.
Где хранятся сессионные данные? Это зависит от того, как настроен модуль express-session.
Такие данные могут храниться в:
- памяти — только при разработке
- базе данных, например, MySQL или Mongo
- кэше, например, Redis или Memcached
В любом случае идентификатор сессии записывается в куки, а сами данные хранятся на сервере. Куки с идентификатором сессии включается в каждый запрос клиента.
По идентификатору сервер осуществляет поиск хранящихся на нем данных.
По умолчанию для хранения данных используется память, но это подходит только для разработки.
Лучшим решением является Redis, однако, она требует дополнительной настройки инфраструктуры.
Другим популярным решением является пакет cookie-session. Он сохраняет данные в куки на стороне клиента. Данный способ использовать не рекомендуется, поскольку данные будут включаться в каждый запрос клиента и размер данных ограничен 4 Кб. Кроме того, обычные куки не подходят для хранения конфиденциальной информации. Существуют безопасные куки, передаваемые по протоколу HTTPS, но такие куки требуют дополнительной настройки с помощью прокси-сервера.
На сегодня это все. В следующей и последней части мы поговорим о валидации данных, полученных от пользователя, обработке форм, извлечении добавленных в них файлов, а также рассмотрим, как сделать сервер безопасным.
Следите за обновлениями. Благодарю за внимание и хороших выходных.
Node.js is an emerging technology, and with Express it become insanely powerful. We can use Node.js with Express to manage sessions. In this tutorial, you will learn to manage sessions including setting up sessions, saving data in sessions and fetching data from sessions.
A website uses HTTP protocol to transfer information between a client and a server. This HTTP protocol is a stateless protocol, where the server won’t have a status of communication and it doesn’t keep track of requests and responses made from a client to the server. In terms of security, it is really better to track the user request to know how many times a user requests or which data a user wants to access, etc.
To make the HTTP protocol stateful from stateless, we have sessions.
A session comes into action when a client makes a request to the server, a server then creates a session with a unique ID sent to the user as a response as cookies and stored on their browser and the session server created is stored in the server. Next time when the same user comes, the session unique ID attached to the user will also come and the server knows that this user is the same user as the previous one.
For creating a session in Node.js, we have a module “express-session”.
express-session Module in Node.js
This module is used to manage sessions in Node.js, for installing this module in your Node.js project using NPM, execute the below command in the terminal.
If you got an error, make sure that you have Node and NPM installed on your system.
Session Setup in Node.js
To use this “express-session” module to set a session in Node.js, it is also required to install the Express module. Execute the below command in the terminal to install Express.
Once you have installed the express-session and express module, it’s time to create a server file “app.js” to set up the session.
Inside the server file, let’s start with importing the express and express-session module, then create an instance of express and use it to call the “use” method and pass the session method with an object as an argument containing a secret key, and some optional parameters.
const express = require('express')
const session = require('express-session')
const app = express()

app.use(session({secret: 'Your_Secret_Key', resave: true, saveUninitialized: true}))
Once we have set up the session, it’s time to create session variables, to store some information.
Creating Session Variables
Below is the syntax to create session variables:
where the key is later used to access the value.
Let’s create a variables userName and store some values in it.
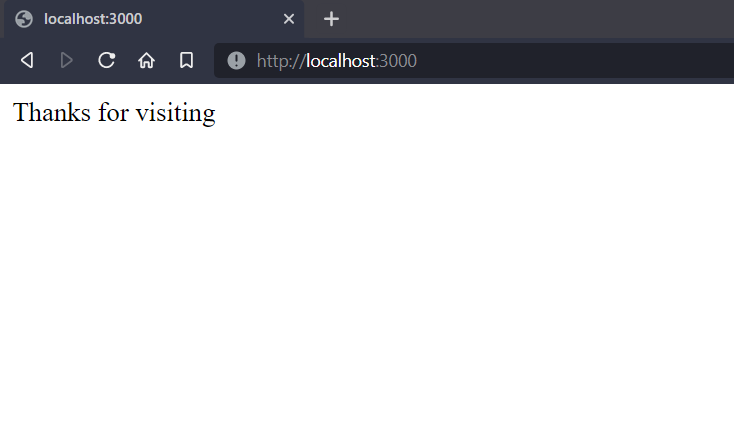
app.get("/", function(req, res){
    req.session.userName = '[email protected]';

    res.send("Thanks for visiting");
})
Accessing Session Variables
Below is the syntax to Access session variables:
Let’s access the session variables userName which we have created in the above step, and send its value as a response to the client.
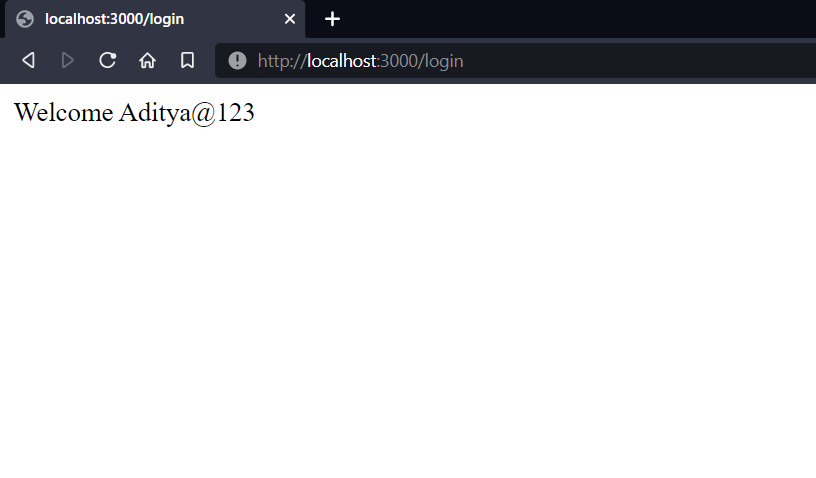
app.get("/login", function(req, res){
    var userName = req.session.userName;
    res.send("Welcome " + userName);
})
Complete Code:
const express = require('express')
const session = require('express-session')
const app = express()

app.use(session({secret: 'Your_Secret_Key', resave: true, saveUninitialized: true}))

app.get("/", function(req, res){
    req.session.userName = '[email protected]';

    res.send("Thanks for visiting");
})

app.get("/login", function(req, res){
    var userName = req.session.userName;
    res.send("Welcome " + userName);
})

app.listen(3000, function(error){
    if(error) {
        console.log(error)
    }
    console.log("Server listening on PORT 3000")
})
Run the Application
The application code is written in a single file “app.js” that runs on executing the below command in the terminal.
Open the Application
Enter the below URL inside the search bar of a web browser to open the application.
Output:
Summary
The session is important to keep track of its clients, to have knowledge about how many times they request the server and what response they want, etc. It provides security as well. For setting sessions, we have a module express-session which can be installed using NPM. Hope this tutorial helps to understand the way of managing sessions using Node.js and Express.
Reference
https://www.npmjs.com/package/express-session