Haчaло paботы
Ocновныe фyнкции
Различные режимы записи
Воспроизведение/удаление
Редактирование сообщений
Πpοcлyшивание радио
Использование функции меню
Инcтpyкция по экcплyaтaции
Использование цифрового диктофона с компьютером
Поиcк и ycтpaнeниe нeиcпpaвноcтeй
Дополнительная информация
Изготовитeль: Сони Корпорeйщн
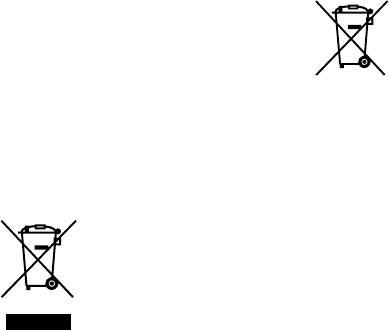
Данный знак на элементе питания
или упаковке означает, что элемент
aдрec: 1-7-1 Конaн,
питания, поставляемый с устройством,
Минaто-ку, Toкиo 108-0075, Япония
нельзя утилизировать вместе с
прочими бытовыми отходами.
Стрaнa-прoизвoдитeль: Китaй
Обеспечивая правильную утилизацию использованных
Для покупателей в Европе
элементов питания, вы предотвращаете негативное влияние
на окружающую среду и здоровье людей, возникающее
Утилизaция элeктpичecкого и
при неправильной утилизации. Вторичная переработка
элeктpонного обоpyдовaния
материалов, использованных при изготовлении элементов
питания, способствует сохранению природных ресурсов.
(диpeктивa пpимeняeтcя в cтpaнax
При работе устройств, для которых в целях
Eвpоcоюзa и дpyгиx eвpопeйcкиx
безопасности, выполнения каких-либо действий
или сохранения имеющихся в памяти устройств
cтpaнax, гдe дeйcтвyют cиcтeмы
данных необходима подача постоянного питания
paздeльного cбоpa отxодов)
от встроенного элемента питания, замену такого
Дaнный знaк нa ycтpойcтвe или eго
элемента питания следует производить только
yпaковкe обознaчaeт, что дaнноe
в специализированных сервисных центрах.
ycтpойcтво нeльзя yтилизиpовaть
Для правильной утилизации использованных
элементов питания, после истечения срока службы,
вмecтe c пpочими бытовыми отxодaми.
сдавайте их в соответствующий пункт по сбору
Eго cлeдyeт cдaть в cоотвeтcтвyющий
электронного и электрического оборудования.
пpиeмный пyнкт пepepaботки
Об использовании прочих элементов питания, пожалуйста,
элeктpичecкого и элeктpонного
узнайте в разделе, в котором даны инструкции по
обоpyдовaния. Heпpaвильнaя
извлечению элементов питания из устройства, соблюдая
yтилизaция дaнного издeлия можeт пpивecти к
меры безопасности. Сдавайте использованные
потeнциaльно нeгaтивномy влиянию нa окpyжaющyю
элементы питания в соответствующие пункты по сбору и
cpeдy и здоpовьe людeй, поэтомy для пpeдотвpaщeния
переработке использованных элементов питания.
подобныx поcлeдcтвий нeобxодимо выполнять
Для получения более подробной информации о вторичной
cпeциaльныe тpeбовaния по yтилизaции этого издeля.
переработке данного изделия или использованного
Пepepaботкa дaнныx мaтepиaлов поможeт cоxpaнить
элемента питания, пожалуйста, обратитесь в местные
пpиpодныe pecypcы. Для полyчeния болee подpобной
органы городского управления, службу сбора бытовых
инфоpмaции о пepepaботкe этого издeлия обpaтитecь в
отходов или в магазин, где было приобретено изделие.
мecтныe оpгaны гоpодcкого yпpaвлeния, cлyжбy cбоpa
Уведомление адресовано
бытовыx отxодов или в мaгaзин, гдe было пpиобpeтeно
издeлиe.
пользователям в странах, где
Вxодящиe в комплeкт пpинaдлeжноcти: наушники
действуют директивы ЕС
Производителем данного устройства является
Утилизация использованных
корпорация Sony Corporation, 1-7-1 Konan, Minato-ku,
элементов питания (применяется
Tokyo, Japan. Уполномоченным представителем по
в странах Евросоюза и других
электромагнитной совместимости (EMC) и безопасности
изделия является компания Sony Deutschland GmbH,
европейских странах, где действуют
Hedelnger Strasse 61, 70327 Stuttgart, Germany. По
системы раздельного сбора отходов)
вопросам обслуживания и гарантии обращайтесь по
адресам, указанным в соответствующих документах.
RU
2

Информация для
пользователей
Программа: © 1999, 2000, 2001, 2002, 2003, 2004,
2005, 2006, 2007, 2008 Sony Corporation
Documentation ©2008 Sony Corporation
Все права защищены. Все или отдельные части
настоящего руководства или описанного в
нем программного обеспечения запрещается
воспроизводить, переводить или сокращать
в любом виде, пригодном для прочтения на
компьютере, без предварительного письменного
разрешения Sony Corporation.
НИ ПРИ КАКИХ ОБСТОЯТЕЛЬСТВАХ КОРПОРАЦИЯ
SONY НЕ НЕСЕТ НИКАКОЙ ОТВЕТСТВЕННОСТИ ЗА
КАКИЕ БЫ ТО НИ БЫЛО ПОБОЧНЫЕ, КОСВЕННЫЕ
ИЛИ РЕАЛЬНЫЕ УБЫТКИ КАК ПО ГРАЖДАНСКОМУ
ЗАКОНОДАТЕЛЬСТВУ, КОНТРАКТУ, ТАК И ПРИ
ЛЮБЫХ ДРУГИХ ОБСТОЯТЕЛЬСТВАХ, ВОЗНИКШИХ
ВСЛЕДСТВИЕ ИЛИ В СВЯЗИ С ИСПОЛЬЗОВАНИЕМ
ДАННОГО РУКОВОДСТВА, ПРОГРАММНОГО
ОБЕСПЕЧЕНИЯ ИЛИ ДРУГОЙ ИНФОРМАЦИИ,
СОДЕРЖАЩЕЙСЯ В НИХ ИЛИ ПОЛУЧЕННОЙ В
РЕЗУЛЬТАТЕ ИХ ИСПОЛЬЗОВАНИЯ.
Sony Corporation сохраняет за собой право в любое
время без уведомления вносить любые изменения
в данное руководство или содержащуюся в нем
информацию.
Использование программного обеспечения,
описанного в данном руководстве, также может
быть определено положениями отдельного
лицензионного соглашения пользователя.
Это программное обеспечение работает в
системе Windows, его нельзя использовать на
компьютерах Macintosh.
Прилагаемый соединительный кабель
предназначен для цифрового диктофона
ICD-P630F. Другие цифровые диктофоны
использовать нельзя.
RU
3

Воспроизведение/удаление
Содержание
Bоcпpоизвeдeниe сообшений ………………..23
Укaзaтeль дeтaлeй и оpгaнов
Повтоpноe воcпpоизвeдeниe
yпpaвлeния ………………………………………………………6
cообщeний — Повтоp
воcпpоизвeдeния …………………………………25
Haчaло paботы
Heпpepывноe воcпpоизвeдeниe
вcex cообщeний в пaпкe
Шaг 1. Уcтaновкa бaтapeeк ………………………..9
— Heпpepывноe
Зaмeнa бaтapeeк ……………………………………10
воcпpоизвeдeниe …………………………………25
Шaг 2. Уcтaновкa чacов ……………………………….11
Поиcк впepeд/нaзaд во вpeмя
воcпpоизвeдeния (Поиcк/
Пpовepкa) ………………………………………………..25
Ocновныe фyнкции
Быcтpый поиcк мecтa, c
Зaпиcь cообщeний ……………………………………….13
котоpого нeобxодимо нaчaть
Bыбоp пaпки …………………………………………………….17
воcпpоизвeдeниe (Easy Search) ……..26
Aвтомaтичecкоe нaчaло зaпиcи пpи
Bоcпpоизвeдeниe cообщeния в
нaличии звyкового cигнaлa —
нyжный дeнь и вpeмя c cигнaлом
Уcовepшeнcтвовaннaя фyнкция VOR …..17
пpeдyпpeждeния …………………………………………..26
Bыбоp чyвcтвитeльноcти микpофонa ….18
Удaлeниe cообщeний …………………………………..30
Удaлeниe cообщeний по одномy ….30
Различные режимы записи
Удaлeниe вcex cообщeний в
пaпкe…………………………………………………………..31
Добaвлeниe зaпиcи ………………………………………19
Иcпользовaниe добaвлeния
зaпиcи ………………………………………………………..19
Редактирование сообщений
Добaвлeниe зaпиcи к paнee
Paзбиeниe cообщeния ………………………………..32
зaпиcaнномy cообщeнию …………………20
Пepeмeщeниe cообщeний в дpyгyю
Зaпиcь c помощью внeшнeго микpофонa
пaпкy — Фyнкция пepeмeщeния …………..33
или c дpyгого обоpyдовaния …………………..21
RU
4

Πpοcлyшивание радио
Использование цифрового
диктофона с компьютером
Пpоcлyшивaниe paдиоcтaнций
диaпaзонa FM ………………………………………………….35
Использование прилагаемого
Пepeключeниe выводa FM-paдио
программного обеспечения
мeждy гpомкоговоpитeлeм и
Digital Voice Editor ………………………………………….44
головными тeлeфонaми …………………….36
Возможности программного
Зaпиcь paдиопpогpaмм в
обеспечения Digital Voice
диaпaзонe FM …………………………………………36
Editor …………………………………………………………..44
Пpeдвapитeльнaя нacтpойкa
Системные требования ……………………..45
paдиоcтaнций диaпaзонa FM …………………..36
Установка программного
обеспечения …………………………………………..46
Aвтомaтичecкaя пpeдвapитeльнaя
нacтpойкa paдиоcтaнций
Подсоединение цифрового
диaпaзонa FM ………………………………………………….37
диктофона к компьютеру ………………….49
Обращение к файлам справки……….50
Пpоcлyшивaниe зaпpогpaммиpовaнной
paдиоcтaнции …………………………………………………38
Удaлeниe cоxpaнeнныx cтaнций
Поиcк и ycтpaнeниe
диaпaзонa FM ………………………………………………….39
нeиcпpaвноcтeй
Пepeключeниe чyвcтвитeльноcти
Поиcк и ycтpaнeниe нeиcпpaвноcтeй …51
пpиeмникa FM-paдио …………………………40
Дополнительная информация
Использование функции меню
Mepы пpeдоcтоpожноcти …………………………57
Bыбоp peжимa диcплeя ……………………………..41
Texничecкиe xapaктepиcтики ………………….58
Oтключeниe звyкового cигнaлa ……………..42
Измeнeниe peжимa зaпиcи ………………………42
Heпpepывноe воcпpоизвeдeниe вcex
cообщeний в пaпкe ………………………………………43
Oтключeниe индикaтоpa
работы (LED) …… 43
RU
5
Посмотреть инструкция для Sony ICD-P630F бесплатно. Руководство относится к категории Устройства звукозаписи, 1 человек(а) дали ему среднюю оценку 5.3. Руководство доступно на следующих языках: русский. У вас есть вопрос о Sony ICD-P630F или вам нужна помощь? Задайте свой вопрос здесь
Не можете найти ответ на свой вопрос в руководстве? Вы можете найти ответ на свой вопрос ниже, в разделе часто задаваемых вопросов о Sony ICD-P630F.
Какой вес Sony ICD-P630F?
Инструкция Sony ICD-P630F доступно в русский?
Не нашли свой вопрос? Задайте свой вопрос здесь
-
Инструкции по эксплуатации
1

SONY ICD-P630F инструкция по эксплуатации
(60 страниц)
- Языки:Русский
-
Тип:
PDF -
Размер:
1.4 MB -
Описание:
Диктофон
Просмотр
На NoDevice можно скачать инструкцию по эксплуатации для SONY ICD-P630F. Руководство пользователя необходимо для ознакомления с правилами установки и эксплуатации SONY ICD-P630F. Инструкции по использованию помогут правильно настроить SONY ICD-P630F, исправить ошибки и выявить неполадки.
-
Contents
-
Table of Contents
-
Troubleshooting
-
Bookmarks
Quick Links
Related Manuals for Sony ICD-P630F
Summary of Contents for Sony ICD-P630F
-
Page 2
Notice for the customers in the countries applying EU Directives The manufacturer of this product is Sony Corporation, 1-7-1 Konan, Minato-ku, Tokyo, Japan. The Authorized Representative for EMC and product safety is Sony Deutschland GmbH, Hedelfinger Strasse 61, 70327 Stuttgart, Germany. -
Page 3: Notice For Users
Sony Corporation. IN NO EVENT SHALL SONY CORPORATION BE LIABLE FOR ANY INCIDENTAL, CONSEQUENTIAL OR SPECIAL DAMAGES, WHETHER BASED ON TORT, CONTRACT, OR OTHERWISE, ARISING OUT OF OR IN CONNECTION…
-
Page 4: Table Of Contents
Table of Contents Index to Parts and Controls …6 Getting Started Step 1: Installing the Batteries …9 Replacing the batteries …10 Step 2: Setting the Clock …11 Basic Operations Recording Messages…13 Selecting the Folder …17 Starting Recording Automatically in Response to the Sound —…
-
Page 5
Editing Messages Dividing a Message …32 Moving Messages to a Different Folder — Move Function …33 Listening to the Radio Listening to an FM Radio Station …35 Switching the FM radio output between speaker and headphones …36 Recording FM broadcasts …36 Presetting FM Radio Stations …36 Presetting FM Radio Stations Automatically …37… -
Page 6: Index To Parts And Controls
Index to Parts and Controls Main unit Built-in microphone (microphone) jack FM• (headphone)/ (speaker) selector REC (record) – (review/fast backward)/ + (cue/fast forward) Display window DISPLAY/MENU (stop) Speaker * There is a tactile dot beside the control to show the direction to turn up the volume.
-
Page 7
Preventing Accidental Operation — HOLD function Slide the HOLD switch to ON. “HOLD” will flash three times, indicating that all the functions of the buttons are locked. When the HOLD function is activated during stop, all the display will be turned off after “HOLD”… -
Page 8: Display Window
Display window Remaining battery indicator Recording mode Folder indication indication REC (recording) Microphone sensitivity indicator Alarm indicator FM indicator Repeat play indicator Selected message number EASY-S (Easy Search) REC DATE (recorded date) indicator indication Number of messages REMAIN indicator in a folder/Menu indication/Counter/ FM radio sensitivity Remaining time…
-
Page 9: Getting Started
Getting Started Step 1: Installing the Batteries Slide and lift the battery compartment lid. Insert two LR03 (size AAA) alkaline batteries with correct polarity, and close the lid. Make sure to insert both of the batteries from their – ends. If the battery compartment lid is accidentally detached, attach it as illustrated.
-
Page 10: Replacing The Batteries
Approx.7 hr. FM reception: Approx.13 hr. (hr.: hours) * Using Sony alkaline batteries LR03 (size AAA) **When playing back through the internal speaker with the medium volume level The battery life may shorten depending on the operation of the unit.
-
Page 11: Step 2: Setting The Clock
Step 2: Setting the Clock DISPLAY/MENU PLAY/ENTER (stop) – Clock setting display appears when you insert batteries for the first time, or when you replace the batteries with new ones. In this case, proceed from step 2. Display the clock setting display.
-
Page 12
Set the time. Press – digits of the hour. Press PLAY/ENTER. The minute digits will flash. Set the minute. Press PLAY/ENTER at the time signal. The display will return to “SET DATE. ” … -
Page 13: Basic Operations
Basic Operations Recording Messages Display window Recording mode Current message number Counter display* Remaining memory indicator * The display selected with the DISPLAY/MENU button appears. You can record up to 99 messages in each of the four folders (A, B, C, and D). Since a newly recorded message is automatically added behind the last recorded message, you can start…
-
Page 14: Other Operations
Start recording. Press REC. You do not need to keep pressing REC while recording. Speak to the built-in microphone. Stop recording. Press (stop). The unit stops at the beginning of the current recording. If you do not change the folder after you stop recording, the next time you record you will record in the same folder.
-
Page 15
Note on recording Noise may be recorded if an object, such as your finger, etc., accidentally rubs or scratches the unit during recording. Maximum recording time The maximum recording time of all the folders is as follows. You can record messages for the maximum recording time in a single folder. -
Page 16
Remaining memory indication During recording, the remaining memory indicator decreases one by one. The memory is nearly full. Flashing When the remaining time of recording reaches 5 minutes, the last one of the indication flashes. If the remaining recording time display mode is selected, the remaining recording time display will also flash when the remaining time reaches 1… -
Page 17: Selecting The Folder
Selecting the Folder Press DISPLAY/MENU for more than 1 second until “MODE” appears in the display window. Press – + to select “FOLDER” and press ENTER. Press – + to select the folder you want and press …
-
Page 18: Selecting The Microphone Sensitivity
Selecting the Microphone Sensitivity Press DISPLAY/MENU for more than 1 second until “MODE” appears in the display window. Press – “SENS” and press Press – “H (high sensitivity)” or “L (low sensitivity)” and press ENTER. Press …
-
Page 19: Various Recording Modes
Various Recording Modes Adding a Recording Using an adding recording At a factory setting, you cannot add a recording not to erase the message by accidental operation. If you want to add a recording to a previously recorded message or add an overwrite recording, change the REC-OP setting in the procedures below.
-
Page 20: Adding A Recording To A Previously Recorded Message
Adding a recording to a previously recorded message You can add a recording to the message being played back. When “ADD” is selected in the menu The added recording will be placed after the current message and counted as a part of the message.
-
Page 21: Recording With An External Microphone Or From Other Equipment
While “ADD” or “OVER” flashes, press REC again. The operation indicator will light in red. An add or overwrite recording starts. Press (stop) to stop the recording. Notes You cannot add or overwrite a recording if the remaining memory is not long enough.
-
Page 22
Notes Make sure that the plugs are connected securely. We recommend you make a trial recording to check the connections and volume control. When connecting equipment other than Sony’s, refer to the instruction manual of the equipment. -
Page 23: Playback/Erasing
Playback/Erasing Playing Back Messages PLAY/ENTER (stop) – /+ When playing back a previously recorded message, start from Step 1. When playing back a message you have just finished recording, start from Step 3. Select the folder. See “Selecting the Folder” on page 17. …
-
Page 24
Start playback. Press PLAY/ENTER. Adjust the volume with the VOL control. Stop playback. Press (stop). After playing back one message, the unit stops at the beginning of the next message. When the continuous play function is set to “CONT ON” (see page 43), the unit stops after playing all messages in a folder. -
Page 25: Playing Back A Message Repeatedly — Repeat Play
Playing back a message repeatedly — Repeat Play During playback, press for more than one second. “ “ will be displayed and the selected message will be played back repeatedly. To resume normal playback, press PLAY/ENTER again. To stop playback, press …
-
Page 26: Locating Quickly The Point You Wish To Start Playback (Easy Search)
When fast playback is done to the end of the last message, “END” flashes 5 times. (You cannot hear the playback sound.) If you keep – while “END” is flashing, the messages are played back rapidly, and normal playback will start at the point you release the button.
-
Page 27
Note “ALARM OFF (or ON)” will not appear and the alarm cannot be set if the clock has not been set or no message has been recorded in the selected folder. Press PLAY/ENTER. “OFF” starts to flash. … -
Page 28
Set the alarm sound. Press – alarm sound either from “B-PLAY” (playing back the message after the alarm) or “B-ONLY” (alarm only). Press PLAY/ENTER. “ALARM ON” will be displayed. Press (stop) to exit the menu … -
Page 29
If more than one alarm time comes during recording, only the first message will be played back. When the alarm time comes when the unit is in the menu mode, alarm will sound and the menu mode will be canceled. If you erase the message you set the alarm to … -
Page 30: Erasing Messages
Erasing Messages DISPLAY/MENU PLAY/ENTER (stop) – You can erase the recorded messages one by one or all messages in a folder at a time. Note that once a recording has been erased, you cannot retrieve it. Erasing messages one by one When a message is erased, the remaining messages will advance and renumbered…
-
Page 31: Erasing All Messages In A Folder
Press PLAY/ENTER. The setting is completed. The message is erased and the remaining messages will be renumbered. (For example, if you erase Message 3, Message 4 will be renumbered as Message 3. When erasing is completed, the unit will stop at the beginning of the following message.) To cancel erasing…
-
Page 32: Editing Messages
Editing Messages Dividing a Message You can divide a message during recording or playback, so that the message is divided into two and the new message number is added to the divided message. By dividing a message, you can easily find the point you want to play back when you make a long recording such as a meeting.
-
Page 33: Moving Messages To A Different Folder — Move Function
To play the divided message Press – + to display the message number as the divided messages each have message numbers. To play the divided messages continuously Select “ON” for CONT in the menu as described in “Playing Back All Messages in a Folder Continuously.
-
Page 34
Press – folder to which you want to move the message. Press PLAY/ENTER. The message is moved in the destination folder. Press (stop) to exit the menu mode. To cancel moving the message(s) Press (stop) before step 5. … -
Page 35: Listening To The Radio
Listening to the Radio Listening to an FM Radio Station (stop) – / The display in the display window may be different from the actual one in some regions. Press FM to enter FM radio mode. Tune in a station.
-
Page 36: Switching The Fm Radio Output Between Speaker And Headphones
Switching the FM radio output between speaker and headphones When headphones are connected during FM reception or FM recording, you can switch between the sound from the speaker and from the headphones by pressing FM for more than 1 second. The sound will be switched between speaker and headphones.
-
Page 37: Presetting Fm Radio Stations Automatically
Press FM to enter FM radio mode. Tune in the station you want to preset and store on the preset number. Press and hold PLAY/ENTER until a preset number flashes on the display. The station will be stored in memory after 3 seconds.
-
Page 38: Listening To A Preset Radio Station
Press FM to enter FM radio mode. Preset stations automatically in the menu. Press DISPLAY/MENU for more than 1 second until “AUTO- P” appears in the display window. Press PLAY/ENTER. Press – and press …
-
Page 39: Erasing Preset Fm Radio Stations
Press FM repeatedly until “[P]” appears. If you press FM repeatedly, the radio switches between tuning manually (“P” appears) and tuning by preset number (“[P]” appears). Tune in the station. Press – + repeatedly until the preset number you want is displayed.
-
Page 40: Switching The Receiver Sensitivity Of The Fm Radio
Press FM repeatedly until “[P]” appears. Press – until the preset number you want to erase is displayed. Erase the preset number. Press PLAY/ENTER for more than 1 second. The preset number and “ERASE” flash in the display window. …
-
Page 41: Utilizing The Menu Function
Utilizing the Menu Function Selecting the Display Mode You can select the display mode for the stop, recording and playback modes. Each time you press DISPLAY/MENU, the display mode will change as shown below: On the current time display If the unit is left unoperated for more than 3 seconds in the stop mode, the display will show the current time, regardless of the…
-
Page 42: Turning Off The Beep Sound
Turning off the Beep Sound BEEP ON: A beep will sound to indicate that operation has been accepted. BEEP OFF: No beep sound will be heard except for the alarm and timer. Press DISPLAY/MENU for more than 1 second until “MODE” appears in the display window.
-
Page 43: Playing Back All Messages In A Folder Continuously
Playing Back All Messages in a Folder Continuously CONT ON: You can play back all messages in a folder continuously. CONT OFF: Playback stops at the end of each message. Press DISPLAY/MENU for more than 1 second until “MODE” appears in the display window.
-
Page 44: Using The Ic Recorder With Your Computer
Using the IC Recorder with Your Computer Using the Supplied Digital Voice Editor Software What you can do using the Digital Voice Editor software The Digital Voice Editor software allows you to transfer the messages to your display monitor, to save them on your computer’s hard disk, and to play back and edit them.
-
Page 45: System Requirements
System requirements Operating Systems: Windows Vista® Home Basic Windows Vista® Home Premium Windows Vista® Business Windows Vista® Ultimate Windows® XP Home Edition Service Pack 2 or higher Windows® XP Professional Service Pack 2 or higher Windows® XP Media Center Edition Service Pack 2 or higher Windows®…
-
Page 46: Installing The Software
Note on transcribing a message When you use Dragon NaturallySpeaking® speech-recognition software to transcribe a message, your computer must also meet the system requirements that the Dragon NaturallySpeaking requires. For latest version and availability of Dragon NaturallySpeaking in each region, please refer to the following page: http://www.nuance.com/ Note on sending a voice e-mail When you use Microsoft®…
-
Page 47
Windows® XP Media Center Edition 2005 Service Pack 2 or higher, log on as a user name with the “Computer administrator” user account. (To find if the user name has a “Computer administrator” user account, open the “User Accounts” from the “Control Panel”… -
Page 48: Uninstalling The Software
When the dialog box used to input the owner name is displayed Input the owner name. The owner name is the setting for privileges and limitations in the Digital Voice Editor usage. Notes You cannot change the owner name …
-
Page 49: Connecting The Ic Recorder To Your Computer
For Windows Vista – Click [Start] [Control Panel] – [Programs], and then select and click [Uninstall a Program] from the category. Select [Digital Voice Editor 3] from the list and click [Uninstall]. Click [Continue] in the [User Account control] window. Follow the instructions on the screen.
-
Page 50: Referring To The Help Files
Notes Be sure to install the Digital Voice Editor software before connecting the IC recorder to your computer. Otherwise, a message like [Found New Hardware Wizard] may appear when you connect the IC recorder to your computer. In this case, click [Cancel]. Do not connect more than two USB devices …
-
Page 51: Troubleshooting
Troubleshooting Troubleshooting Before taking the unit for repair, check the following sections. Should any problem persist after you have made these checks, consult your nearest Sony dealer. IC recorder Symptom Remedy The unit does not operate. No sound comes from the …
-
Page 52
Symptom Recording level is unstable (when recording music, etc.). “—Y—M—D” or “—:—” is displayed. “—Y—M—D” or “—:—” is displayed on the REC DATE display. You cannot divide a message. You cannot record messages up to the maximum recording time. Remedy This unit is designed to automatically adjust the recording level … -
Page 53
Symptom Remedy The remaining time displayed in the display window is shorter than that displayed in the supplied Digital Voice Editor software. The audio is weak or has poor quality when listening to the radio. The picture of your TV … -
Page 54
Digital Voice Editor Refer to the Help files of the Digital Voice Editor software, too. Symptom The Digital Voice Editor software cannot be installed. The IC recorder or “Memory Stick” cannot be properly connected. Remedy The free disk or memory space on the computer is too small. … -
Page 55
Symptom Remedy The IC recorder does not operate. Messages cannot be played back./Playback sound volume is too low. Saved message files cannot be played back or edited. Counter or slider moves incorrectly. There is noise. -
Page 56
Symptom The software ‘hangs’ when the Digital Voice Editor software starts up. Remedy Do not disconnect the connector of the IC recorder while the computer is communicating with the IC recorder. Otherwise the computer operations become unstable or the data inside the IC recorder may be damaged. -
Page 57: Additional Information
Do not use alcohol, benzine or thinner. If you have any questions or problems concerning your unit, please consult your nearest Sony dealer. Backup recommendations To avoid potential risk of data loss caused by accidental operation or…
-
Page 58: Specifications
Specifications IC recorder section Recording media Built-in flash memory 512 MB, Monaural recording A part of the memory capacity is used as a management area. Recording time HQ: 59 hours 45 minutes SP: 159 hours 20 minutes LP: 261 hours 45 minutes Freqency range HQ: 260 Hz — 6,800 Hz SP/LP: 220 Hz — 3,400 Hz…
-
Page 59
are trademarks of Sony Corporation. “Memory Stick PRO Duo” and are trademarks of Sony Corporation. “MagicGate Memory Stick” is the trademark of Sony Corporation. “LPEC” and are registered trademarks of Sony Corporation. US and foreign patents licensed from Dolby …
Диктофоны Sony ICD-P630F — инструкция пользователя по применению, эксплуатации и установке на русском языке. Мы надеемся, она поможет вам решить возникшие у вас вопросы при эксплуатации техники.
Вы можете скачать инструкцию к Sony ICD-P630F по ссылке ниже, если не хотите ждать загрузки. Если остались вопросы, задайте их в комментариях после инструкции.
«Загружаем инструкцию», означает, что нужно подождать пока файл загрузится и можно будет его читать онлайн. Некоторые инструкции очень большие и время их появления зависит от вашей скорости интернета.
Полезные видео
Остались вопросы?
Не нашли свой ответ в руководстве или возникли другие проблемы? Задайте свой вопрос в форме ниже с подробным описанием вашей ситуации, чтобы другие люди и специалисты смогли дать на него ответ. Если вы знаете как решить проблему другого человека, пожалуйста, подскажите ему


Часто задаваемые вопросы

Как посмотреть инструкцию к Sony ICD-P630F?
Необходимо подождать полной загрузки инструкции в сером окне на данной странице или скачать кликнув по специальной кнопке.
Руководство на русском языке?
Все наши руководства представлены на русском языке или схематично, поэтому вы без труда сможете разобраться с вашей моделью
Как можно распечатать инструкцию?
Скачайте ее по специальной кнопке над формой чтения на ваше устройства и отправьте на печать.