-
Page 1
Dishwasher User’s Manual Document Number : 15 9894 0100_AA_BEKO_E7_EN/ 01-02-18.(10:58) -
Page 2
Please read this user manual first! Dear Customer, We hope that you get the best results from your product which has been manufactured with high quality and state-of-the-art technology. Therefore, please read this entire user manual and all other accompanying documents carefully before using the product and keep it as a reference for future use. -
Page 3
Dishwasher User’s Manual Document Number : 15 9894 0100_AA_BEKO_E7_EN/ 01-02-18.(10:58) -
Page 4
Please read this user manual first! Dear Customer, We hope that you get the best results from your product which has been manufactured with high quality and state-of-the-art technology. Therefore, please read this entire user manual and all other accompanying documents carefully before using the product and keep it as a reference for future use. -
Page 5: Table Of Contents
CONTENTS 1 INSTRUCTIONS FOR SAFETY Lower basket multipurpose / height adjustable service rack ….. 23 AND ENVIRONMENT Lower basket bottle wire ….24 General safety ……..4 Upper basket height adjustable rack 24 Intended use ……….4 Upper basket multipurpose service Children’s safety ……..5 rack …………
-
Page 6: Instructions For Safety And Environment
instructions for safety and environment This section contains safety Never touch the plug with • instructions that will help to get wet hands! Never unplug by protected from risk of personal pulling on the cable, always injury or property damage. Failure pull out by grabbing the plug.
-
Page 7: Children’s Safety
instructions for safety and environment Children’s safety This appliance is intended • to be used in household and Electrical products are • similar applications such as: dangerous for the children. — Staff kitchen areas in shops, Keep children away from the offices and other working product when it is in use.
-
Page 8: Compliance With Weee Directive And Disposing Of The Waste Product
instructions for safety and environment Package information 1. Unplug the product before transporting it. Packaging materials of the 2. Remove water drainage and product are manufactured from water supply connections. recyclable materials in accordance with our National Environment 3. Drain the remaining water in Regulations.
-
Page 9: Dishwasher Overview
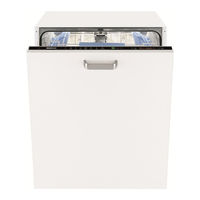
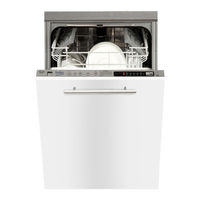
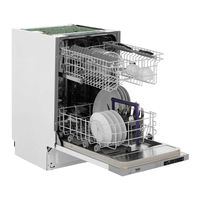
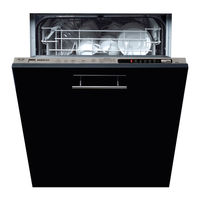
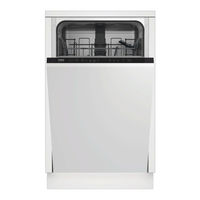
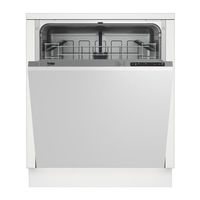
Dishwasher Overview 1. Upper basket 2. Upper impeller 3. Lower impeller 4. Silverware basket 5. Door 6. Rating Label 7. Control panel 8. Detergent dispenser 9. Lower basket 10. Filters 11. Salt reservoir lid 12. Upper basket rail 13. Upper cutlery basket (depends on model) 14.
-
Page 10: Fan Drying System
Dishwasher Technical specifications Compliance to standards and test data / EC declaration of conformity This product complies with the following EU directives; Development, production and sales stages of this product comply with the safety rules included in all pertaining European Community regulations. 2014/35/EU, 2014/30/EU, 93/68/EC, IEC 60436/DIN 44990, EN 50242 Power input 220-240 V, 50 Hz (see rating label)
-
Page 11: Installation
Installation Refer to the nearest Authorised Service capacity! The product must be installed Agent for installation of your product. To on a flat surface in order for the door to make the product ready for use, make sure be closed comfortably and securely. that the electricity, tap water supply and Do not install the product at places •…
-
Page 12: Connection To The Drain
Installation Do not use old or used water inlet hose • on the new product. Use the new water inlet hose supplied with the product. Connect the water inlet hose directly • to the water tap. Pressure coming from the tap should be minimum 0.3 and maximum 10 bars.
-
Page 13: Aquasafe
Installation Aquasafe+ The voltage and allowed fuse or • breaker protection are specified in the (depends on model) “Technical specifications” section. If the The Aquasafe+ system protects against current value of the fuse or breaker in water leaks that may occur at the hose inlet. the house is less than 16 Amps, have Water contact with the valve box of the a qualified electrician install a 16 Amp…
-
Page 14: Preparation Tips For Energy Saving
Preparation Tips for energy saving Adjusting the water softening system Following information will help you use the product in an ecological and energy-efficient Cleaning, rinsing and drying performance of manner. your dishwasher will increase when water Wipe away any coarse food remnants on the softening system is adjusted properly.
-
Page 15
Preparation Use the test strip supplied with the product according to the steps given below to determine hardness level of your supply water. Remove the test Turn on the tap and Hold the test strip in Remove the test Wait for 1 minute. The test strip shows strip from the let the water run for… -
Page 16: Adding Salt
Preparation If you move your house, it is necessary to readjust water hardness level of your machine by considering the information given above according to the hardness level of the supply water in your new location. Your machine will display the most recently adjusted water hardness level.
-
Page 17: Detergent
Preparation Since different salt brands 2. Put suggested amount of powder, in the market have different liquid/gel or tablet detergent in the particle sizes and since the water reservoir. hardness may vary, dissolution of the salt in water may take Inside the detergent dispenser a couple of hours.
-
Page 18: Tablet Detergents
Preparation The best washing performance in dishwashers is obtained by using detergent, rinse aid and water softening salt individually. Observe the instructions of the detergent manufacturer on the package when using tablet detergents. Contact the detergent manufacturer if your dishes are wet and/or if you notice Use powder or liquid/gel limescale spots particularly on…
-
Page 19: Rinse Aid
Preparation Rinse aid 4. If there are stains on tableware items after washing, level must be increased The rinse aid used in and if there is a blue trace after wiping dishwashers is a special them by hand, it must be decreased. combination that aims to This is set to position 3 as factory increase drying efficiency and…
-
Page 20: Placing The Dishes Into The Dishwasher
Preparation Placing the dishes into the dishwasher You can use your dishwasher in the optimum way with respect to energy consumption and washing and drying performance only if you place the dishes in an orderly way. Wipe away any coarse food remnants •…
-
Page 21
Preparation Suggestions for loading the dishwasher Improper Loading Of Dishware Lower basket Upper basket Improper Loading Of Dishware Dishwasher / User’s Manual 19 / 44 EN… -
Page 22: Cutlery Basket
Preparation Cutlery basket Cutlery basket (depends on model) (depends on model) Cutlery basket is designed to wash your Cutlery basket is designed to wash your dishes such as knife, fork, spoon, etc. in an dishes such as knife, fork, spoon, etc. in an efficient manner.
-
Page 23: Collapsible Lower Basket Tines
Preparation Collapsible lower basket Bringing the tines to the tines horizontal position by holding them from the tips may cause (depends on model) them to bend. Therefore, it will There are foldable tines (A) located at the be appropriate to bring the tines in the middle to horizontal or lower basket of the machine are designed vertical position by holding them…
-
Page 24: Tray Wash Supports
Preparation SoftTouch Accessory (depends on model) The SoftTouch Accessory found in the lower basket of your machine enables a safe washing for your fragile glasses. Bringing the tines to the horizontal position by holding them from the tips may cause them to bend.
-
Page 25: Lower Basket Multipurpose / Height Adjustable Service Rack
Preparation Lower basket multipurpose Make sure that the impeller does / height adjustable service not touch the dishes you placed rack on the racks. (depends on model) To close the racks: This accessory located at the lower basket Fold the rack (A). of your machine allows you to easily wash 2.
-
Page 26: Lower Basket Bottle Wire
Preparation Lower basket bottle wire (depends on model) The bottle wire is designed for easier washing of long pieces with wide mouths. You may take out the bottle wire from the basket when not in use by pulling it out from both sides (H).
-
Page 27: Adjusting The Height Of The Upper Basket
Preparation Adjusting the height of the To lower the basket, while it is in the uppermost position; upper basket Hold the upper basket wires with both (depends on model) hands, slightly lift up the basket and The upper basket height adjustment simultaneously push and release the mechanism has been designed for you to latches shown in the figure (B).
-
Page 28: Collapsible Upper Basket Wires
Preparation Collapsible upper basket Pull out the basket out completely. Place the basket back into the tracks at the wires desired height (depends on model) Push the latches back into the correct You can use collapsible wires when you need position.
-
Page 29: Ceiling Cutlery Basket
Preparation Ceiling cutlery basket (depends on model) Ceiling cutlery basket is designed to wash your cutlery items such as forks, spoons and etc. by placing them between the bars on the basket. When the central tray is in the lower position, you can load long/high items such as coffee cups, ladles, etc.
-
Page 30: Operating The Product
Operating the product On/Off key 2. Programme Selection / Programme Cancel (3 seconds) key 3. Function keys Tablet detergent function Half Load function 4. Programme indicator 5. Salt indicator Not in use 7. Start / Cancel indicator 8. Time Delay / Programme Time indicator 9.
-
Page 31: Keys
Operating the product Keys Programme selection On/Off key Press the On/Off button to turn on your When you press On / Off key, indicator lights machine. illuminate on the display for ON position. The 2. Check the Salt and Rinse Aid indicators lights turn off in OFF position.
-
Page 32
Operating the product /44 EN Dishwasher / User’s Manual… -
Page 33: Auxiliary Functions
Operating the product Auxiliary functions Tablet detergent function Allows to obtain a better drying performance Washing programmes of your dishwasher from the multi-purpose detergents called as are designed to obtain the best cleaning all in one detergents such as 2in1, 3in1, 4in1, effect, considering the type of the soiling, 5in1 and etc., depending on the hardness soiling degree and properties of the dishes…
-
Page 34: Scheduling The Washing Time
Operating the product Scheduling the washing Interior Lighting (Depends on the model) time Some models have interior lighting to Time Delay illuminate the interior when the door is If an economical electricity tariff is applied opened. in your region, you can use the Time Changing the interior lighting Delay function to wash your dishes during setting…
-
Page 35: Starting The Programme
Operating the product Cancelling the programme of the product and wait for the draining process complete. Draining is completed in Open the door of the product Press and 2 minutes and the machine gives an audible hold the Programme Selection / Programme warning when it is completed.
-
Page 36: Rinse Aid Indicator ( )
Operating the product Adjusting the amount of For energy saving, the machine rinse aid is automatically turned off following the completion of the After turning on the machine, press programme or if the programme Time Delay and P+ keys simultaneously. is not started.
-
Page 37: Innerclean
Operating the product InnerClean This programme is recommended to be operated on each 1-2 months for machine cleaning and necessary hygiene. The programme should be operated while the machine is empty. In order to achieve an efficient result, it is recommended to use together with special machine cleaning agents.
-
Page 38: Maintenance And Cleaning
Maintenance and cleaning Cleaning the filters Service life of the product extends and frequently faced problems decrease if it is Clean the filters at least once a week in order cleaned at regular intervals. for the machine operates efficiently. Check if Unplug the product and turn off food residues are left on the filters.
-
Page 39: Cleaning The Hose Filter
Maintenance and cleaning Cleaning the hose filter Damages on the machine that may be caused by impurities coming from the urban supply water or your own water installation (such as sand, dirt, rust, etc.) can be prevented by means of the filter attached to the water inlet hose.
-
Page 40: Cleaning The Impellers
Maintenance and cleaning Cleaning the impellers Upper impeller Clean the impellers at least once a week in Check if the holes on the upper impeller (1) order for the machine operates efficiently. are clogged. If they are clogged, remove and clean the impeller. Turn its nut to left to Lower impeller remove the upper impeller.
-
Page 41: Troubleshooting
Troubleshooting Machine does not start. • Power cable is unplugged. >>> Check if the power cable is plugged in. • Fuse is blown. >>> Check the fuses in your house. • Water is cut. >>> Make sure that the water inlet tap is open. •…
-
Page 42
Troubleshooting • Rinse aid is not sufficient. >>> Check the rinse aid indicator and add rinse aid if necessary. Increase the rinse aid setting if there is enough amount of rinse aid in the machine. • Machine is unloaded right after the programme is over. >>> Do not unload your machine right after washing process is completed. -
Page 43
Troubleshooting Since the salt granules that will remain under the lid will dissolve during prewash, causing the lid loosen, check the lid once again at the end of the programme. There is a different odour in the machine A new machine has a peculiar odour. It will fade out after a couple of washes. •… -
Page 44
Troubleshooting Detergent remains in detergent dispenser. • Detergent dispenser was damp when adding detergent. >>> Make sure that the detergent dispenser is dried well prior to filling it with detergent. • Detergent is added long before the washing process. >>> Pay attention to add detergent shortly before start-up of the washing. -
Page 45
Troubleshooting A smear remains on glasses that resembles milk stain which can not be removed when wiped by hand. A bluish / rainbow appearance occurs when the glass is pointed to light. • Excessive rinse aid is used. >>>Lower rinse aid setting. Clean the spilled rinse aid when adding rinse aid.
- Manuals
- Brands
- Beko Manuals
- Dishwasher
ManualsLib has more than 617 Beko Dishwasher manuals
Click on an alphabet below to see the full list of models starting with that letter:
2
3
5
8
B
D
E
F
H
L
M
P
Q
S
U
Popular manuals

38 pages
Dishwasher Instruction Manual

38 pages
Dishwasher User Manual
42 pages
dishwasher User Manual

2 pages
DW602 User Quick Reference Manual

2 pages
DSFN 4630 Quick Reference Manual
48 pages
DVN05R20W User Manual
51 pages
BDFN15430W User Manual

49 pages
BDFN Series User Manual
28 pages
DSFN 1534 Manual
40 pages
DW451 Manual
28 pages
DSFN 1530 Manual
41 pages
DIS15010 Instruction Manual
28 pages
DL1243 Installation & Operation Instructions
28 pages
DW602 Manual
47 pages
DSN28420X User Manual
49 pages
BDFN Series User Manual
40 pages
BDF1410X User Manual
61 pages
DIS16R10 User Manual
51 pages
DTC36610W Instruction Manual
35 pages
DIN15210 User Manual
Models
Document Type
2
2521

Manual
3
3905 MI
Instruction Manual
5
5023790035316
User Manual
5023790035347
User Manual
5023790035361
User Manual
5023790035378
User Manual
5023790035385
User Manual
8
8690842194238
User Manual
8690842204784
User Manual
B
BDDN38530DD
User Manual
BDDN38530XD
User Manual
BDEN38530FX
User Manual
BDEN38640FG
User Manual
BDF1410W
User Manual
BDF1410X
User Manual
BDF1620W
User Manual
BDF1620X
User Manual
BDF1630X
User Manual
BDF1640AX
User Manual
BDF1640DX
User Manual
BDFN Series
User Manual • Manual • User Manual • User Manual • User Manual • User Manual • User Manual • User Manual
BDFN15420B
User Manual
BDFN15420W
User Manual • User Manual
BDFN15420X
User Manual
BDFN15430G
User Manual • User Manual
BDFN15430W
User Manual • User Manual
BDFN15430X
User Manual • User Manual
BDFN15431W
User Manual
BDFN26430W
User Manual
BDFN26430X
User Manual
BDFN26430XC
Manual
BDFN26520WQ
User Manual
BDFN26520XQ
User Manual
BDFN26521XQ
User Manual
BDFN26530XC
User Manual
BDFN26640XC
User Manual
BDFN36530XC
User Manual
BDFN36640C
User Manual
BDFN36640CX
User Manual
BDFN36640XC
User Manual
BDFN36650C
User Manual
BDFN36650CX
User Manual
BDFS16020W
User Manual • User Manual
BDI1410
User Manual
BDIN Series
User Manual • User Manual • User Manual • Instructions Manual • User Manual • User Manual
BDIN14421
User Manual
BDIN16421
User Manual
BDIN16422
Instructions Manual
BDIN16431
User Manual
BDIN1E420
User Manual
BDIN26430
User Manual
BDIN36430
User Manual • User Manual
BDIN36520Q
User Manual
BDIN38530D
User Manual
BDIN38531F
User Manual
BDIN38640C
User Manual
BDIN38640D
User Manual • User Manual
BDIN38640F
User Manual
BDIN38641C
User Manual
BDIN38641D
User Manual
BDIN38644D
User Manual
BDIN38650C
User Manual
BDIS Series
User Manual
BDIS25023
User Manual
BDIT Series
User Manual • User Manual • Instructions Manual
BDUN Series
User Manual • User Manual • Owner’s Manual • User Manual
BDUN1E420W
Owner’s Manual
BDUN1E420X
Owner’s Manual
BDUN38641WD
User Manual
BDUN38K640X
User Manual
D
D 5001 E
Instruction Manual
D 5001 EM
Instruction Manual
D 5001 ES
Instruction Manual
D 5001 EX
Instruction Manual
D2731
Manual
D2731FW
Manual
D3422
Manual
D3732F
Manual
D5323
Instructions For Use Manual
DDN25400X
User Manual • User Manual
DDN25401X
Installation Manual • User Manual • Installation Manual • Installation Manual
DDN25402W
Installation Manual • User Manual
DDN25402X
Installation Manual • User Manual
DDN38450
Instruction Manual
DDN38531DX
User Manual
DDS25840X
User Manual • Installation Manual
DDS25841X
User Manual • User Manual
DDS25842X
User Manual • User Manual
DDT25400B
User Manual • User Manual
DDT25400GB
User Manual
DDT25400W
User Manual • User Manual
DDT25400X
User Manual • User Manual
DDT25400XP
User Manual • User Manual
DDT25401B
Installation Manual • User Manual • Installation Manual • Installation Manual
DDT25401W
Installation Manual • User Manual • Installation Manual • Installation Manual
DDT25401X
Installation Manual • User Manual • Installation Manual • Installation Manual
DDT28410X
User Manual
DDT28430X
User Manual
DDT28430XP
User Manual
DDT29430X
User Manual • User Manual
DDT29430XP
User Manual
DDT36430X
Installation Manual • Installation Manual • User Manual • Installation Manual
DDT36430XIH
Installation Manual • Installation Manual • User Manual • Installation Manual
DDT38530BX
User Manual • Installation Manual • Installation Manual • Installation Manual
DDT38530X
User Manual • Installation Manual • Installation Manual • Installation Manual
DDT38530XIH
User Manual • Installation Manual • Installation Manual
DDT38530XWS
Installation Manual • Installation Manual • Installation Manual • User Manual
DDT38532X
Installation Manual • User Manual
DDT38532XIH
Installation Manual • User Manual
DDT39432CF
Installation Manual • Installation Manual • Installation Manual • User Manual
DDT39432X
Installation Manual • Installation Manual • Installation Manual • User Manual
DDT39432XIH
Installation Manual • Installation Manual • Installation Manual • User Manual
DDT39434CF
Installation Manual • User Manual
DDT39434X
Installation Manual • User Manual
DDT39434XIH
Installation Manual • User Manual
DE 2541 F
Quick Reference Manual
DE 2542 F
Manual
DE 3430F
Installation & Operation Instructions
DE2431F
User Manual
DE2541FW
Manual • Manual
DE3431FW
Manual
DE3542F
Manual
DE3761F
Manual
DE3762F
Manual
DEN Series
User Manual • User Manual • User Manual
DEN26X20GG
User Manual
DEN28320G
User Manual
DEN28320GB
User Manual
DEN28420GB
User Manual
DEN28X20GB
User Manual
DEN36X30
User Manual
DEN36X30W
User Manual
DEN36X30X
User Manual
DEN38530XAD
User Manual • User Manual
DEN48520GB
User Manual
DEN48520W
User Manual • User Manual
DEN48520WAD
User Manual
DEN48520X
User Manual
DEN48520XAD
User Manual
DEN48521XAD
User Manual
DEN48X20G
User Manual • User Manual • User Manual
DEN48X20X
User Manual
DEN59420D
User Manual
DEN59420DA
User Manual
DEN59420DG
User Manual
DEN59420DX
User Manual
DEN59532XAD
User Manual • User Manual
DEN59533XAD
User Manual
DFC04210B
User Manual
DFC04210S
User Manual
DFC04210W
User Manual
DFC04C10W
User Manual
DFC05R10B
User Manual
DFC05R10S
User Manual
DFC05R10W
User Manual
DFN 1000 X
User Manual
DFN 1430
Manual • Instruction Manual
DFN Series
User Manual • Manual • User Manual • User Manual • User Manual • User Manual • User Manual • User Manual • User Manual • User Manual • User Manual • Owner’s Manual • User Manual • User Manual • User Manual • User Manual • User Manual • User Manual • Instructions Manual • User Manual • User Manual
DFN04210B
User Manual
DFN04210S
User Manual
DFN04210W
User Manual
DFN04310W
User Manual
DFN04C11W
User Manual
DFN05210W
Quick Reference Manual
DFN05310
User Manual
DFN05310B
User Manual
DFN05310S
User Manual • User Manual • User Manual • User Manual
DFN05310W
User Manual • User Manual • User Manual • User Manual
DFN05311B
User Manual
DFN05311W
User Manual • User Manual
DFN05311X
User Manual
DFN05312W
User Manual
DFN05314X
User Manual
DFN05320B
User Manual
DFN05320S
User Manual
DFN05320W
User Manual
DFN05321S
User Manual • User Manual
DFN05321W
User Manual
DFN05321X
User Manual
DFN05410S
User Manual
DFN05410X
Quick Reference Manual
DFN05Q10
User Manual
DFN05Q10W
User Manual • User Manual • User Manual
DFN05R10B
User Manual
DFN05R10S
User Manual • User Manual
DFN05R10W
User Manual • User Manual • User Manual
DFN05R11
User Manual
DFN05R11B
User Manual • User Manual • User Manual
DFN05R11S
User Manual • User Manual • User Manual
DFN05R11W
User Manual • User Manual • User Manual
DFN05W13S
User Manual
DFN05X10S
User Manual • User Manual
DFN05X10W
User Manual • User Manual
DFN05X11
User Manual
DFN05X11S
User Manual • User Manual • User Manual
DFN05X11W
User Manual • User Manual • User Manual
DFN15J10W
User Manual
DFN15R10
User Manual
DFN15R10X
User Manual
DFN15X10B
User Manual
DFN15X10X
User Manual
DFN16210W
User Manual
DFN16410W
User Manual
DFN16410X
User Manual
DFN16421S
User Manual
DFN16421W
User Manual
DFN16430G
User Manual • User Manual • User Manual
DFN16430W
User Manual • User Manual
DFN16430X
User Manual • User Manual • User Manual
DFN16R10B
User Manual
DFN16X10
User Manual
DFN16X10X
User Manual
DFN16X20X
User Manual
DFN16X21B
User Manual • User Manual
DFN16X21W
User Manual • User Manual • User Manual
DFN16X21X
User Manual • User Manual
DFN2000X
User Manual
DFN2520S
Wiring Diagrams & Specifi Cations
DFN26220W2
User Manual
DFN26220X2
User Manual
DFN26320X2MM
User Manual
DFN26420W
User Manual
DFN26420X
User Manual
DFN26422W
User Manual
DFN26422X
User Manual
DFN26423W
User Manual
DFN26423X
User Manual
DFN26424W
User Manual
DFN26424X
User Manual
DFN28320W
User Manual
DFN28321W
User Manual
DFN28420S
User Manual
DFN28420W
User Manual
DFN28421W
User Manual
DFN28422S
User Manual
DFN28422W
User Manual • User Manual
DFN28424W
User Manual
DFN28424X
User Manual
DFN28430B
User Manual
DFN28430X
Instruction Manual • User Manual
DFN28431X
User Manual
DFN28432W
User Manual
DFN28432X
User Manual
DFN28520X
User Manual
DFN28J20
User Manual
DFN28J20X
User Manual • User Manual
DFN28J21X
User Manual
DFN28R20W
User Manual
DFN28R21B
User Manual
DFN28R21W
User Manual
DFN28R22B
User Manual
DFN28R22W
User Manual
DFN28R30X
User Manual
DFN28R31
User Manual
DFN28R31Series
User Manual
DFN29420
User Manual
DFN29420G
User Manual
DFN29420W
User Manual
DFN29432X
User Manual
DFN29X20X
User Manual
DFN38450
Instruction Manual
DFN38530DX
User Manual
DFN38530X
User Manual • User Manual
DFN38531DX
User Manual
DFN38531X
User Manual
DFN38533X
User Manual
DFN38535X
User Manual
DFN38536X
User Manual
DFN39530X
User Manual
DFN39531W
User Manual
DFN39531X
User Manual
DFN39533X
User Manual
DFN59534XAD
User Manual
DFS 1511
Operating Manual
DFS 1511 S
Manual • Operating Manual • Instruction Manual
DFS 2531
Manual • Operating Manual • Instruction Manual
DFS04010
User Manual
DFS04010B
User Manual
DFS04010S
User Manual
DFS04010W
User Manual
DFS04C10W
User Manual
DFS04R10
User Manual
DFS04R10S
User Manual
DFS04R11
User Manual
DFS04R11W
User Manual
DFS05010
User Manual
DFS05010B
User Manual
DFS05010S
Instruction Manual • User Manual • User Manual
DFS05010W
Instruction Manual • User Manual • User Manual
DFS05012S
User Manual
DFS05012W
User Manual
DFS05013S
User Manual
DFS05013W
User Manual
DFS05013X
User Manual
DFS05014W
User Manual
DFS05014X
User Manual • User Manual
DFS05020B
User Manual
DFS05020S
User Manual
DFS05020W
User Manual
DFS05C10W
User Manual • User Manual
DFS05J1W
User Manual • User Manual
DFS05Q10
User Manual
DFS05Q10W
User Manual • User Manual
DFS05R13W
User Manual
DFS05W13S
User Manual
DFS05X10W
User Manual
DFS05X11W
User Manual • User Manual
DFS05X11X
User Manual
DFS25R11W
User Manual
DFS25W11S
User Manual
DFS25W11W
User Manual
DFS26010B
Instruction Manual
DFS26010S
Instruction Manual
DFS26010W
Instruction Manual
DFS26010X
Instruction Manual
DFS26024X
User Manual
DFS26025W
User Manual
DFS26025X
User Manual
DFS28020X
Instruction Manual
DFS28021W
User Manual
DFS28021X
User Manual
DFS28022W
User Manual
DFS28022X
User Manual
DFS28120W
User Manual
DFS28123X
User Manual
DFS28R20B
User Manual
DFS28R20W
User Manual
DFS39020X
Instruction Manual
DIN 1400 XN
Manual
DIN 15212
Quick Reference Manual
DIN 1531
Manual • Instruction Manual
DIN 4530
Instruction Manual
DIN 5633
Instruction Manual
DIN 5833 Extra
Manual • Instruction Manual
DIN 5838 X
Quick Reference Manual
DIN Series
User Manual • User Manual • User Manual • User Manual • User Manual • Instructions Manual • User Manual • User Manual
DIN-5834
User Manual
DIN14C10
User Manual
DIN14C11
User Manual
DIN14D11
User Manual
DIN14N20
User Manual
DIN14W13
User Manual
DIN15210
User Manual
DIN15211
User Manual
DIN15310
User Manual • User Manual
DIN15311
User Manual • User Manual
DIN15320
User Manual • User Manual
DIN15321
User Manual • User Manual
DIN15322
User Manual
DIN15410
User Manual
DIN15C10
User Manual • User Manual
DIN15C20
User Manual • User Manual
DIN15Q10
User Manual • User Manual
DIN15Q20
User Manual
DIN15R10
User Manual
DIN15R11
User Manual • User Manual
DIN15R20
User Manual • User Manual
DIN15X10
User Manual
DIN15X11
User Manual • User Manual
DIN15X20
User Manual • User Manual
DIN16210
User Manual
DIN16430
User Manual • User Manual
DIN16N30
User Manual
DIN16R10
User Manual
DIN16X10
User Manual • User Manual
DIN16X20
User Manual
DIN24215
User Manual
DIN24310
User Manual
DIN24N11
User Manual
DIN25400
User Manual • User Manual
DIN25401
Installation Manual • User Manual • Installation Manual • Installation Manual
DIN25410
User Manual
DIN26220
Instruction Manual
DIN26410
User Manual
DIN26415
User Manual
DIN26420
User Manual
DIN26422
User Manual
DIN26423
User Manual
DIN26X20
User Manual
DIN26X21
User Manual
DIN26X22
User Manual
DIN28320
User Manual
DIN28420
User Manual
DIN28421
User Manual
DIN28422
User Manual
DIN28423
User Manual
DIN28424
User Manual
DIN28426
User Manual • User Manual
DIN28427
User Manual
DIN28428
User Manual
DIN28429
User Manual
DIN28430
User Manual
DIN28431
User Manual
DIN28433
User Manual
DIN28435
User Manual
DIN28436
User Manual
DIN28520
User Manual
DIN28Q20
User Manual
din28r20
User Manual
DIN28R22
User Manual • User Manual
DIN29X20
User Manual • User Manual
DIN29X31
User Manual
DIN34320
User Manual
DIN34322
User Manual
DIN35320
User Manual
DIN35321
User Manual
DIN35322
User Manual
DIN36420
User Manual
DIN36421
User Manual
DIN36422
User Manual
DIN38450
Instruction Manual
DIN39430
User Manual
DIN46X30
User Manual • User Manual
DIN48425
User Manual
DIN48430
User Manual • User Manual • User Manual
DIN48431
User Manual
DIN48532
User Manual
DIN48533
User Manual
DIN48534
User Manual
DIN48Q20
User Manual
DIN48Q21
User Manual
DIN59420D
User Manual
DIN59530 AD
Quick Manual • User Manual
DIN59531
User Manual
DIP28430
User Manual
DIS 1520
Manual • Operating Manual • Instruction Manual
DIS 1522
Manual • Operating Manual • Instruction Manual
DIS 25011
Manual • User Manual
DIS 4530
Instruction Manual
DIS 5630
Instruction Manual
DIS 5831
Manual • Operating Manual • Instruction Manual
DIS 5930
Instruction Manual
DIS Series
User Manual • User Manual • User Manual
DIS15010
User Manual • Instruction Manual
DIS15011
User Manual • User Manual
DIS15012
User Manual
DIS15014
User Manual • User Manual
DIS15020
User Manual • User Manual
DIS15022
User Manual
DIS15Q10
User Manual
DIS15Q20
User Manual • User Manual
DIS15R10
User Manual
DIS15R12
User Manual
DIS15X10
User Manual
DIS16R10
User Manual • User Manual
DIS25010
User Manual
DIS25840
User Manual • Installation Manual
DIS25841
User Manual • User Manual
DIS25842
User Manual • User Manual
DIS25D12
User Manual
DIS25S11
User Manual
DIS26010
Instruction Manual
DIS26012
User Manual
DIS26021
User Manual
DIS26022
User Manual
DIS28020
Instruction Manual
DIS28023
User Manual
DIS28120
User Manual
DIS28122
User Manual
DIS28123
User Manual
DIS28124
User Manual
DIS28Q20
User Manual
DIS35023
User Manual
DIS35025
User Manual
DIS39020
Instruction Manual
DIS46120
User Manual
DIS48120
User Manual
DIS48130
User Manual
DISHWASHER
User Manual • Instruction Booklet • Instruction Manual • User Manual
DIT Series
User Manual
DIT16221
Instruction Manual
DIT25400
User Manual • User Manual
DIT25401
Installation Manual • User Manual • Installation Manual • Installation Manual
DIT25410
User Manual
DIT26420
User Manual
DIT28430
User Manual
DIT29430
User Manual • User Manual
DIT38430
User Manual
DIT38530
User Manual • Installation Manual • Installation Manual • Installation Manual
DIT38532
Installation Manual • User Manual
DIT39432
Installation Manual • Installation Manual • Installation Manual • User Manual
DIT39434
Installation Manual • User Manual
DIT48530
User Manual
DL1043W
User Manual
DL1243
Installation & Operation Instructions
DL1243AP
User Manual
DMS 3511
Instruction Manual
DSFN 1530
Manual • Manual • Instruction Manual
DSFN 1532
Installation & Operation Manual
DSFN 1534
Manual
DSFN 4630
Quick Reference Manual
DSFN 6830
Installation & Operation Instruction
DSFN 6839 W
Instalation And Operation Instructions
DSFN-6837
Instruction Manual
DSFN1530
Quick Reference Manual
DSFS 1530
Operating Manual • Instruction Manual
DSFS 1530 S
Instruction Manual
DSFS 1531 W
Installation & Operation Manual
DSFS 4530
Instruction Manual
DSFS 4530 S
Instruction Manual
DSFS 6831 X
Instruction Manual
DSN 2521
Manual
DSN Series
User Manual • User Manual • User Manual • User Manual • User Manual • Owner’s Manual • User Manual • User Manual • User Manual
DSN04310X
User Manual
DSN04N10X
User Manual
DSN04N11X
User Manual
DSN04N20X
User Manual
DSN05310X
User Manual
DSN05311X
User Manual
DSN15420X
Manual • User Manual
DSN26420W
User Manual
DSN26420X
User Manual
DSN26421X
User Manual
DSN28330X
Instruction Manual
DSN28420X
User Manual • User Manual
DSN28422X
User Manual
DSN28430X
User Manual • User Manual
DSN28435X
Instruction Manual
DSN28520X
User Manual
DSN39430X
User Manual
DSS 28020 X
Instruction Manual
DSS05011X
User Manual
DSS28021X
User Manual
DSS28121X
User Manual
DTC36610W
Instruction Manual
DTC36810W
Instruction Manual
DUN Series
User Manual • Owner’s Manual • User Manual
DUN15420X
User Manual • User Manual
DUN28520X
User Manual
DUS26010W
User Manual
DUT25400B
User Manual
DUT25400W
User Manual
DUT25400X
User Manual
DUT25401B
User Manual • Installation Manual • Installation Manual • Installation Manual
DUT25401W
User Manual • Installation Manual • Installation Manual • Installation Manual
DUT25401X
User Manual • Installation Manual • Installation Manual • Installation Manual
DUT28430X
User Manual
DUT36420W
Installation Manual • Installation Manual
DUT36420X
Installation Manual • Installation Manual
DUT36520W
Installation Manual • User Manual • Installation Manual
DUT36520X
Installation Manual • User Manual • Installation Manual
DUT36522W
Installation Manual • User Manual
DUT36522X
Installation Manual • User Manual
DVN Series
User Manual • User Manual • User Manual • User Manual • User Manual
DVN04320
User Manual
DVN04320B
User Manual • User Manual
DVN04320S
User Manual • User Manual
DVN04320W
User Manual • User Manual
DVN04321W
User Manual • User Manual
DVN04X20
User Manual
DVN04X20B
User Manual • User Manual
DVN04X20S
User Manual • User Manual
DVN04X20W
User Manual • User Manual
DVN05320S
User Manual
DVN05321B
User Manual
DVN05321S
User Manual
DVN05321W
User Manual
DVN05321X
User Manual
DVN05322W
User Manual
DVN053R01W
User Manual
DVN053W01W Series
User Manual
DVN053WR01S
User Manual
DVN05C20
User Manual
DVN05C20W
User Manual • User Manual
DVN05Q20W
User Manual • User Manual
DVN05R20
User Manual
DVN05R20B
User Manual • User Manual
DVN05R20S
User Manual • User Manual
DVN05R20W
User Manual • User Manual
DVN06430W
User Manual
DVN06431W
User Manual
DVS Series
User Manual
DVS04020B
User Manual
DVS04020S
User Manual
DVS04020W
User Manual
DVS04X20W
User Manual
DVS04X20X
User Manual
DVS05025S
User Manual
DVS05C20W
User Manual
DVS05J20W
User Manual
DVS05R20W
User Manual
DW450
Installation Manual
DW451
Manual
DW600
Installation Manual
DW602
Manual • User Quick Reference Manual
DW603
Quick Reference Manual • User Manual
DW663
Installation & Operation Manual
DWC4540W
User Manual
DWC6540W
User Manual
DWD 8657
Installation & Operation Instruction • Installation & Operation Instructions
DWD4310
User Manual
DWD4311
Manual
DWD4312
Manual
DWD5410
User Manual
DWD5411
Manual
DWD5412
Installation & Operation Manual
DWD5414
Installation & Operating Instructions Manual • Quick Reference Manual • Programme Chart
DWD8650X
Manual • Manual
DWD8667
Installation & Operating Instructions Manual
E
EDDN Series
User Manual • User Manual • User Manual • Instructions Manual
EDIN Series
User Manual • User Manual • User Manual • Instructions Manual
EDIS Series
User Manual
F
FDIN Series
User Manual • User Manual • User Manual
H
Hygiene Shield BDEN38520H
User Manual
Hygiene Shield BDEN38520HW
User Manual
L
LVI Series
User Manual
M
MDFN26431W
User Manual
MDIN Series
User Manual
P
PDIS Series
User Manual
PDSN Series
User Manual
Q
QDW486
User Manual
QDW696
User Manual
S
SDFN16410S
User Manual
SDFN16410W
User Manual
SDVN Series
User Manual
U
UDW601
Instruction Manual

- Регистрация
- Войти
Инструкции » Посудомоечные машины » BEKO
|
Всего инструкций в разделе: 120 |
|
Мануал для посудомоечной машины BEKO содержит описание кнопок блока управления, режимов работы и рекомендации по использованию моющих средств. |


| инструкция | устройство | размер |
| BEKO DIS15R12 | встраиваемая посудомоечная машина | 6.37 MB |
| BEKO DIS48130 | встраиваемая посудомоечная машина | 7.01 MB |
| BEKO DIN48430 | встраиваемая посудомоечная машина | 10.97 MB |
| BEKO DIN26420 | встраиваемая посудомоечная машина | 12.49 MB |
| BEKO DFS28120X | посудомоечная машина | 6.85 MB |
| BEKO DFS28120W | посудомоечная машина | 6.85 MB |
| BEKO DFS26020W | посудомоечная машина | 6.85 MB |
| BEKO DFN28421W | посудомоечная машина | 11.92 MB |
| BEKO DFN05310S | посудомоечная машина | 11.58 MB |
| BEKO DEN48522DX | посудомоечная машина | 11.89 MB |
| BEKO DDS28120W | посудомоечная машина | 6.85 MB |
| BEKO DDS25015W | посудомоечная машина | 6.45 MB |
| BEKO BDIS38121Q | встраиваемая посудомоечная машина | 7.14 MB |
| BEKO BDIS38120Q | встраиваемая посудомоечная машина | 7.14 MB |
| BEKO BDIS16020 | встраиваемая посудомоечная машина | 6.53 MB |
| BEKO BDIS15021 | встраиваемая посудомоечная машина | 6.60 MB |
| BEKO BDIN15320 | встраиваемая посудомоечная машина | 7.70 MB |
| BEKO BDIN14320 | встраиваемая посудомоечная машина | 11.78 MB |
| BEKO BDFS26020W | посудомоечная машина | 6.85 MB |
| BEKO BDFS15020S | посудомоечная машина | 2.22 MB |
| BEKO DIN 28420 | встраиваемая посудомоечная машина | 12.51 MB |
| BEKO DIN 26420 | встраиваемая посудомоечная машина | 12.49 MB |
| BEKO DDS 28120 W | посудомоечная машина | 6.85 MB |
| BEKO DTC 36610 W | посудомоечная машина | 2.83 MB |
| BEKO DFN 28421 W | посудомоечная машина | 11.92 MB |
| BEKO DEN 48522 W | посудомоечная машина | 11.16 MB |
| BEKO DEN 48522 DX | посудомоечная машина | 11.89 MB |
| BEKO DIS 26021 | встраиваемая посудомоечная машина | 4.47 MB |
| BEKO DFS 05R13 W | посудомоечная машина | 6.42 MB |
| BEKO DFS 05012 S | посудомоечная машина | 4.16 MB |
| BEKO DFN 15410 W | посудомоечная машина | 11.94 MB |
| BEKO DFS 25W11 W | посудомоечная машина | 5.33 MB |
| BEKO DFS 25W11 S | посудомоечная машина | 5.33 MB |
| BEKO DFS 05W13 S | посудомоечная машина | 4.86 MB |
| BEKO DFS 05012 W | посудомоечная машина | 6.35 MB |
| BEKO DTC 36610W | посудомоечная машина | 2.83 MB |
| BEKO DIS 28124 | встраиваемая посудомоечная машина | 9.81 MB |
| BEKO DIS 26022 | встраиваемая посудомоечная машина | 6.47 MB |
| BEKO DIN 15310 | встраиваемая посудомоечная машина | 10.15 MB |
| BEKO DFN 26420W | посудомоечная машина | 11.50 MB |
| BEKO DIN 24310 | встраиваемая посудомоечная машина | 11.50 MB |
| BEKO DIS 25010 | встраиваемая посудомоечная машина | 3.02 MB |
| BEKO DFS 26010 X | посудомоечная машина | 4.86 MB |
| BEKO DFS 26010X | посудомоечная машина | 5.20 MB |
| BEKO DFN 05310 W | посудомоечная машина | 7.29 MB |
| BEKO DIS 39020 | посудомоечная машина встраиваемая | 5.22 MB |
| BEKO DSFS 6831 X | посудомоечная машина | 6.87 MB |
| BEKO DSFS 6630 S | посудомоечная машина | 6.83 MB |
| BEKO DSFS 6630 B | посудомоечная машина | 6.83 MB |
| BEKO DSFS 4530 | посудомоечная машина | 6.40 MB |
«— 1 2 3 —»
Что удобнее для чтения книг?
Планшет
Электронная книга
Смартфон
Книга в бумажном переплёте
Не читаю книг

© 2010- ManualBase.ru
- Статьи
- О сайте
- Помощь
- Контакты
© 2010- ManualBase.ru
Посудомоечная машина Веко: инструкция по применению и режимы работы
Инструкция к посудомоечной машине Веко описывает основные этапы использования от закладки специальной соли, ополаскивателя и моющего средства до загрузки посуды. При первом применении контейнер для соли нужно промыть солью, затем загрузить все необходимые препараты и посуду. Пошаговое описание действий со схемами можно найти в этой статье.
Заполнение емкости солью
После установки и подключения агрегата к коммуникациям, а также подключения к сети необходимо заполнить специальный дозатор солью для машин. Средство используется для регулирования жесткости воды и позволяет предотвратить образование накипи на тэне, тем самым увеличив общий срок службы.
Инструкция к посудомоечной машине Beko предусматривает применение специальной соли в виде таблеток или гранул. Чтобы поместить их в емкость, необходимо действовать так:
- Открывают дверцу и убирают самую нижнюю корзину, предназначенную для загрузки посуды.

- Отворачивают крышку, двигаясь по направлению против часовой стрелки.

- Если машина используется первый раз, сначала в контейнер нужно налить литр обычной воды.
- Затем засыпают соль доверху – в емкость помещается 2 кг (в некоторых моделях 1,5 кг), что соответствует примерно 2 упаковкам.

- Инструкция к посудомойке Beko рекомендует перемешать соль ложкой, чтобы ее растворение шло быстрее.
- При необходимости убирают все просыпавшиеся кристаллы вокруг и плотно закручивают крышку.
- Сразу после этого запускают стандартную программу для мойки. В это время будет гореть индикатор, отслеживающий уровень соли. По окончанию полного цикла (примерно через 2 часа) он погаснет.


Заполнение дозатора ополаскивателем
Инструкция к посудомоечной машине Беко наряду с обычным средством рекомендует применять и ополаскиватель. Он обеспечивает полное удаление остатков пены и воды с поверхности посуды. Благодаря этому она становится идеально чистой и без разводов. При этом в составе некоторых моющих средств уже есть ополаскиватель – тогда данный этап пропускают.
В остальных случаях действуют так:
- Открывают дозатор, предназначенный для ополаскивателя. Для этого нужно нажать на рычаг, обозначенный на схеме буквой «В».

- Затем аккуратно заливают средство до предельного уровня. Больше лить нельзя, иначе может пойти обильная пена.
- Чтобы не ошибиться с количеством, необходимо воспользоваться регулятором, обозначенным «4». Он устанавливается практически на всех моделях, о чем указано в инструкции по эксплуатации посудомоечной машины Веко.
- Закрывают крышку, обозначенную «3», до щелчка.

- Если на поверхности остались капельки, их нужно полностью удалить тряпкой.
- Затем запускают мойку и оценивают результат. В норме посуда должна быть идеально чистой. Но если на ней остаются разводы, количество ополаскивателя нужно немного уменьшить. Если же заметны следы от воды, количество, наоборот, увеличивают.


Заполнение дозатора моющим средством
Следующий этап инструкции к посудомойке Веко описывает процесс добавления моющего средства. Последовательность действий аналогичная:
- Открыть дверцу и найти емкость в нижней части.
- Сдвинуть крышку «А» влево, как показано на схеме.

- Залить или засыпать средство в емкость «1».

- Закрыть крышку, при необходимости убрать тряпкой остатки капель или порошка.


При определении объема нужно учесть, что предельная вместимость контейнера определяется уровнем в 40 см. Однако весь его использовать не стоит, поскольку это может привести к обильному пенообразованию и отключению устройства из-за системы «аквастоп». Поэтому следует соблюдать такие рекомендации:
- Если посуды слишком много, и она сильно загрязнена, заливать до 15 см.
- В остальных случаях достаточно налить до уровня 15 см.
- Если же запускается короткая программа без предварительной мойки, желательно применять не жидкое, а порошковое средство, которое засыпают в лоток, обозначенный «2». Оно рассчитано на предельный объем 5 см3.

- Инструкция по применению посудомоечной машины Беко также предупреждает о том, что не стоит применять средства в виде таблеток в короткой программе. Они могут не раствориться полностью, и посуда не отмоется либо пойдет слишком много пены.

Загрузка посуды
Далее можно разложить по корзинам столовые приборы, тарелки и другую посуду. При этом необходимо соблюдать несколько правил:
- Тщательно удалить все пищевые остатки.
- Все глубокие емкости, бокалы, стаканы размещать открытой стороной книзу, чтобы с них могла свободно стекать жидкость.
- Не ставить стеклянные емкости слишком близко друг к другу.
- Инструкция по применению посудомоечной машины Веко предупреждает о том, что посуду нельзя ставить близко к распыляющим консолям. В ходе цикла они должны свободно перемещаться и опрыскивать посуду водой.
- Крупные предметы ставят в нижний лоток, а более мелкие – в верхние. Если предметы узкой формы и длинные, их помещают посередине корзины.
- Использовать опоры для тарелок в нижней корзине. Можно по отдельности складывать каждую опору (обозначено от «1» до «4») либо сложить сразу все, если понадобится много места.

- Чтобы удобно сложить опоры, необходимо пользоваться рукояткой, обозначенной «А» в инструкции по эксплуатации посудомоечной машины Beko.

- После полной загрузки закрыть дверцу и запустить нужную программу.


Теперь понятно, как пользоваться посудомоечной машиной Веко. Основные правила сводятся к необходимости использования соли, ополаскивателя и моющего средства. Причем последнее не следует заливать в слишком больших количествах. Благодаря этому не образуется лишняя пена, а сам процесс мойки будет качественным.
Хотите узнавать о выходе новых статей? Подпишитесь на рассылку!